Class Description
We are grateful to be able to bring you this 9-lesson online class with Visionary artist Anne Marie Grgich who generously shares her process refined from her lifelong passion for making art. Incorporate Anne’s creative approach and techniques to augment your skillset. You will learn step-by-step the Grgich technique as she demonstrates mixed-media elements of ornamentation, printing, drawing, painting and cold wax treatment.
You will learn how to assemble overlays of collage and cutouts and build up colour fields and use subliminal tactics, like overpainting collage with “glow in the dark” paint, to achieve a deep transparent layering.
In this class you will create a large, compelling, mosaic-like collage painting filled with complexity.
____________________________
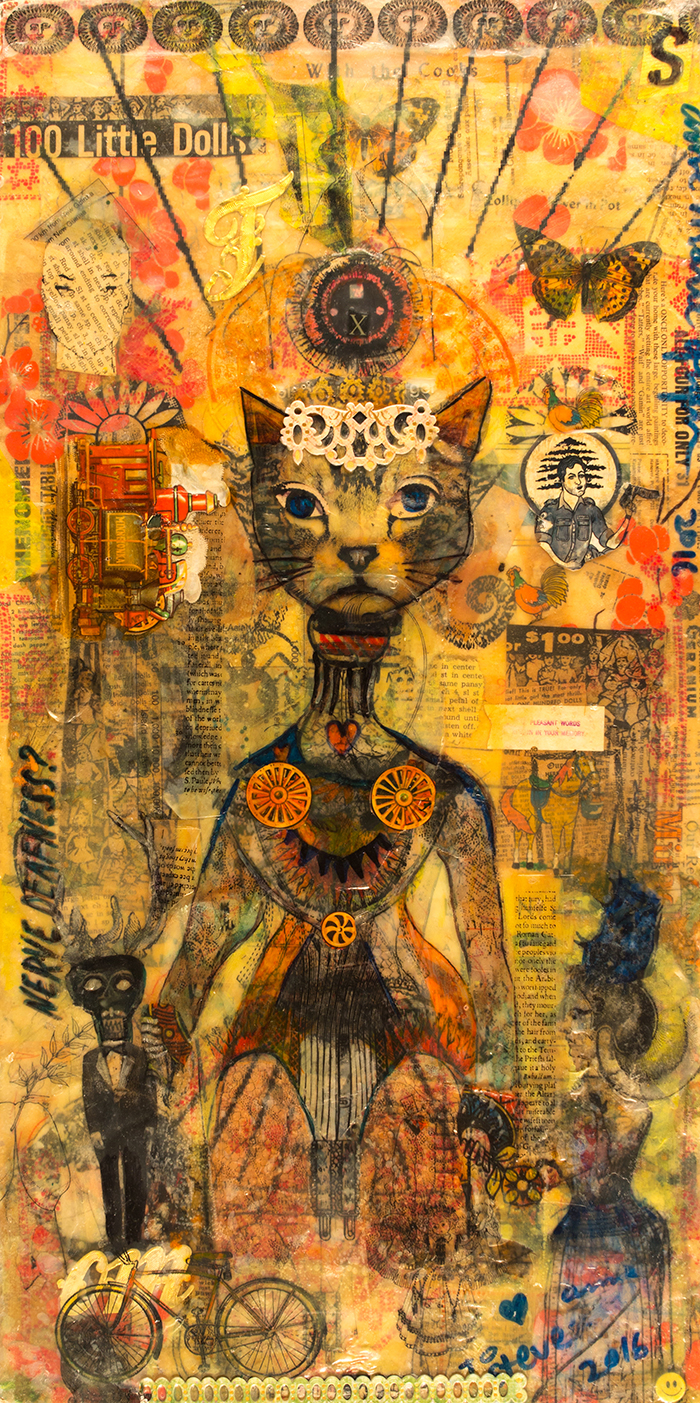
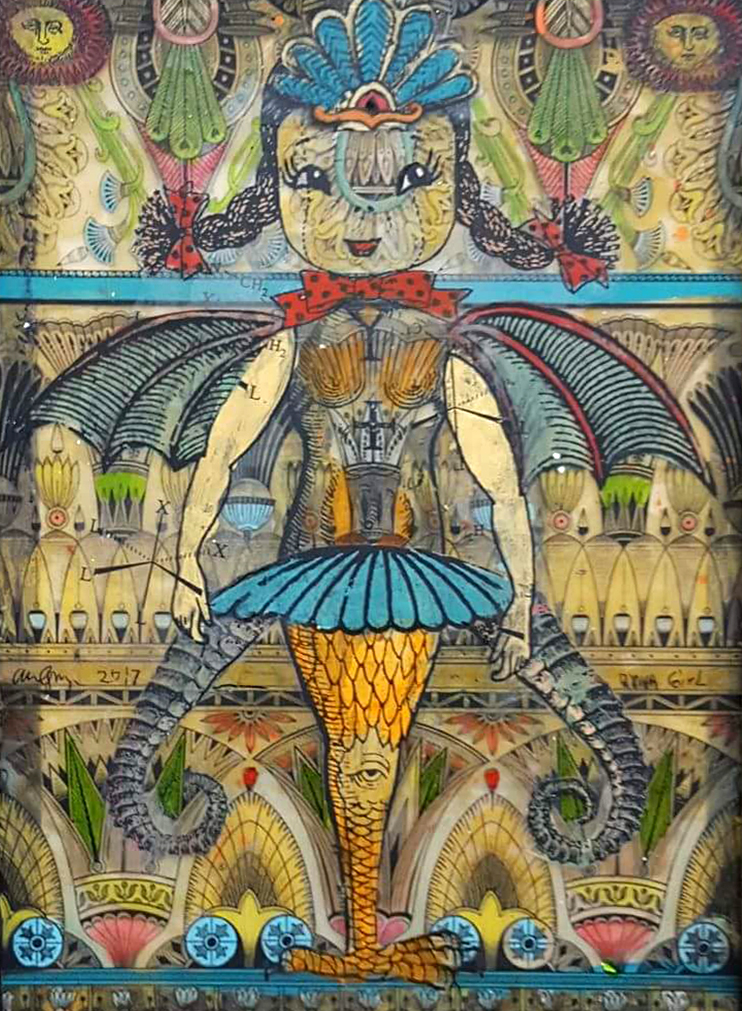
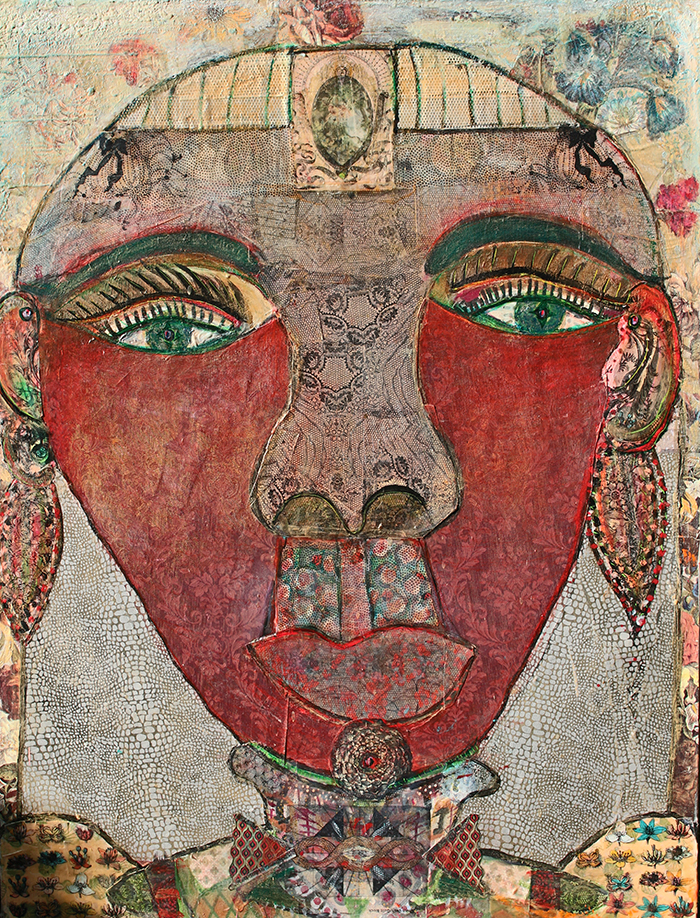
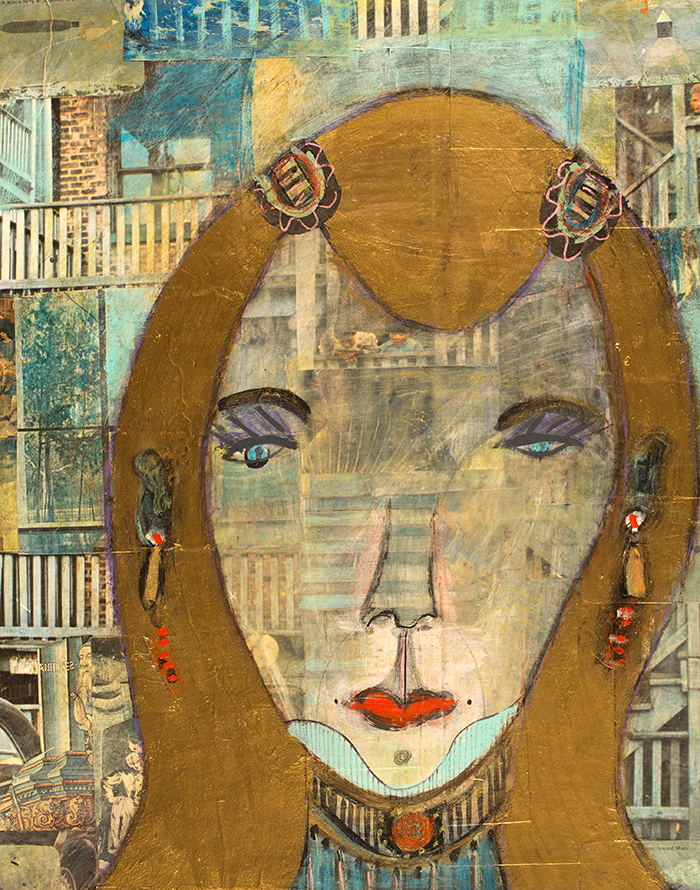
A selection of art made with the techniques Anne shares in this class:
Detail:

Figures:
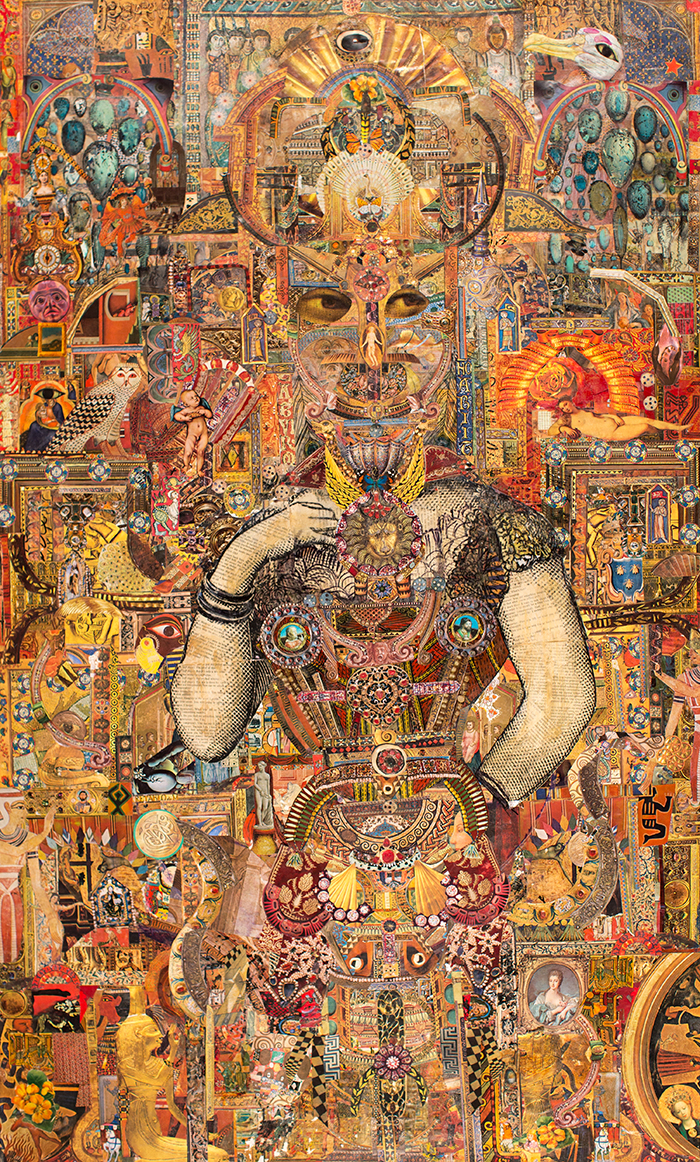
Faces:
Class Itinerary
Lesson 0: Begin Collecting your Collage Materials!
Find three art history books that have color pages and set aside for now. Then, collect printed matter of anything that inspires you — words, posters, advertising, theatre tickets, stamps, rub on lettering, stickers, poems, flowers, faces, figures, politics…. Also collect decorated napkins and tissue paper. You will want a lot to choose from when you start gluing!
Lesson 1: Cannibalize Your Books
Be like a detective and sort out the information you’ve gathered. Scour through your books, finding colored pages and take them out of the book and begin the sorting process. Find maps, create cutouts of classical figures, culture, and patterns, colour fields or specific artists like Michelangelo and Frida Kahlo. Sort into piles of color, trim off white areas, and set the sacred trimmed little pieces aside.
Lesson 2: Breaking up Space
Select your two favorite color piles (complimentary or contrasting) and, like a theatrical stage or game board, start laying down collage items on the center and working out to the edge. Lay out symmetrically or abstractly and cover the canvas. Work fast, be playful and think overall structure. It’s a good time to sign and date the under layer so your name and date is embedded into the art. Add your first “ice skating rink,” a generous layer of even gel medium.
Lesson 3: Color Washes and the Painterly Touch
Today we are adding vivid color or lines, tinted or muted color washes, more collage and black paint lines. You’re finding the shape of the overall structure, maybe adding a new collage piece or lettering or a stamp or word that pulls the piece together. Don’t get blocked by what its going to be, were building a surface of many layers and if you can let your intuition take over it will flow out of your hands and lay into focus. Fine tune loud areas to mute noise and add vivid colors to make art pop, like stained glass. Circling the edge with collage and add fine brush stokes for whimsy. Echo shapes and paint details and forms with ornamentation and pattern and text cutouts.
Lesson 4: Print on Tissue
The next three lessons you will learn the secret to what I call “chimera, or “see thru” tissue collage. This tissue works seamlessly as collage elements and is one of my favorite techniques to get that waxy, aged look.
Today you will collect imagery (like old letters or illustrations, or use the ones I provide for you) and print out about a dozen tissue pages from your computer. Make multiples of the same designs to color and use as patterns. Apply color or add swatches of white paint or collage over the back side of some of your tissue designs.
Lesson 5: Gluing Tissue Layers
Begin gluing your first tissue layer to your painting. As you’re working, the white of the wet gel medium will obscure your vision; work blindly and keep adding everything you planned. This creates a sense of serendipity. When dry, lay flat and create an ice skating rink and dry overnight.
Lesson 6: Draw, Paint and More
Draw and paint where its needed with water based crayons and add final layers of tissues. Try rubber stamp and emboss using gold or red. Use fancy printed tissues, napkins, and gift wraps to enhance your subject. Use minimal muted color washes over sections of the painting to intensify your color-fields use patterned shading. Pull out your collection of sewing patterns find one with the right lines and words. Last, make your ice skating rink.
Lesson 7: Transparencies Galore
Print designs on transparency film. Add collage elements and color to some pieces, then adhere to your canvas. Once the film is is overlaid onto your collage it gives a solid shape to carve spaces; continue adding layers and color. Notice how the transparency makes things pop (like tattoo-lined time machine!). Cover both sides with a thin layer of gel medium, rub air bubbles out with finger. When dry lay flat and create an ice skating rink, dry overnight.
Lesson 8: Finishing Touches
You are looking at the work now and bringing it all together. Draw with water based crayons and use minimal muted color washes over sections of the painting to intensify your color-fields and define areas and set apart the foreground from the background. Draw and paint where needed then add final layers of tissues, transparencies, and napkins. Score to let dry, build up gel medium on eyes, and add final smaller collage elements. Make your last ice skating rink.
Lesson 9: Bring the Work Alive and Finish
Today we are looking at the work and bringing it all together. By now a central image is embedded in the layers. Make final touches using crayons and rubbings, add finishing touches of collage and color, and trim. Finally, finish your piece with a layer of cold wax. This last layer seals in the mixed media, adds depth, and melds it all together. The wax also diminishes the reflections of the gel layers and gives a natural looking surface.