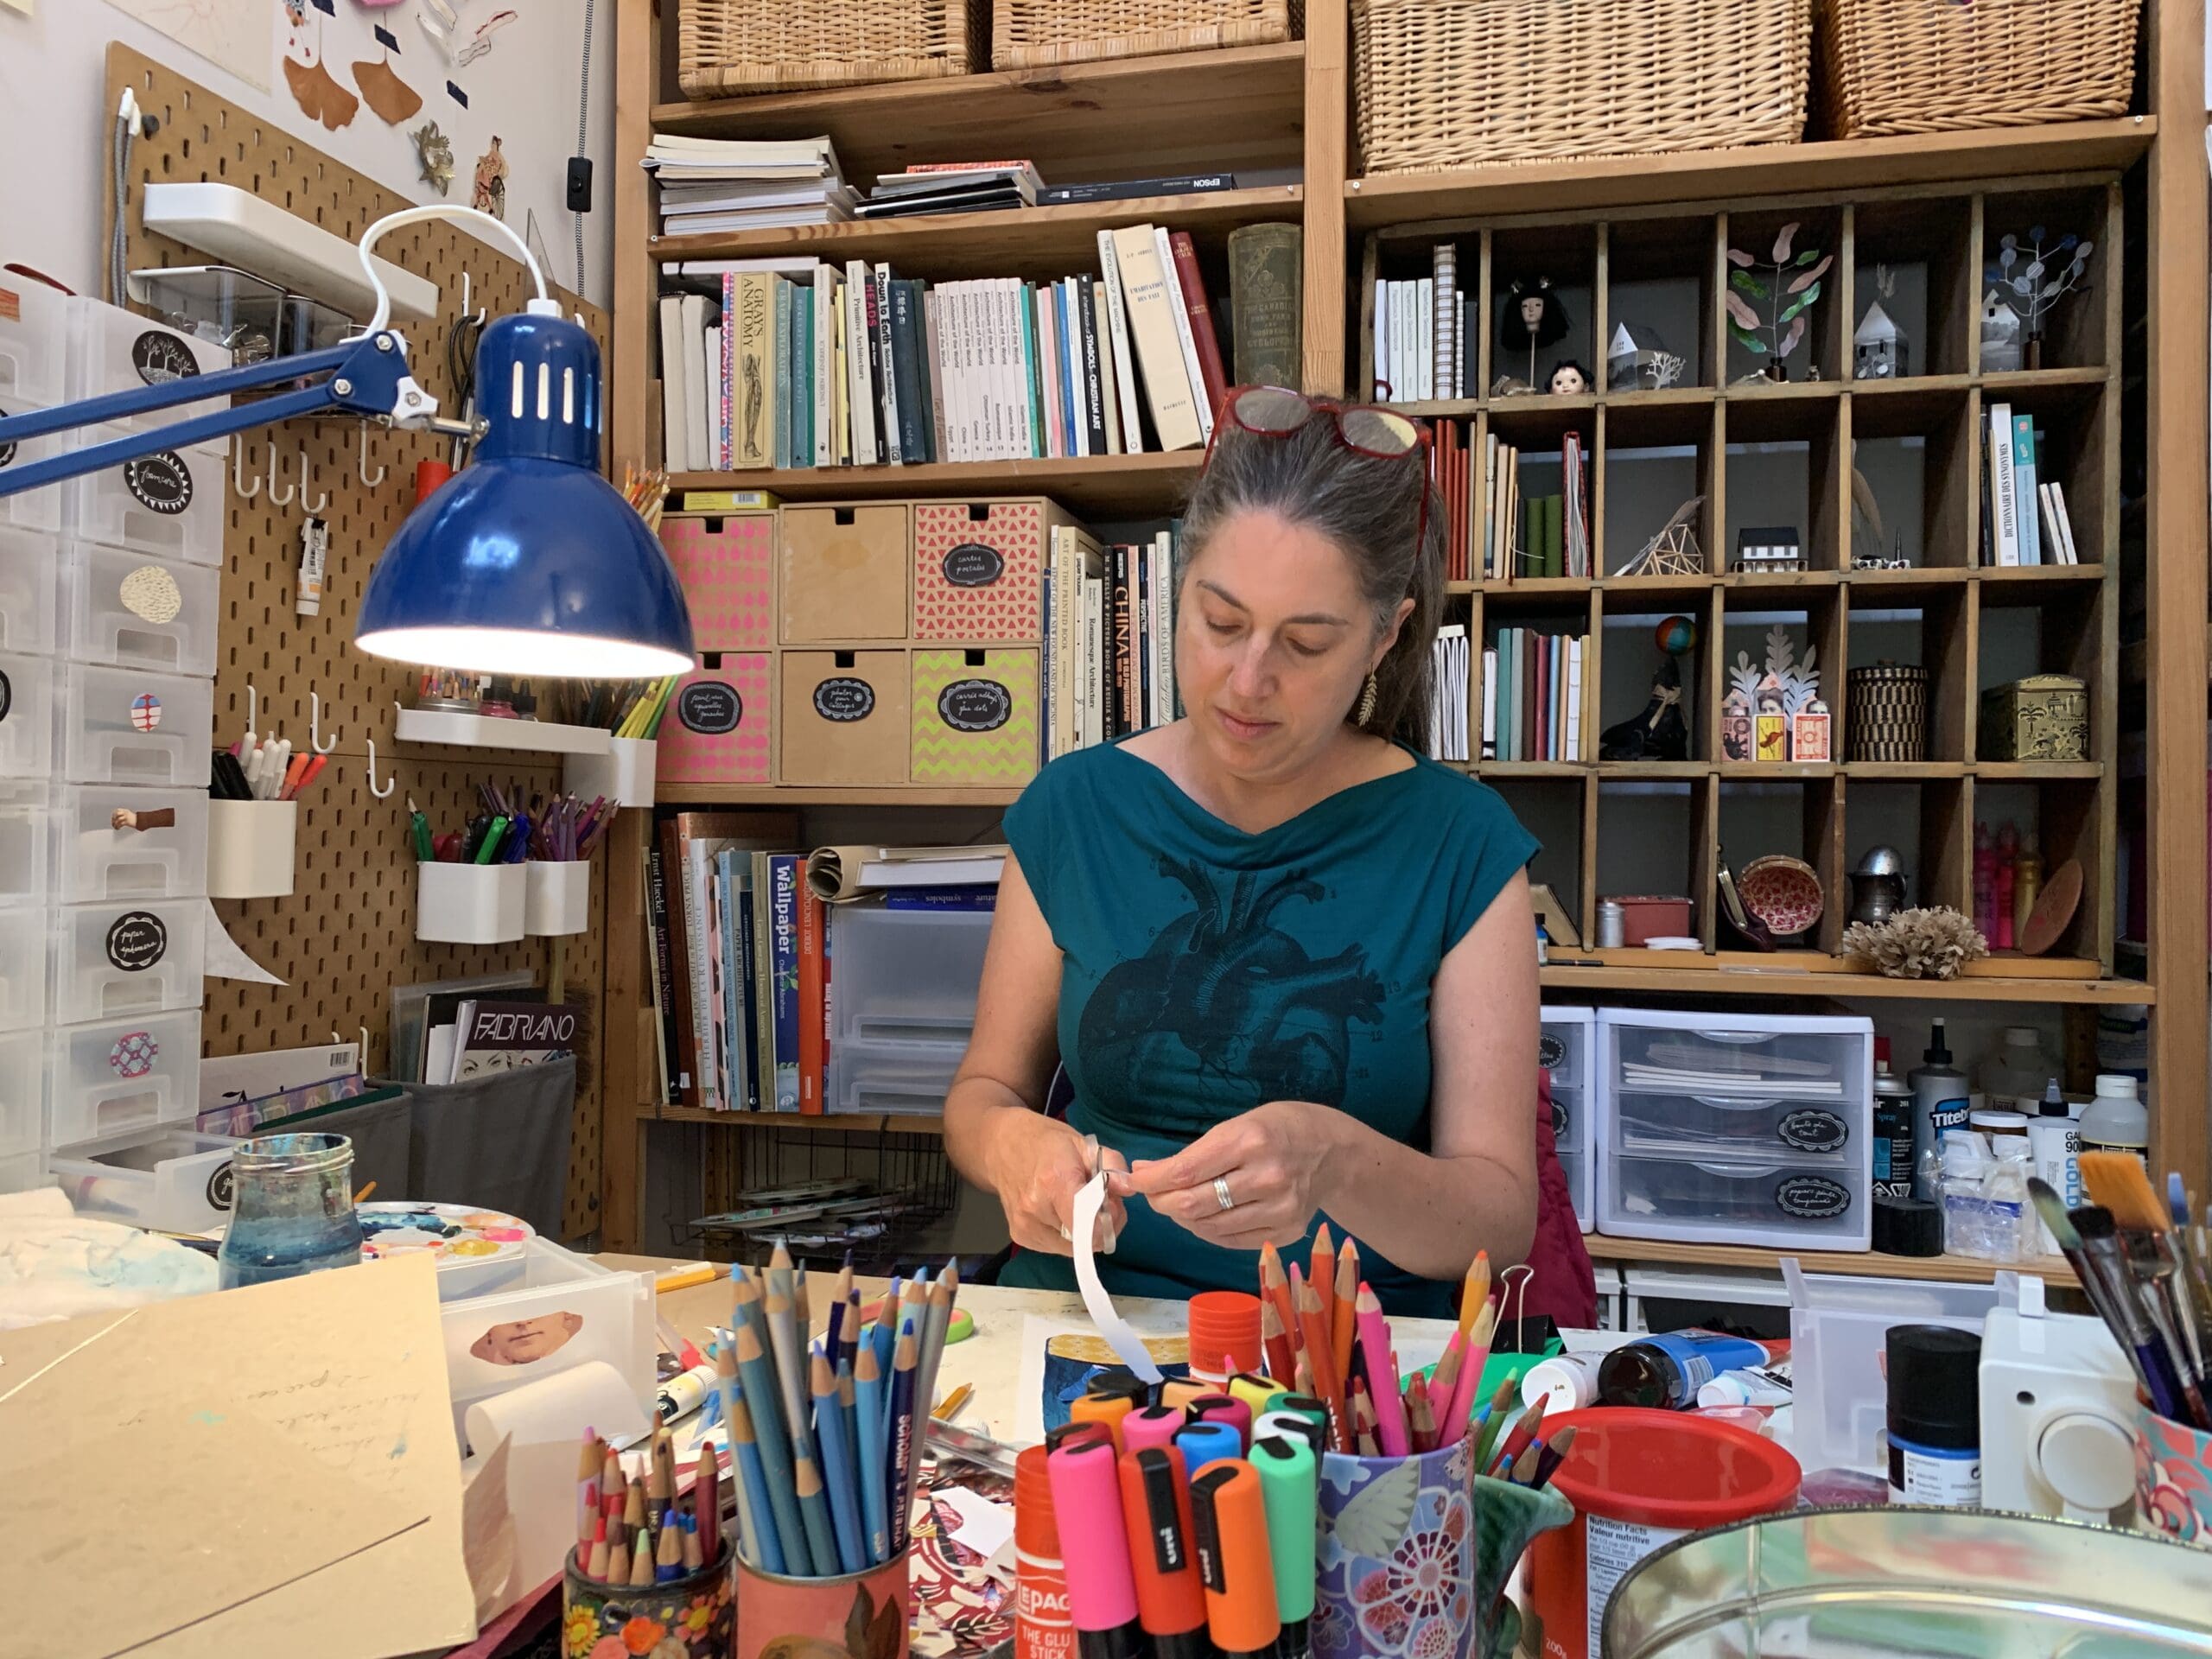

Class Description

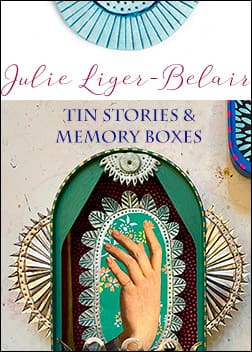
Tin Stories & Memory Boxes
Mixed-Media Assemblage with Julie Liger-Belair
Now available as a self-study class.
. . . . . . . . . . . . . . . . . . . . . . . . . . . . . . . . . . . . . . . . . . . . . . . . . . . . . . .
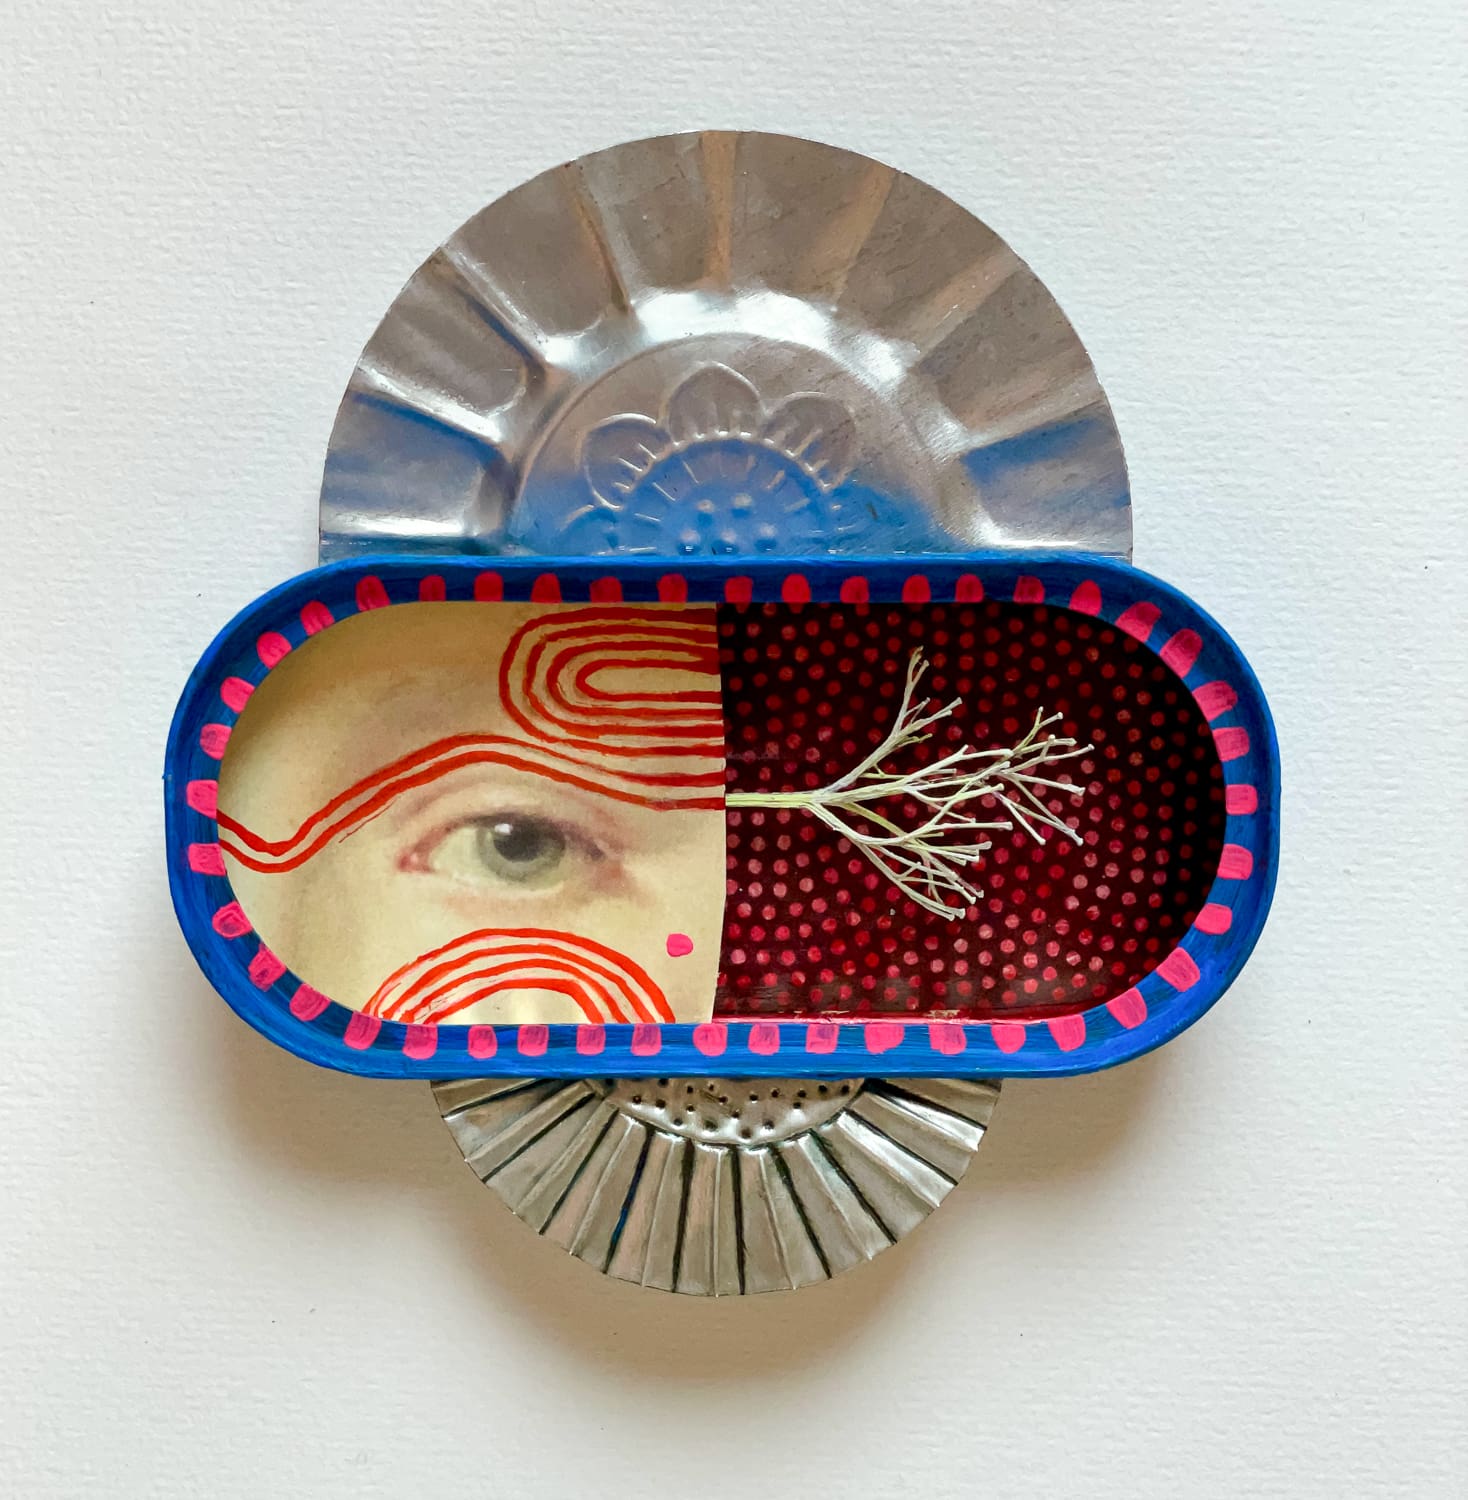
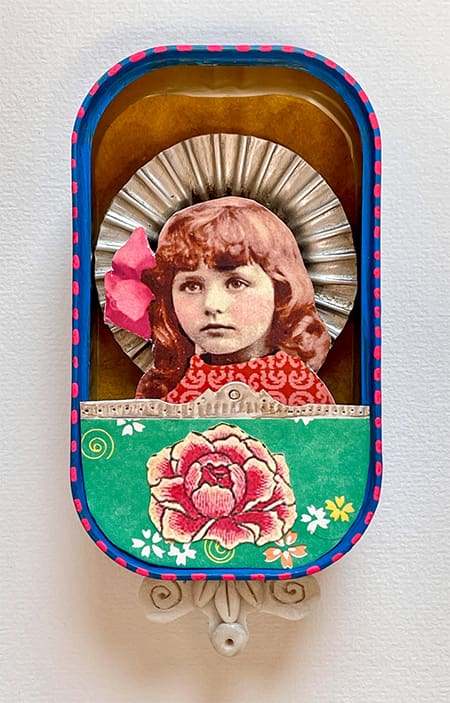
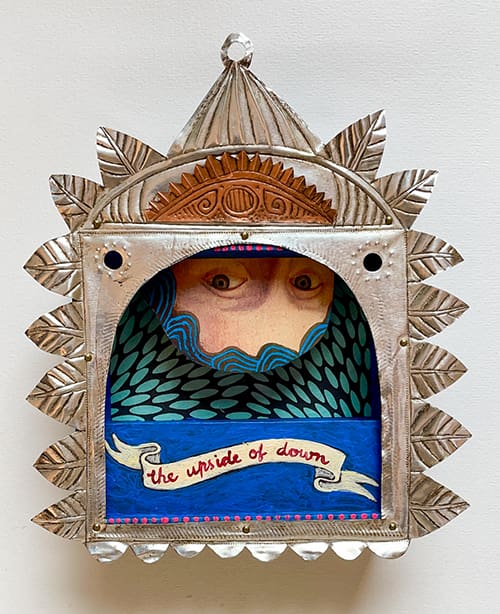
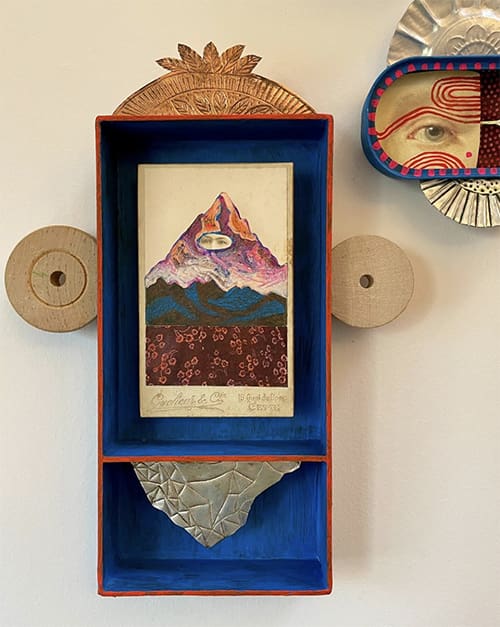
In this class we will be exploring assemblage and mixed-media work through two different projects. In the first project we will explore storytelling through a three-dimensional collage piece in a sardine (or any found) tin. Make this piece about a loved one (person or pet) or simply about a whimsical made-up character. We will be painting and collaging elements to make a lovely little piece complete with hand tooled tin ornamental details.
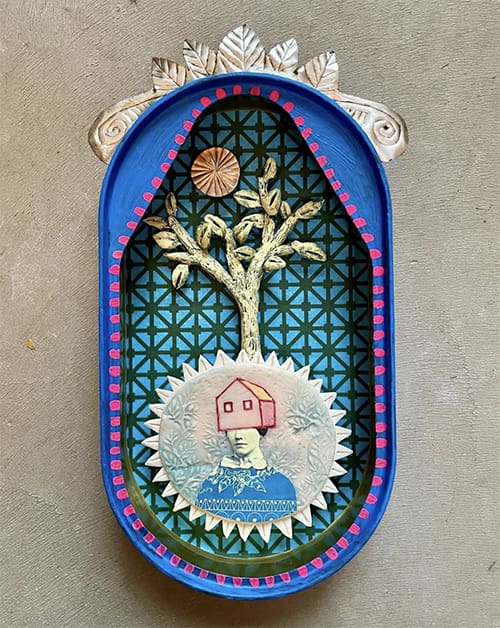
The second project will be a bigger papier mâché piece to house some little found or treasured objects. I’m a collector of many things; from seeds, shells, stones and bits of pottery to small objects from my past like family photographs or a small figurine brought back from a trip. I have always loved finding ways to display these things and tell a story with them and I think this piece will make a perfect display for your own memories. We will also be making some beautiful polymer clay details to add and embellish our piece.
I’m really excited about making these two projects with you. I hope you can join me!
Julie

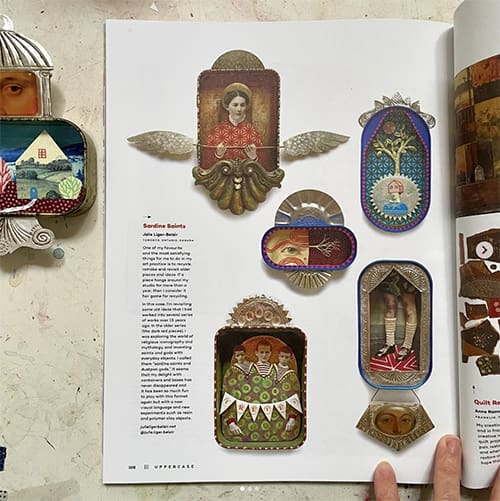
Julie’s pieces were featured in the recent issue of Uppercase Magazine!
. . . . . . . . . . . . . . . . . . . . . . . . . . . . . . . . . . . . . . . . . . . . . . . . . . . . . . .
Class Itinerary
You have instant access to the following lessons:
Lesson 1. We will be starting our first project which will be using a found tin and a three dimensional collage. I will show you how to attach a wire for hanging and how to prepare and paint the tin. We will then choose paper and glue it to our background. I will talk about what kind of image/photograph to use as the main element in your tin.
Lesson 2. Once you’ve decided what image to use, I’ll show you how I build up layers of cardboard and foam core behind it to seal and solidify it so it can appear to float in your tin. I’ll also show you how to attach an object to the bottom of your tin. And of course, we will be adding some finishing touches in form of some tin embellishments! I’ll show you how to cut out and score details into the tin to make some really fun baroque-esque details.
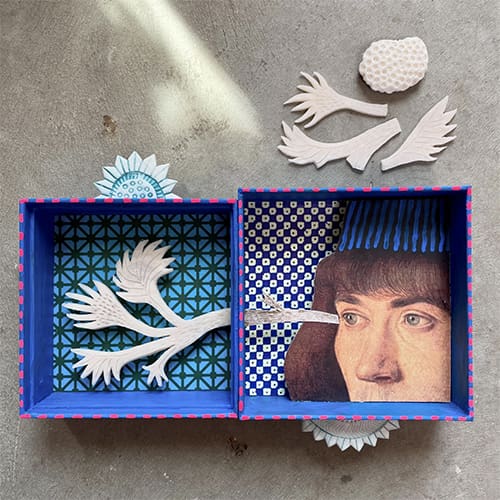
Lesson 3. Grab all those little boxes you just can’t throw out and have been wondering what to do with! We will be assembling them into fanciful display pieces for all your found objects and meaningful nicknacks. Add a fun architectural element (or two), and bring it all together with papier mâché.
Lesson 4. This lesson is really fun. We will be making polymer clay elements for our pieces. I love adding decorative details and the more intricate the better! I will be demonstrating how to work the clay, bake it and then treat it with a paint wash to accentuate all the detail you will have carved into them.
Lesson 5. Now it’s time to paint our papier mâché piece and think about which objects we want to include and how to arrange them in our box. I’ll also explain how I like to highlight certain elements with paint to give the piece visual depth. Have fun with the arranging of your objects, storytelling is such a delightful part of this project.
Lesson 6. In this last lesson we’ll be finishing up our papier mâché piece. This is my favourite part as all the objects and images get glued down and you get to add the polymer clay details you’ve made! I’ll show you how to secure those to your piece. You can also make some tin embellishments to add. There really is no limit to how many details you can add to your piece, so have fun!
_________________________________________
General supplies:
What is so great about these projects is that a lot of the materials used can come from the recycling bin or from basic things in your kitchen/house/studio. You can make your projects with only things on hand (that would be a good challenge!) or go all out and buy some of the supplies listed below. You can make simple, minimalist boxes or ornate, baroque pieces, it really is up to you. Most of all, please do not feel pressured to go out and buy a whole bunch of supplies. The list below is simply a list of all the materials I used in the making of my demo pieces. The point is to have fun and explore what and how the things you have around you can be assembled to make art.
• Found tins (or fish tin, well washed), make sure they aren’t deeper than 1”-1.5”
• Found boxes; cell phone boxes, jewelry boxes or small gift boxes work well. They can be as big or small as you like. For context, the ones I used in this project are: 6.5” x 3.5” and 5.5” x 3” with a depth of 2”.
• Small objects; natural elements like driftwood, seeds, pods, stones, shells etc., treasured/keepsake objects that have some special meaning for you. Or you can also just assemble random objects into a story of your own making☺
• Various colours of acrylic paint. I used raw umber, aqua, pale olive, deep green as well as some metallic gold and brass. But any colour that you like and suits your images and objects is good.
• smaller bits of patterned paper (Japanese, wrapping paper, stamped paper) or any collage paper/ image you’d like to use as a background in your boxes/tins.
• Acrylic matte medium. This is the one I use.
• Various sizes of brushes including some stiffer bristled ones for pushing the paint into the grooves in the tin and polymer elements.
• Polymer clay (or any oven baked clay). I prefer Sculpey but any of the other brands work too. I prefer a white or off-white colour of clay, but you can choose to use any colour you like. One 2 oz package will be more than enough for this project.
• Glass oven proof dish and aluminum foil for baking polymer clay.
• Metal tooling foil (aluminum or copper). You don’t need a whole roll of this (unless you want to make lots more!), so if you can find just sheets it would be cheaper. Here is what I use. For a recycled option, you can cut up and use the inside of some pop cans. I’ve done this in the past quite successfully.
• Tin snip or scissors for cutting the metal.
• Awl or any sharp pointed tool for scoring the tin.
• Printed image or photograph for the first project (or second project too)
• Metal wire for making a hanger on the back of the sardine tin project and for securing any other objects to your boxes. Something like this. Also, for your bigger project, a bar hanger for the back of the papier mâché piece.
• Newspaper and/or paper towel, torn into small strips for papier mâché. Cardboard and masking tape for making ‘architectural’ elements.
• Some tiny pieces of foam core or cardboard.
• Hot glue gun, not essential but useful.
• Glue for papier mâché. I use wallpaper paste that is in the form of a powder I mix with water to get a paste (sorry, I don’t have the original box and so have not been able to find it online for you. I believe it is essentially methyl cellulose). You can also use slightly watered down mod podge or white glue. Or the traditional papier mâché glue made using 1 part flour to 2 parts water.