
Here is a quick assignment from collage artist Kara Kramer!
Kara is a Brooklyn-based collage artist and illustrator, and her class with us is Improv Collage. Thanks, Kara!
Category: Tutorial
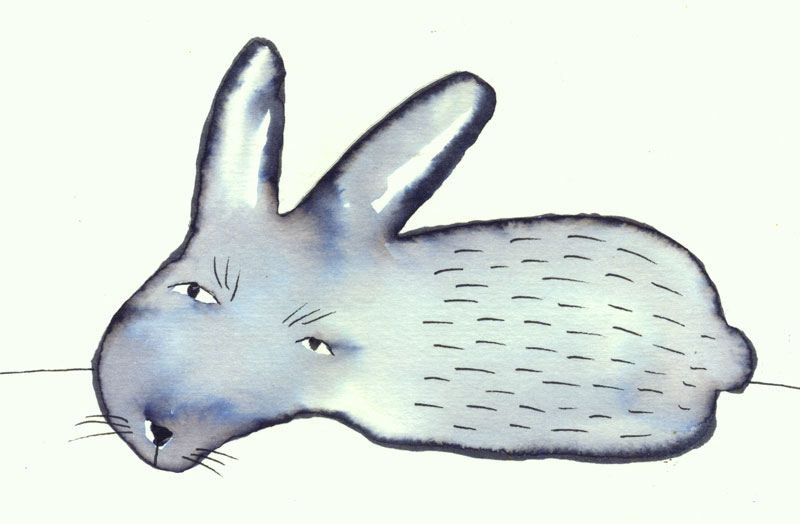
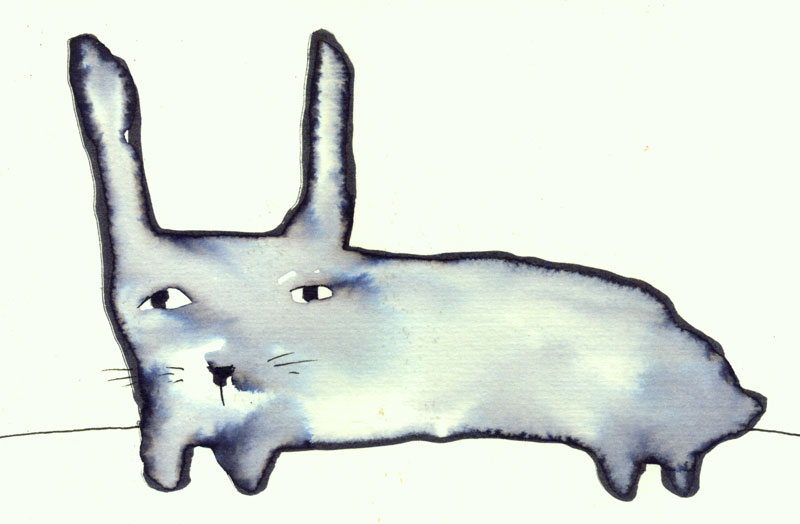
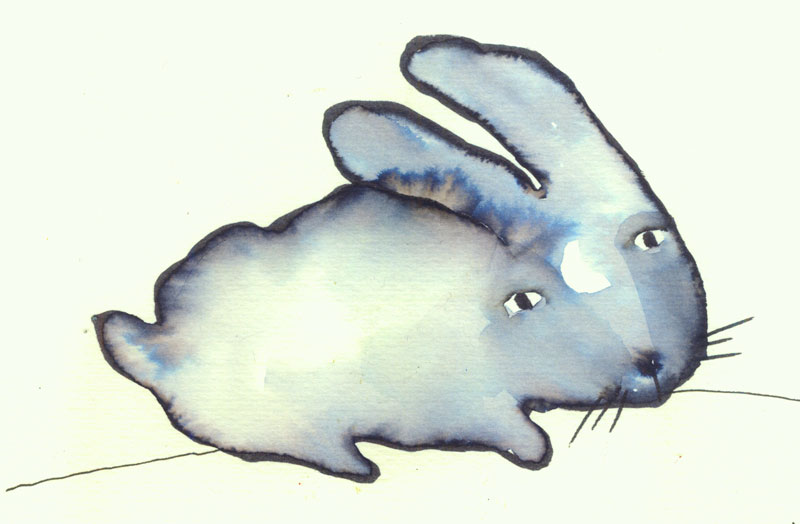
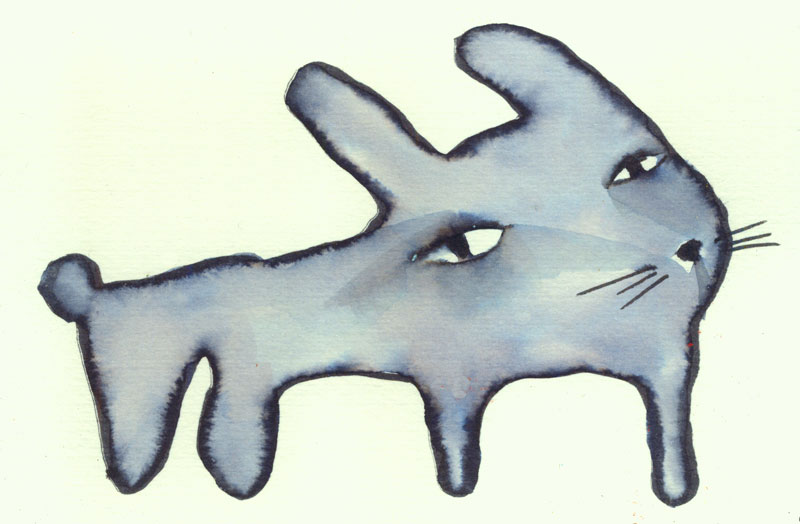
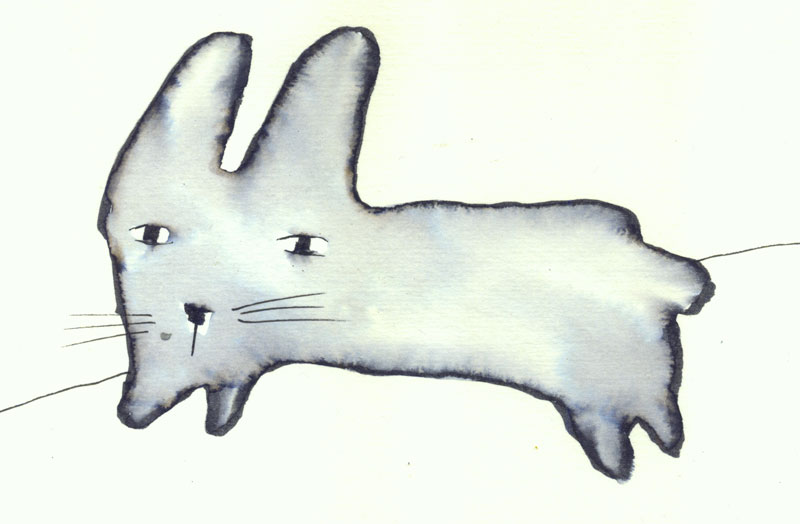
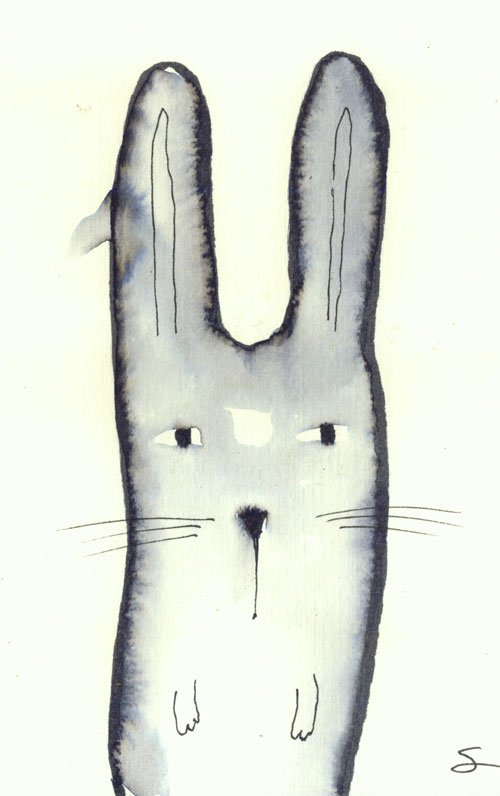
Easy Tombow® Rabbits
Enjoy these very EASY Tombow® rabbits… fast and fun, they make great cards! Upload your creations to our Facebook Group page:
https://www.facebook.com/groups/1587972621494055/
Have fun!
Carla
____________
Supplies Needed
— black Tombow® N15 marker (or any water soluble marker)
— watercolor paper (or greeting card kit)
— #12 round watercolor brush (or similar)
— black permanent pen (like a Micron .05)
And here is one done with inexpensive Crayola markers:

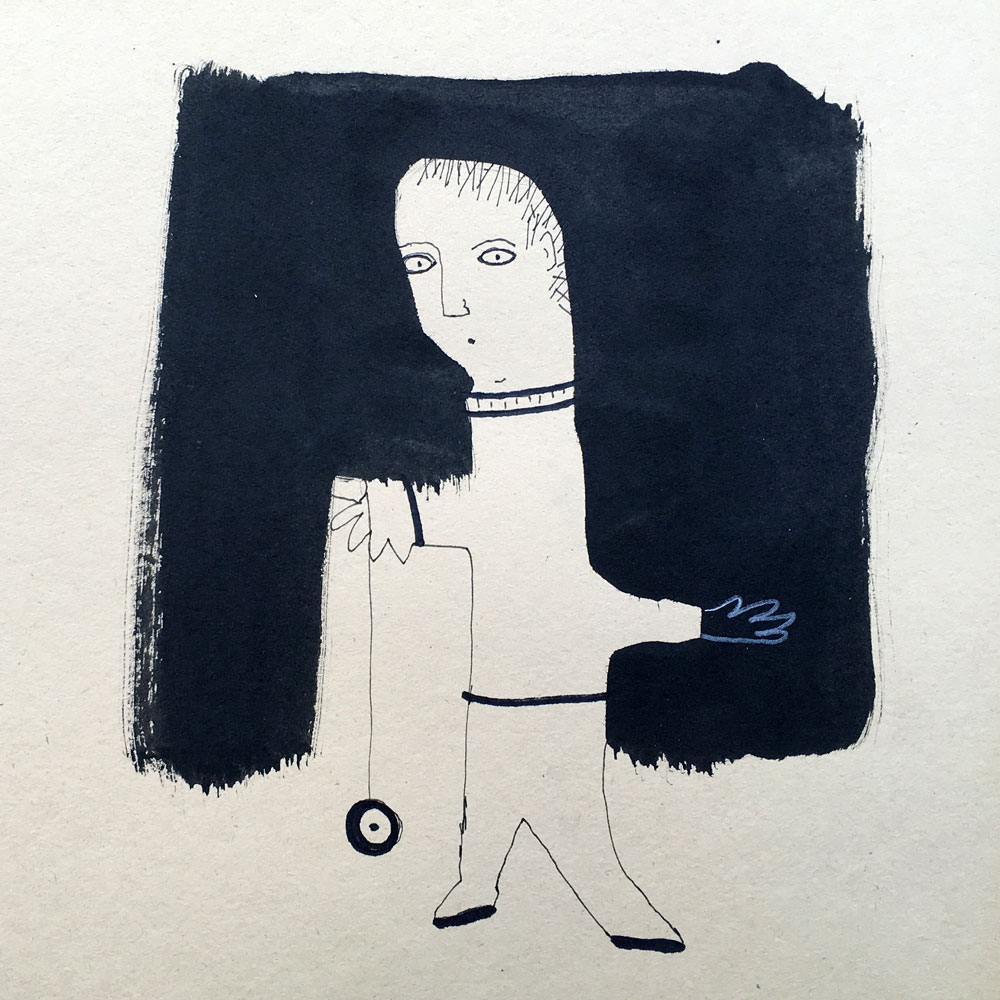
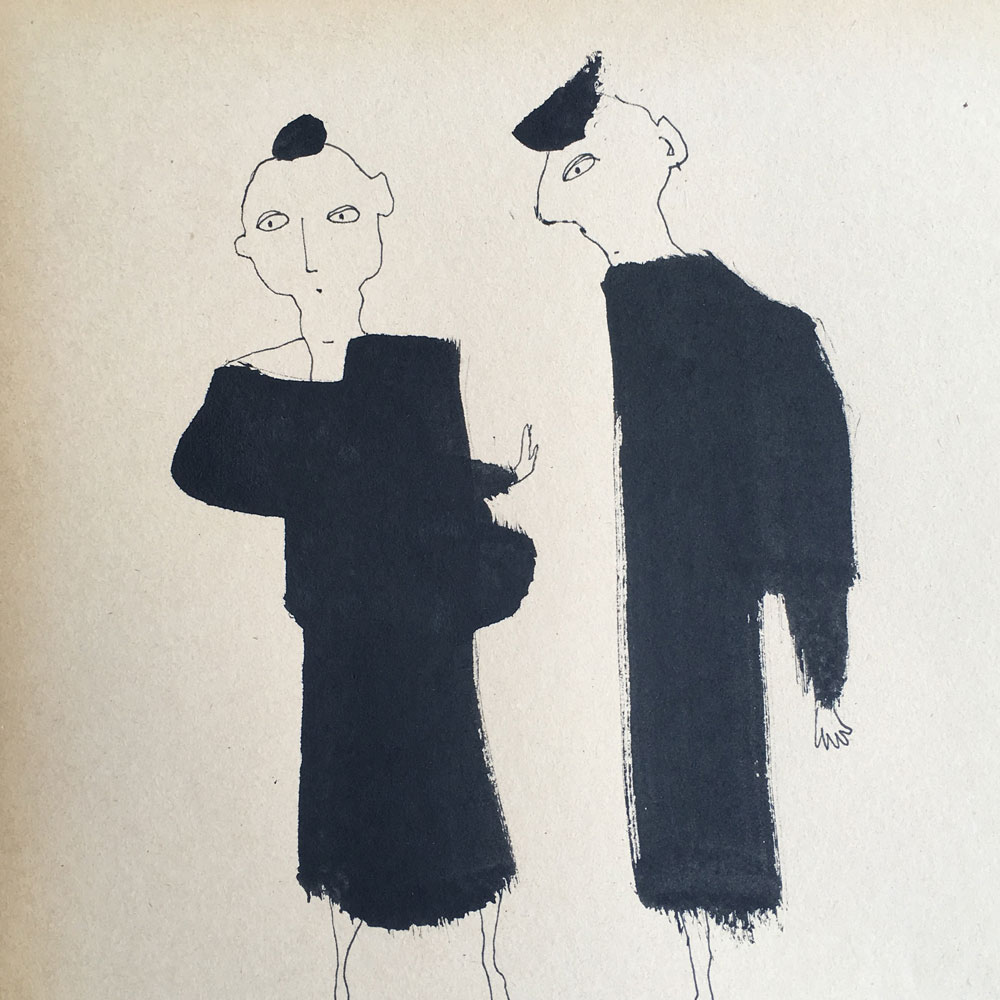
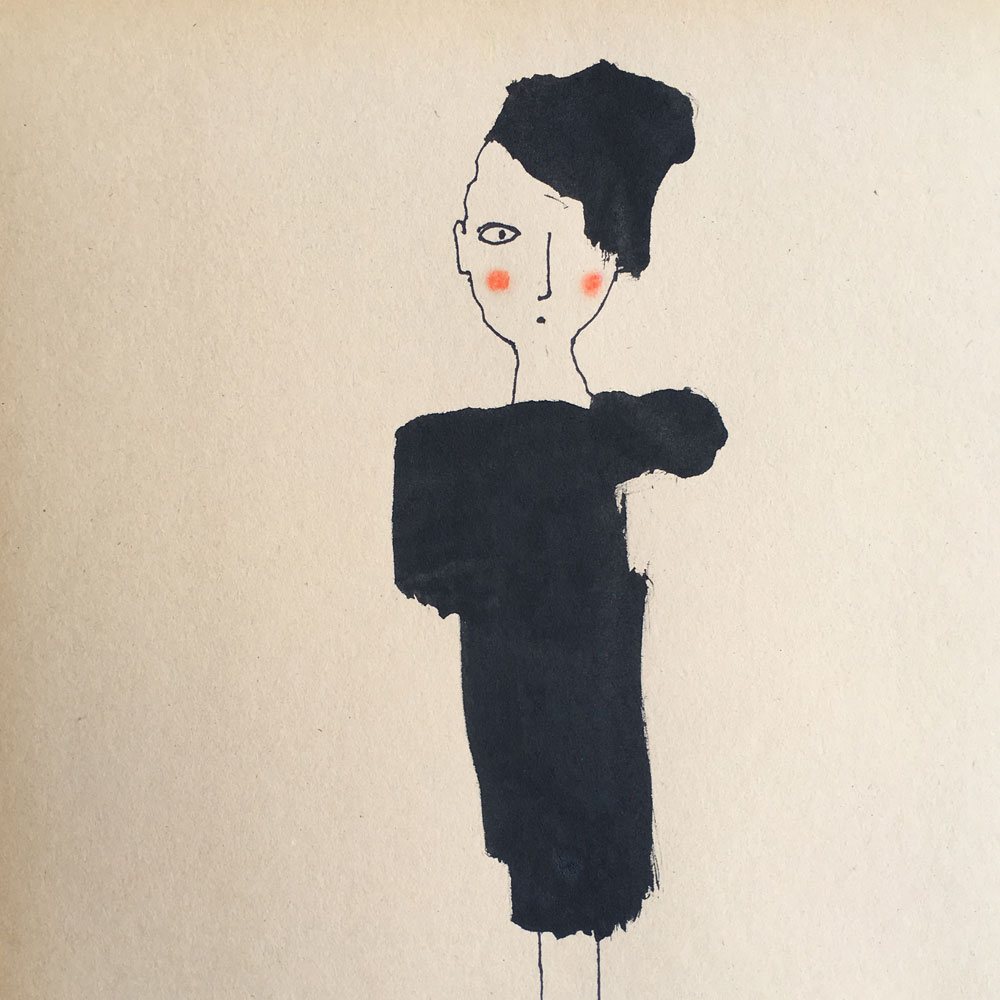
Creating Ink Figures
Hi Everyone! Here is a quick lesson on making ink figures (a la artists Norman Laliberte and Saul Steinberg)!
Supplies needed:
- – thick paper
- – ink
- – white colored pencil
- – red soft pastel
And here are some samples!
Have fun, and post your figures to our Facebook group!
https://www.facebook.com/groups/1587972621494055/
Marbling with Nail Polish – Tutorial

Marbling with Nail Polish – Art Tutorial with Carla Sonheim from Silly U on Vimeo.
Hello!
Above you will find a short tutorial on how I’ve been marbling with nail polish. To try this, you will need
— 2 or more colors of nail polish
— some stiff paper (I like to use 140# hot press watercolor paper)
— a small tub filled with water
— a sharp object such as a needle or nail
— rag, scissors

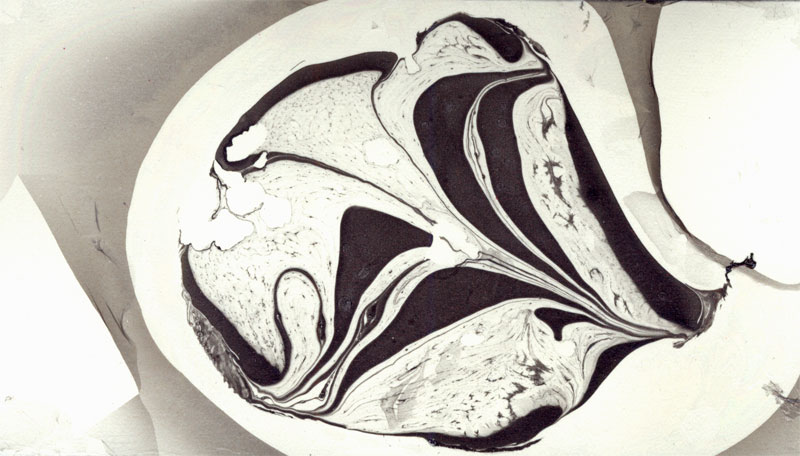
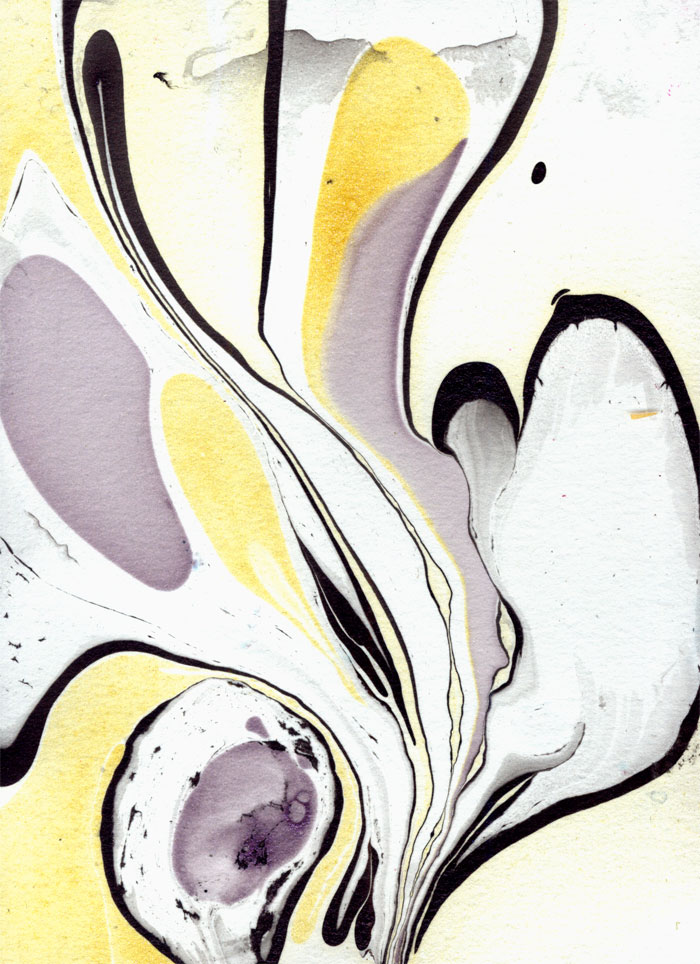
If you could like to create circles like the ones above, just cut your paper into circles before you marble.
Have fun, and upload your creations to either the “Carla Sonheim Presents” Flickr or Facebook sites!
_______________
For more fun TUTORIALS, click HERE!
To sign up for our NEWSLETTER so you don’t miss the next free tutorial, click HERE!
Best Ideas Ever Jar

Hello! While we were in Florida shooting Lynn Whipple’s “The Joy of Collage” class, we also were able to shoot Lynn talking about this brilliant little project, a “Best Ideas Ever!” Jar. I hope you enjoy it!
(And if you make one, be sure to leave a comment with a link to an image… we want to see them!)
Crazy Birds Tutorial

“Crazy Bird” watercolor, pastel and crayon on cut paper.
Here is a short tutorial of the “Crazy Birds” project that I taught 5th graders in Beijing, China! The video shows only marker, pen, and pencil, but you can modify it with any media you like, as I’ve done in the sample above.
Crazy Birds Tutorial from Silly U on Vimeo.
(If you have trouble viewing it through this blog, click the direct link here: http://vimeo.com/96276667)
___________________
CRAZY BIRDS
Supplies Needed:
– Four pieces of watercolor paper, about 5″x5″ or 6″x6″ square
– Four mark-making tools, such as pens, markers, watercolors, pastels, crayons
– scissors
– glue stick
Here are the steps:
STEP 1
Using two sheets of paper, draw a loose flower shape on one and a loose circle shape on the other. Use 2-4 different media. Work fast and loose!

STEP 2
Cut the flower and the circle papers into four equal pieces. Then, using another paper as a ground, arrange the pieces to create the beginning of a bird shape. Glue in place. Repeat if desired.


STEP 3
“Finish” the birds already started using the same combination of media used in Step 1.


This is a great project for anyone because it’s hard to go wrong! Please feel free to share with your friends, in your child’s classroom, etc. And send me some Crazy Birds!
Positive & Negative Space
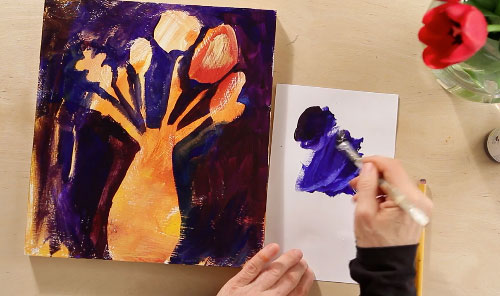
In this video, artist/teacher Diane Culhane demonstrates an acrylic painting project using both the positive and negative spaces. Have fun!
_____
Diane is a painter and art educator living in Seattle. She has held two online classes through us, “Between Speech & Silence” and “Table Top: Drawing & Painting.” Both are available as self-study classes now.
Paper Dolls Tutorial

Here is a quick and fun way to make original paper dolls… a perfect thing to do with your kids or to nurture the kid inside you… because we’re never too old to play with paper dolls! Have fun!
Carla Sonheim
P.S. This tutorial was made in anticipation of my next online art class, “2014: Year of the Fairy Tale.”
__________________
Supplies Needed
– a small watercolor set
– #12 round paintbrush (or similar)
– 8″x10″ sheet of 140# hot press watercolor paper (or similar)
– a regular pencil
– an eraser (I like kneaded rubber erasers)
– scissors
__________________
VIDEO TUTORIAL
Paper Dolls Art Tutorial from Silly U on Vimeo.
__________________
STEP BY STEP
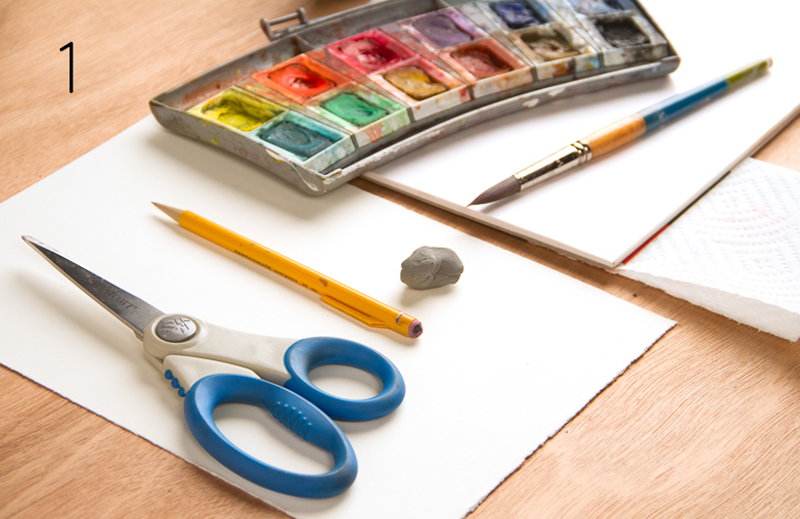
1. Gather your supplies.
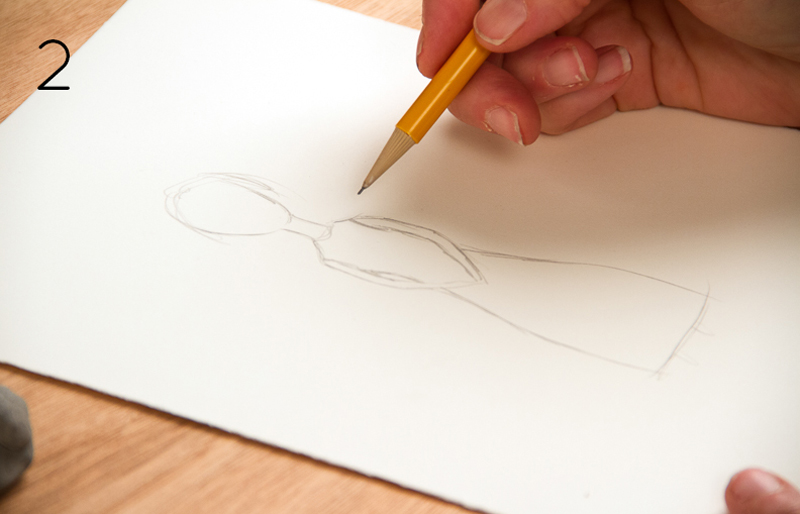
2. Lightly sketch in an outline of your doll. Keep your hand loose, and try not to worry about exact proportions (sometimes the most charming characters emerge when we let go of perfection!).

3. Using lots of water, mix up a color to use as the skin tones. Paint face, arms and feet. When face has had a chance to dry, get some red pigment on your brush and “dot” it into the watercolor quickly. The color should begin to spread out a bit for some nice rosy cheeks.

4. Let dry completely.
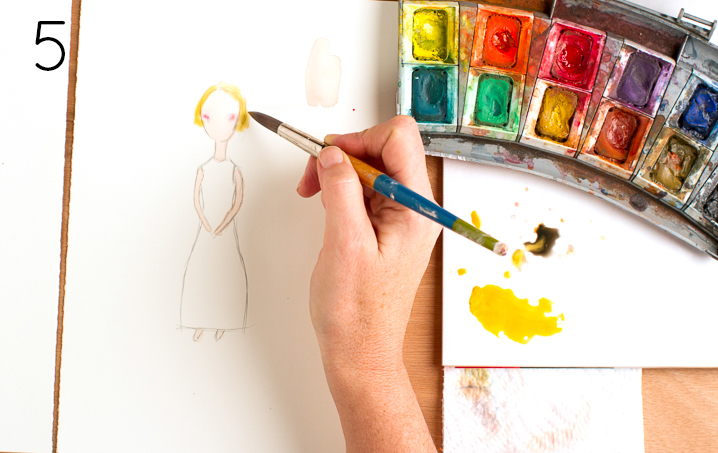
5. Paint in some hair; let dry completely.
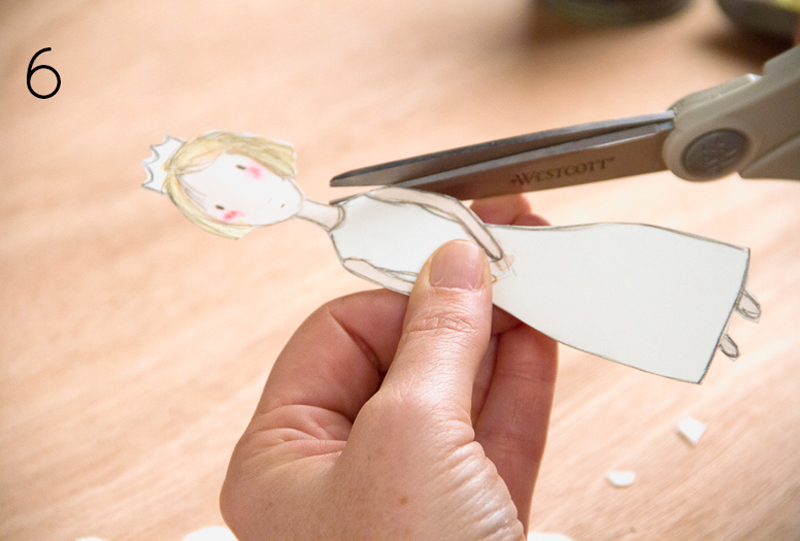
6. Cut out your paper doll, and…
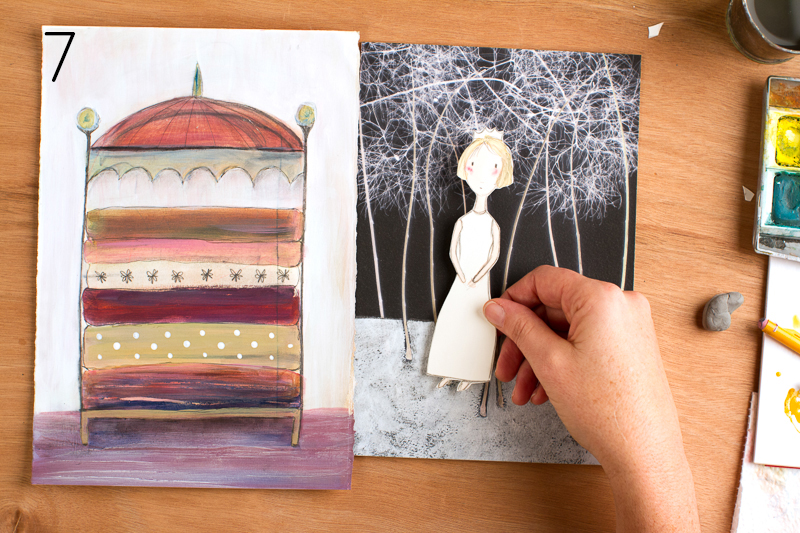
7. Play!
____________
© 2013 Carla Sonheim (www.carlasonheim.com)
Carla Bio:
Carla Sonheim is a painter, illustrator, and online art instructor known for using innovative techniques to help students of all levels embrace a playful approach to creating art. She is also the author of the “Drawing Lab for Mixed Media Artists: 52 Creative Exercises to Make Drawing Fun.” Carla’s paintings have been showcased in many galleries nationwide, as well as private and corporate collections. For the last three years her focus has been on creating engaging online art classes, where she teaches and also presents well-known guest artists.
More Free Tutorials: https://www.carlasonheim.com/tutorials/
Next Online Art Class: 2014: Year of the Fairy Tale
Link to Carla’s Online Classes: https://www.carlasonheim.com/store/
"Abstracted Minutia" Drawing Tutorial

Hello!
One of the labs in “Drawing Lab for Mixed-Media Artists” is called Abstracted Minutia, in the chapter “Inspired by Nature. Following is a more elaborated tutorial than found in the book:

1. Gather some dried leaves, flowers, pods, shells, feathers, rocks, seaweed, grasses… anything you find out and about that looks interesting to you.

2. Next, gather some paper and drawing and mark-making tools. I’m using charcoal, various types of graphite, and just one or two colors of PanPastels; I like to keep my palette limited to mimic my subject matter. The paper I usually work with is Fabriano Artistico 140# hot press.

3. Start arranging your items into an abstract design. Try not to think “flower” or “leaves, but just look at shapes, textures, and colors and place them in a design that doesn’t read as anything necessarily.

4. When you’ve settled on a design, get ready to draw it:


Don’t worry about copying the design exactly. Use your pod setup as a starting point, but then let the drawing tell you which elements you might want to leave out, or if there are areas you would like to add more to. Here is my finish:

Have fun with it, and play with your materials!
Photos by Matisse Lorance Berthiaume
Shading Imaginary Animals

How do you SHADE an animal that you’ve created from your imagination? There are two things I think about when shading imaginary creatures.

First, I imagine a light source, such as a sun, shining down on the object from either the right or the left. So in my example above, I have decided that the light source is in the upper right hand corner. So everything “close” to the light will be brighter and everything “far away” from the light would be shaded. (Shading done using a mechanical pencil.)

The second thing I think about is the areas where things (such as ears, eyes, paws) are overlapping, joined, or protruding. So, for example, I’ve added shading underneath the neck, between the legs, and at at the bottom of the bear (where it’s paws and body meets the ground). I also added shading under the eyes.

Sometimes, if I want to double-check my shading, I’ll find an image in my stash of pet books or online that is similar to the drawing I’ve made. (This is an optional step.) Here is a polar bear image that works well, and by looking at the photograph I realized that no matter what, the area around the bear’s mouth would probably be dark due to staining, so I darkened that area. The photograph also showed that the left half of the body was in a bit more shadow than I thought, so I added a little more shading there. The photograph also reminded me to add shading on the ground.

Finally, don’t stress too much if you go overboard with your shading and put it in “wrong” places. With Imaginary Animals, you can quickly adjust your thinking so that your ill-shaded areas are dark patches of fur, instead!
*************************
For more tutorials and assignments, click HERE!
Red Bull Tutorial
Hello! Today’s tutorial is sort of a Take It Further option of Chapter 5 from “Drawing and Painting Imaginary Animals“: Abstract Watercolor Starts.

I will be showing you how I made the above drawing/painting (kind of interchangeable in my mind). However, this only outlines how I happened to finish this particular piece, and it could have gone many different ways and still have been successful (or not). If you choose to try the steps outlined below, remember that the result will — and should — turn out differently… your own unique hand will enter the process, a very good thing!
(Click to enlarge images.)
*************************
SUPPLIES NEEDED
One piece of hot press 140# watercolor paper, about 7″x10″
watecolors, brushes (I like a #12 round)
white gesso
mechanical pencil
spray fixative
*************************
STEP 1

(This first step is really two steps combined, as i hadn’t originally planned to make this a tutorial and didn’t scan the very first step.)
Step 1a. Using red watercolor and a #12 round brush, mix up a very watery amount and make a mark. I started with the tail in this case. Once I had a shape I liked, I picked up the paper and added more watercolor to the base of the tail, and then tipped my paper so that the pigment would slide across the page. I had a dog in mind, and just kept repeating the mark/dripping process until I had a recognizable animal (head, body, four legs). Also, load your brush with pigment and then “splatter” it onto the page randomly by hitting the brush against your hand.
While the paint was still wet, I went in to some of the areas and pulled out little lines (fur!) from some of the areas with a sharp stylus (though you can also use a mechanical pencil or even a shish kabab skewer). Here’s a detail:

Step 1b. Once your red watercolor is dry, mix up another color of your choice and color in your animal, leaving the areas where you want the eyes, white.
*************************
STEP 2

Step 2. Here I added some blue watercolor on the body, and some pencil iines as fur once that dried. In addition, I decided to “take a risk” and turn the head a bit, as I was feeling the original was a little boring. (At this point the “dog” became a bull.) I also decided to pencil in the eyes, and changed their shape a bit at this step as well. Let dry.
*************************
STEP 3

Step 3. After changing the head direction, I felt it would be too difficult to hide the original lines without the help of the big guns — gesso. Using a small, round, dry brush I added the fur on the body. Then, I wet the brush a little when i applied it on the face. I also added a white layer to the eyes with a very small brush. Let dry completely.
*************************
STEP 4
Step 4. All the shading and details were then pulled out using a regular, cheap mechanical pencil (2B). When applying your pencil lines for fur especially, keep your hand very loose and apply more pressure at the beginning of the stroke than at the end of the stroke. Work fairly quickly so you don’t over-think it — fur is usually scraggly!
Here’s a detail:

Spray with fixative. Done!
*************************
For more tutorials and assignments, click HERE!
Go Blob Hunting
TODAY’S ASSIGNMENT: GO BLOB HUNTING!

Instructions
1. Grab a small sketchbook or stack of drawing paper and a pen or a pencil (any kind). I used an Ultra Fine Point Sharpie pen.
2. If the weather is nice, go outside. Start looking at the ground, at fences, and at the side of buildings for interesting shapes to draw; could be from a leaf, a stain on your driveway, or a sidewalk crack. Draw its outer shape (and it’s not necessary at this point to “see” anything in it; just draw a shape). Repeat four more times with different inspirations, one to a page.
If it’s too cold to go outside, you can just hunt for blobs inside! Look at marbled counter tops, stucco, your breakfast plate, or water marks left in a sink or bathtub. Draw it. Repeat four more times with different inspirations, one to a page. Here is a “blob” drawn from a piece of bacon.

3. Now, “finish” one of your blobs. Here’s how to do it: Turn your paper or book around and around and look at your blob from all four directions. Do you see something? An animal, or part of an animal? If so, add an eye and any other lines or elements to “finish” your animal. Here is how I finished the “bacon blob,” above:

First I added some legs.

Next I started adding pen details for fur. Here’s a detail:

I added a bit more fur/shading to the areas where the line crossed the top of the leg…

… and underneath the dog’s body for shading. At this point the rump bothered me…

… so I added a tail. I also wanted to add two more legs, but was a bit chicken to do it directly with pen, so I lightly sketched in with pencil first.

I finished him up by adding a ground, and looking over the whole thing to see if I wanted to add any details. In this case, I added a beard, some spots, and a few more scraggly hairs.
4. If you want to add color to your animals, head on over to these two tutorials for some ideas: Layered Poodle and Alligator Coloring Tutorial.
5. If time, repeat Steps 3 & 4 with your other four “blobs”!
6. Upload your images to the NEW Drawing and Painting Imaginary Animals flickr site!
*************************
For more tutorials and assignments, click HERE!
Animals in Tape

_____________________
Animals in Tape: Mini Tutorial
_____________________
Supplies Needed:
• Several different kinds of Washi masking tape (or even just regular masking tape)
• Mechanical pencil
• Smooth paper, about 5″x7″ (I use Fabriano Artistico #140 hot press watercolor paper)

Step 1. Lay down five pieces of tape anywhere on the page. Don’t worry at this stage what it will be; just concentrate on moving the shapes around in a way that pleases you.

Step 2a. Add five more pieces of tape, a different pattern this time. Make sure to overlap these new pieces on top of the previous five pieces.

Step 2b. Before moving to Step 3, turn your paper all around and see if an animal emerges naturally at this point. I saw potentials in each of the directions, but decided to pull out the barking-dog-like one on the upper right.


Step 3. Lay down however many pieces of tape you like (in new patterns, if desired) to “fill out” your chosen animal.


Step 4. Add pencil to define eyes and body shape, and for hair, fur, whiskers, etc. I usually go about this step rather slowly, and add more tape if desired.

Step 5. Done!
P.S. This is a simplified version of “Animals in Tape.” A more “mixed-media” version is part of my new book, due out in just a few days!
Alligator Coloring Tutorial
Hello!
Those of you who have been in my workshops know that I like to build color very slowly, using multiple layers of transparent colors. This step-by-step shows an example of the process (though remember it’s unlikely you will have the exact colors, types of pens, etc. that I have, so of course whatever you do will be different!).

STEP 1
Using brown watercolor with a little green mixed in, I free-hand painted the alligator shape. The color should be very pale at this stage. (I didn’t use a pencil first… the darker green outline you see around the edges is green watercolor.)

STEP 2
When the first layer of watercolor was COMPLETELY dry, I added a second light layer of green right on top of the previous layer.

STEP 3
Using a light pink Copic marker, I added the “orange” lines you see. (They look orange because the pink is mixing with the greenish-yellow underneath.) Keep your hand loose.

STEP 4
I repeated Step 3 using a light gold Copic marker.

STEP 5
I grabbed a black ballpoint pen and started adding outlines, scales, and cross-hatching, again, keeping my hand loose and squiggly.

STEP 6
Keep working the ballpoint pen until you feel done!
_ _ _ _ _ _ _ _ _
For more tutorials and assignments, click HERE!
Watercolor Birds
Super Easy Watercolor Birds
This little tutorial will hopefully dispel some myths about watercolor being “impossible.” Yes, it does have kind of mind of its own sometimes, but that’s part of the fun (and is usually completely “fixable,” as you will see)!

These birds are super easy. Follow the steps below, but remember your birds will (and should) come out differently than mine! The way you lay down the paint, the colors you choose, the shape of your bird, and your unique “hand” when adding pencil detailing will all contribute to a bird that is uniquely yours. And that is a good thing!
STEP ONE

1. Gather your supplies. You will need a pencil, a set of watercolors (cake or tube is fine), some watercolor paper (I like using a “hot press,” which is smoother), a rag or paper towel for blotting paint, a container with water, and a watercolor brush (I use a #12 round).
STEP TWO

2. Using lots of water, mix up a little pool of the color of your choice. Test the paint on a scrap piece of paper. The pigment should be watered down and the color should be quite light. (This will feel strange to Bright-Color People, but don’t worry! It won’t stay this pale.)
STEP THREE

3. Load your paint brush. Blot a little of the excess water on to your rag or paper towel. Your brush will still be quite wet; this just takes the drippiness out.
STEP FOUR

4. Start painting a bird. I usually do not draw in pencil first, as I like to see how the bird unfolds using paint only. (But you are allowed to draw it in lightly first if you must!) Work fairly quickly; you want the paint to remain wet as you move it into the shape of your bird. If desired, leave a space unpainted for the eye, as shown here:

In the case of my first bird, I the paint was a little too wet… I wanted it to dry a bit more before I added the next step, so I used this time to paint in a second bird.
STEP FIVE

5. While the paint is still wet, go back to your watercolor palette and grab some darker pigment with your paintbrush (not watered-down this time). Dip the heavier pigment into the wet paint here and there (I like to go around the eyes and on the bottom edge of the bird). Just dab it; the watercolor will begin to spread out on its own. Repeat with the second bird:

STEP SIX

6. Let dry completely. (Very important!) You can see here that the green spread out quite a bit when it dried. This wasn’t exactly what I intended (oops), and occurred because my original layer of paint was “too wet.” No worries, though! We can fix it on the second layer.
STEP SEVEN

7. Now you are basically going to repeat steps 2-6, but with different colors. In this case I used a very light orange-red for my second transparent layer (steps 2-4)…

… and a darker blue for my more pigmented drop-ins (step 5).

Repeating now for the second bird.

STEP EIGHT

8. Once the second layer of paint is COMPLETELY dry (very important!) you can add details with pencil. I usually add the eyes, some shading around the eyes perhaps, and some shading on the wings and bottom of the bird.

Keep your hand loose; if the pencil lines seem too harsh, use your finger to soften the effect:

STEP NINE

10. Finished! Here’s a detail:

____________________________
For more tutorials and assignments, click HERE!
Layered Poodle
Layered Poodle
Here is a step-by-step process of how I might layer markers, colored pencils, and pencil when working in my sketchbooks (you can see more sketchbook drawingshere and here!)
STEP 1

I drew a quick line drawing on 5″ x 7″ watercolor paper (140# hot press Fabriano). I used an ultra fine point black Sharpie (permanent marker). I tried to hold the pen loosely in my hand, but I wasn’t particularly happy with the drawing, so I am going to try and “fix” it with color.
STEP 2

I was thinking it was a poodle, and poodles have curly fur! So I started out making the curly marks with a light grey Copic marker (#T2). I like Copics because they come in a whole range of VERY LIGHT colors, which I like to use when layering my colors (instead of drawing bright colors right off the bat, I prefer to build the colors up slowly through transparent layering).
STEP 3

Next I added some light gold colored pencil (just a Crayola I had lying around). I’ve drawn two little “patches” in the lower left corner to show how I like to lay colored pencil down. Instead of pressing really HARD at this point (the far left mark), I press very lightly. Since I’m going to be adding more transparent layers of color on top later, I know that, even though the color looks “blah” right now, it will BUILD into something more interesting as I go along.
STEP 4

Next I added some pink Crayola marker (yes, the cheap kind). Since it was a darker shade, I added it to the areas of the dog I thought might be in shadow, such as the bottom of its snout, around the ears, etc. I also threw a few random pink marks in the body to tie it together, and “puffed out” some poodle hair on the head, tail, ear and feet.
STEP 5

Added red colored pencil in similar areas. I worked both the lighter shade and a few darker lines for the curls.
STEP 6

Now I added some pencil shading (using a regular mechanical pencil from the office supply store). I tried to get the darker pencil into the nooks and crannies where I imagine shadows might be (under the hair tuft, for example). I smeared it with my finger, which I always do but know I shouldn’t! (Note re: smudging! I’m thinking the LEAD isn’t good to rub into my skin and system, but I do it anyway! Update on the Update: Several readers have pointed out that it’s GRAPHITE and non-toxic. Well, then, oil from the fingers on the paper = not good? All I know is that I feel slightly guilty every time I rub pencil with my finger. But I do it anyway!)
STEP 7

The strong line of the original sketch around the fur tufts was bothering me, so I went back to the black Sharpie and added more dark lines to the tufts of hair to try and obscure those original lines a bit. I also, continued the “grass” on the bottom, to give the dog something to stand on and make those marks make more sense!
—————————-
For more tutorials and assignments, click HERE!
Abstracted Flowers
Abstracted Flowers

Hello!
When I posted the above flowers a few weeks ago, many of you expressed an interest as to how I made them! So following is a quick tutorial (though, after several weeks of experimenting, I still haven’t been able to replicate the above flowers exactly… oh well! Just remember to have fun and not worry about the end product very much; because it is such a fast and loose process, you won’t be able to control it that much anyhow!)
SUPPLIES YOU’LL NEED
• #140 hot-pressed (smooth) watercolor paper (or similar), cut or torn to any size
• watercolors (pan or tube, either is fine)
• white gesso (I use Golden brand, because it is a bit thicker than some of the other brands)
• one or two flat brushes (between 1/4″ – 3/4″)
• pencil (I use a cheap mechanical pencil)
• eraser (I prefer kneaded rubber erasers)
STEP-BY-STEP DIRECTIONS

Step 1. Randomly “splotch” 3-6 different colors of watercolors onto your paper. This can be done in one step, and it’s okay if the colors overlap and run a bit. (I usually use a half-inch flat watercolor brush.) Leave some whites spaces. Let dry completely.

Step 2. Once your watercolors are dry, get out your white gesso. Using a DRY brush (or one that you’ve squeezed most of the water out of), start painting gesso circles around areas of the watercolor, as shown above. Once you paint a circle, immediately turn the brush around and “draw into” the gesso with the brush handle. Draw lines for petals, circle-y scribbles, etc.

Here it is at the next stopping point. Notice I covered the in-between areas with white gesso, too. (Also, the white “stars” above are made by putting a dollup of gesso in the middle of a color patch, and then turning the brush around and drawing into it.) Let gesso layer dry completely.

Step 3. Next, add pencil to pull out your flower shapes even more. Keep your hand as loose as possible.

Step 4. I went back in with gesso and added a few more star shapes, as it seemed a little bare after step 3.

Step 5. Fill in the areas between the flowers with a light layer of pencil. Vary your directions a bit, and then smear with your finger to soften.


Step 6. This is hard to see here, but this step involves lightly going back in with an eraser here and there. (This is an optional step; I just felt I was a little too heavy-handed with my pencil in Step 5, so I wanted to soften it a bit.)

Step 7. Finally, I gave the entire piece a VERY LIGHT layer of sepia brown watercolor to unify the piece. (Again, an optional step for you!)
_____________________
These last few weeks I have been FLOWER CRAZY! As I got into trying to get this tutorial ready for you, things kind of exploded and I found I could approach the flowers in many different ways on many different surfaces, using all the layered painting techniques I’ve been sort of making up the last 15 years. (Gesso plus watercolor? Yes! And on wood? And collage, too? Yes and yes!)
For a longer, more in-depth online painting class, you might be interested in the FLOWER CRAZY online class!
——————————
For more tutorials and assignments, click HERE!
Oaxacan Dotted Elephant
Oaxacan Dotted Elephant

This elephant is inspired by beautiful Oaxacan wood animal carvings. Here’s how to do it:

STEP 1: Doodle some scribbly elephants in your sketchbook. Pick the one you like best, and scan into the computer. Enlarge to fit nicely on an 8″x10″ paper; print (I printed on 140# Fabriano hot press watrcolor paper).

STEP 2: With a black permanent marker, draw in curvy lines around the existing lines. Fill in.

STEP 3: Paint a transparent layer of watercolor, using several colors.

STEP 4: Using markers and colored pencils, color in your elephant with lines, dots and patterns until you are pleased.
 (detail)
STEP 5: Finish with a white paint pen. Add dots along the black lines, and any other place you feel needs a little white.

For more tutorials and assignments, click HERE!
The Walking Elephant
The Walking Elephant
For today’s assignment, please grab some paper and charcoal (or any writing utensil that you are comfortable using), and watch this video!
(Remember, “gesture drawings” are quick sketches emphasizing movement or action… take a deep breath, put pencil or charcoal to paper, and try to capture the shape of the elephant as best as you can. Work quickly.)
——————-
For more tutorials and assignments, click HERE!