_____________ Intro to Realism
Instructor: Karine Swenson
Two-Week Class • 6 Lessons
Now available as a self-study class.
In this class you will learn techniques to help you strengthen your drawing and painting skills.
The emphasis will be placed on finding ways to develop your own unique style while getting closer to visual truth. Just as each person has unique handwriting, your own way of drawing and painting will become your strength.
Each of you will pick your own 3D object — a toy, a tool, or something that interests you — and render it multiple times, building from quick sketches all the way to a color painting. We will work with color and value and pay close attention to light and shadow to create dimensionality.
I look forward to working with you!
Karine Swenson
Note: I will be working with oil paint, but you can work with acrylics or watercolor if you wish. For a list of supplies needed, click HERE. ___________
Class Itinerary:
Week 1 Lesson 1 We will spend some time choosing our subject matter that you will draw and paint throughout this class. Then you will light it, photograph it, and do a couple of quick drawings of it! You will also draw your hand in this lesson, an ever-available subject and a great way to sneak a little drawing practice in wherever you find yourself.
Lesson 2
This lesson will be devoted to drawing — both quick study, and slower, more careful study. The drawings are part of the process of learning to see more and to develop better hand/eye coordination. You will do several drawings of your hand and your chosen subject.
Lesson 3
In this lesson we will do more quick studies and then work on and finish a value study in charcoal of our subject to prepare us for our painting.
Lesson 4
Paint!!! Today we will work with a very limited palette, and use our value study from Lesson 3 to help us navigate our first painting of our subjects.
Lesson 5
We will begin the final painting of our subjects. You will be able to expand your color palette (a little!).
Lesson 6
The focus of our final lesson will be to explore the finishing touches, how to know when you are finished, and what you can do to make a painting you like.
Sign up today!
__________________________ Karine Swenson grew up just outside of a town called Rapid City, South Dakota in the Black Hills. The closest neighbor was a mile away. Reared in this environment, Swenson’s connection with the natural world was strong. After receiving her BA in painting from Augustana College in Sioux Falls, South Dakota, she moved to Colorado. She has spent most of her life in small towns that sit right next to the last remaining bits of wilderness. From the mountains of Colorado, the ocean surrounding Maui, Hawaii, the desert near Joshua Tree, California, and now the high desert outside of Santa Fe, New Mexico, Karine feels the most at home out in nature. In the studio, her second home, she can explore her relationship with the natural world. Her oil paintings are reflections of this relationship. Swenson has been a full-time artist for the past ten years.To watch a short video introducing Karine, click HERE.See more wonderful art at Karine’s website: www.karineswenson.com.
NUTS & BOLTS
Here’s how this online class works:
• During the two weeks of class, you will receive an email each Tuesday, Wednesday and Friday from Karine with a reminder to visit the class blog for that day’s lesson.
• A password-protected blog dedicated to each class will serve as our clubhouse and where you will find all the class materials as they are uploaded.
• A Facebook group will be created for you to (optionally) share your paintings, and enjoy and learn from the artwork of others. (However, if you are shy about posting your art, Karine is always available to look at your work via email.)
• The class materials will be up and available for download indefinitely, if for some reason you need to miss a day (or a couple of weeks). • Upon registration, you will receive an email within 48 hours confirming your sign-up. On the Friday before your session begins, you will receive an email with your class codes.
• Class fee is good for participants living in a single household.
QUESTIONS? [email protected] FAQs – If you’ve never taken an online class before and would like to know more about our online classes, click HERE.
Abstraction: Diving Deeper
Instructor: Karine Swenson Drawing, Painting, Mixed-Media • $85 Class Dates: March 22 – April 1, 2016
Have you ever asked yourself “how do I know when a painting is finished?” If you have ever struggled with this question, this is the class for you.
In this painting class, we will dive deeper into our abstract paintings in order to make discoveries and learn, but we will also be constantly asking the question “is this painting finished?”
The focus of the class will be to work through three stages of a painting – the start (so fun, such excitement!), the middle (“oh NO! I ruined it!”), to the finish (Wow! I did it!). I will offer suggestions to help you through each stage as we work towards a resolution. You will be encouraged to use your preferred kind of paint, whether it be acrylic, oil or watercolor. (I will be using oil, but will try to offer tips for other kinds of paint as well.) You will also be encouraged to find your own approach to each part of the process. I do not teach specific techniques as much as I wish to help you find your own techniques and style.
At the end of the class, depending on how quickly you work, you will have finished at least one, if not two, larger sized works. (if you prefer to work small, that’s fine too!) I do encourage you to try a larger painting, if you have been wanting to do it. I encourage risk taking, and I will help you find ways to “save” a painting if you think you’ve pushed it too far. We will be spending a lot of time painting in this class, so push up your sleeves and get ready to move around some paint!
_ _ _ _ _ _ _
Class Itinerary:
Lesson 1
In the first lesson, we will explore different approaches to beginning a new painting. Suggestions will be given on various ways to start – you will be given a lot of freedom to find what way works the best for you. If you already have a method you’ve been using, but want to try a new method, you will have the chance to do some experimenting. We will start a new painting and try to push it as far as we can in the first lesson.
Lesson 2
We will now re-visit our painting. Do you think it’s finished? Can you push it further? Have you reached an impasse? I will encourage you to risk the exciting things you may have found in your initial marks in order to dig deeper. Options will be offered if you are having trouble. We will begin to talk about how to look at our own work critically. We will try to push our painting even further. You can start a new painting if you need to, but I do encourage you to try to dive deeper to see what you can learn.
Lesson 3
FIELD TRIP!!!
I will send you out to a museum or high-end gallery to look at abstract paintings in person. The focus is to learn from other abstract painters. You will be given a list of questions to answer while on your field trip. For those of you who live in rural areas, or who have to schedule this trip, you will have the option to do this lesson at any point during the two week class. (Or, if you sign up early and have the time to go before class starts, you have that option too. I can email the questions to you ahead of time.)
Lesson 4
We will now re-visit our own painting(s) with the same list of questions we had while looking at other artists’ work. Can we be as objective about our own work? Was there something we saw that we want to try with our own work? Did you have an “aha” moment? The lesson is to push the painting deeper or begin another painting using an idea we got while out looking at art. The mission isn’t necessarily to copy another artist as much as to discover something new to try in our own work. Sometimes, this can lead to big discoveries!
Lesson 5
Now we will really try to finish our painting(s). Is it finished? How do we know? How does the painting make us feel? What do we think about when we look at our work? I will give you options of things to try to add just a bit more “wonderful” to your painting. We will also think about if there is just one or two small changes that might make all the difference. Sometimes, a major overhaul is needed, sometimes a simple flourish. I will be painting right along with you, so you can see some of the things I use. This is where we really work up the courage to be able to say “I am finished.” Or “I am almost finished.”
Lesson 6
This is the final lesson, where we will sit and look at the work and once again ask “is it finished?” If you have finished one, this will be where you try to finish another one. We will talk about how each painting leads us to the next painting, and how we develop the idea of painting as a lifelong practice. How we learn to say “I am finished with this painting” in order to be able to begin another one. We will also talk about what we do to a painting when it’s finished (signing, photographing, framing, wiring the back, etc.). What steps here are important to you so you can move on to your next painting?
_ _ _ _ _ _ _
SUPPLIES NEEDED FOR THIS CLASS: For the Supply List, click HERE.
_ _ _ _ _ _ _
Here’s the scoop for this class:
• On Tuesday, Wednesday, and Friday of each week you will receive an email with a reminder to visit the class blog for that day’s lesson.
• A password-protected blog dedicated to each class will serve as our clubhouse.
• A facebook group will be created for you to (optionally) share your paintings, and enjoy and learn from the artwork of others. (However, if you are shy about posting your art, Karine is always available to look at your work via email.)
• The class materials will be up and available for download until “forever,” if for some reason you need to miss a day (or a couple of weeks). • Upon registration, you will receive an email within 48 hours confirming your sign-up. On the Friday before your session begins, you will receive a “test” email to make sure you can receive/view everything.
• What you will need: You will be able to read acrobat pdf files and view videos.
• Class fee is good for participants living in a single household.
QUESTIONS? [email protected]
_ _ _ _ _ _ _
SIGN UP TODAY!
_ _ _ _ _ _ _ Karine Swenson grew up just outside of a town called Rapid City, South Dakota in the Black Hills. The closest neighbor was a mile away. Reared in this environment, Swenson’s connection with the natural world was strong. After receiving her BA in painting from Augustana College in Sioux Falls, South Dakota, she moved to Colorado. She has spent most of her life in small towns that sit right next to the last remaining bits of wilderness. From the mountains of Colorado, the ocean surrounding Maui, Hawaii and now the desert near Joshua Tree, California, she feels the most at home out in nature. In the studio, her second home, she can explore her relationship with the natural world. Her oil paintings are reflections of this relationship. Swenson has been a full time artist for the past ten years.
To watch a short video introducing Karine, click HERE.
See more wonderful art at Karine’s website: www.karineswenson.com.
* * *
_____________ Big Bold Bloom Wild Painting!
A 5-Week Course with Lynn Whipple
10 Lessons Now available as a self-study class.
(For a 2-payment plan option, click HERE!)
Paint Big! Paint Vibrantly! Paint Loose! Paint Blooms!
Are you ready to work large and loose with lots freedom and color?? I am thrilled to share with you a playful, layered approach to painting and drawing that embraces your wild side!
Using acrylic paint, charcoal and colorful chalk pastel, I will walk you through exercises, methods and techniques that will allow you to push your work towards abstraction. We will explore together a fresh, painterly interpretation of a traditional subject matter… FLOWERS!
What to look forward to in this class:
We will begin our Big Bold Bloom Wild Painting journey on 11″x14″ paper with an exercise called “Mark-Making to Music.” These timed, pastel floral drawings will encourage loose line work, energized shapes, bold marks, unexpected color combinations, fun and freedom!
Next we will take the energy of our pastel drawings and scale it up! Working on three 24″x30” canvases we will prepare each canvas with a different ground color, then add a very special charcoal technique, followed by a loose and greyed-down under painting. Now, more paint! More mark making! More color! Each layer leads to the next as we create our Big Bold Bloom Wild Paintings!
LETS GO BIG!!! Using the best of our previous work as a guide and as inspiration, we will work BIG and BOLD on one large 36″x48” canvas. Lots of painting and dancing with color, layering, drawing, designing, spinning the canvas, energized mark making, composition and more! I can’t wait!!!!
I hope you will join me!
All my very best,
xoxo
Lynn
What Big Bold Bloom Students are saying! “From the bottom of my heart, YOU, dear Lynn, are just the best art teacher I’ve ever had. You challenged my senses and encouraged me to play and have fun; something I’ve forgotten to do. Now surrounded by the many blooms in my paintings, I’m dancing, feeling the joy of being free, and waiting for the next adventure with you. Thank You!” — Tina “Life changer for me. Finally took the leap to set myself up and be painting again!! And painting large flowers…always my dream! Looking forward to how this evolves. Thank you for everything, Lynn and amazing, kind and hugely talented artists!!” — Cindy “Lynn, THANK YOU! This has been such a great workshop (I refer to you, the content and the other members of the class). Really, this ranks as one of the best workshops I’ve ever taken and I’m soooo grateful!” — Stacey “Hi Lynn, Finally I have finished my first BIG and BOLD. It really was a labor of love LOL and your wonderful lessons carried me to the end with big smiles on my face!! Love your teaching style and encouragement. I have never attempted anything this big before and now I can’t wait to start another. Thank you so much for helping me through my fear of the BIG blank canvas!!” — Sharon
__________________________ CLASS ITINERARY Week 1 Lesson 1 – Mark Making to Music
Working with pastel on paper 11″x14″ paper, you will turn your studio into a blaze of mark making and vibrant color! Using timed drawing exercises, you will translate flowers into simple, energized, abstracted shapes and planes, while exploring the different ways to describe and design vibrant blooms. Next you will create your first flower arrangement with your fresh and free floral drawings 🙂 Lesson 2 – Growing Flowers. Working larger, working layers
Moving to 24″x30″ canvas, we will begin by preparing each of our three canvases with a different ground color: One orange, one medium blue gray and one thickly painted with gesso.
Time to draw! We will do a 3-part “spin-drawing” on each canvas with charcoal, using flowers as our muse. A final criss-cross pattern on top will set us up for our next layer of paint. Very exciting! Week 2 Lesson 3 – Painting in neutrals. Finding design.
We will look for all of the abstracted shapes that came from our floral charcoal “spin-drawings” and fill our canvas’s with blocks of neutral tones to create a lovely under-painting. These warm and cool colors, our grey blues and grey greens will set us up to show off our next layer of vibrant color. You will fall in love with this layer! Lesson 4 – Painting Flowers from Life
Fill your studio with a big, fresh, new batch of blooms! Enjoy choosing the flowers that you like best! Go for a variety of colors, shapes, sizes with a nice mix of leafy greens (darks) mixed in. Create a large wild bouquet that makes you happy! (You might add a few sunflowers into your bouquet as they are super fun to draw and paint.) Up next: Look for the perfect place on your canvas to lay down your “hero” floral drawing on top of your under painting. Using a light source on one side will help you see the forms of the flowers. Draw your flowers in loose and free! Use both hands! Go back and forth from quiet, close looking to taking lots of liberties!
It’s time! Let’s paint! Using acrylics, large brushes, a variety of brushstrokes, we will describe the pot of blooms one flower at a time with our more vibrant colors. Drips! Dancing! Spatters! We will build a composition, look for design and take time to add in our darks. This will take a few passes. Move forward with lots of freedom to try things. Layer, layer, layer and add color, color, color! Week 3 Lesson 5 – Cut in the background. Push and pull
Now that we have our larger blooms in place and we will look again and begin to cut in around the flowers, bringing out the petal shapes, leaf shapes and more. This is a great exercise in “push and pull” which helps our painting have a forward “main event” and an understated background. We will work on the back layer (which helps describe the foreground) as well as the table top plane and the vase shape. This is an important part of the overall design and composition of our painting. Think proportion, large interesting shapes and ways to keep your eye moving around the entire painting. Lesson 6 – Energizing with Pastels!
OH so MUCH FUN!! Now our big pot of blooms is painted! Everything is falling into place. Bravo!! It’s time to draw on top! Using Mark Making to Music, as we did in our first lesson, let’s plow energy into our work. Use your fresh line work inside and outside of your painted shapes. Play with vibrating color on top of color. Use your brights to describe your highlights. Let your personality jump on to the canvas! Play! Week 4 Lesson 7 – Final Tweaks and Touches
We will back up and look over the entire painting now, squint, change small things, tweak the drawing on top, do another layer of paint on the background and smudge the edges of the drawing to give your flowers a halo effect. It’s time to add the extra highlights with cream paint that will really make your piece pop. Finally, you will sign your name in the perfect spot. A dusting of spray fixative over the entire painting will seal the pastel so it won’t smear. I suggest doing this outside if you can, as not to breathe the fumes. Your pastel color will shift a bit, but still look great!! This is very exciting stuff! As in each step, I can’t wait to see what you have created!! Lesson 8 – Painting Big and Bold pt. 1
Now that we have done the entire process in a medium sized format, LETS GO BIG!!
We will be working on one large canvas 36″x48″! (Go smaller if you prefer.)
We begin by preparing the first layer of ground color. Choose your most successful of the smaller works as your guide. If you love the orange peeking through, start with orange, if you love the grey and the way it pops your top colors you will prepare your canvas with a grey background. Once that is dry, you will do your 3-part spin-drawing!! Add the extra 5-6 criss cross lines to help form your abstracted sections. Week 5 Lesson 9 – Painting Big and Bold pt. 2
Let’s lay in the color for our underpainting using the most successful of the earlier paintings. This is to create an interesting layer that will help our final painting and create interest that we would not get otherwise. These under paintings are usually very fun to paint and very free! There is no wrong way!!
Next lets spin the canvas as we look for the perfect place to draw in our final giant pot of blooms. Squint your eyes! Try not to center your pot of flowers, but sketch it in a little to the left or right. Take your time and enjoy looking deeply at the shapes.
Now paint your flowers with the first pass of vibrant color. Play with drips, and darks! Let that dry and add another pass of color when you are ready! Dance! Have fun! Lesson 10 – Painting Big and Bold pt. 3
As our layers are building, we will consider the best way to handle the background and the table top plane. Using our eye for the push and pull, this is a very exciting time to finalize your larger design. You may choose to leave more of your underpainting showing or to cover it up with a slightly more solid color, either light or dark. Once your background and floral layer are working, let’s add your colorful, loose pastel drawing and mark making! Tweak your final design by adding painted cream highlights, smudging your edges and finding a great spot for your signature. Behold!! Your Big Bold Beautiful Blooms!! Free, fresh and very YOU!!
Kudos to you for your bravery and willingness!
With loads of love, Lynn
P.S. Click HERE for the SUPPLY LIST for this class.
__________________________
Lynn Whipple writes, “I am deeply grateful to live my life as an artist. Play and discovery are my dearest and most constant companions. There are a zillion tiny challenges in each art making experience, and so often I find, just as many small, sweet victories. Without a doubt, living creatively is the most enjoyable and satisfying game I know.”
Lynn shares a warehouse studio with her husband, John Whipple, in Winter Park, Florida. Lynn’s work includes found-object mixed-media assemblages; found images altered with a combination of drawing, painting, sewing and more; and her well-known Ninny Boxes, collages combined with found objects, and assembled within a box format. Her unique pieces have a playful, quirky, and often absurd, charm.
Lynn explains: “I allow myself to play and let my pieces reveal themselves to me…I have been fascinated by old books, history, and odd bits of memorabilia. I find the things that interest me the most are slightly absurd…My hope is to create something real and somehow poetic but not commonplace. My goal is to keep communicating in my language.”
Lynn’s work has been exhibited extensively throughout the United States. Visit Lynn’s website at www.lynnwhipple.com and her etsy shop at www.etsy.com/shop/lynnwhipple
NUTS & BOLTS
Here’s how this online class works:
• During the five weeks of class, you will receive an email each Tu-Th from Lynn with a reminder to visit the class blog for that day’s lesson.
• A password-protected blog dedicated to each class will serve as our clubhouse and where you will find all the class materials as they are uploaded.
• A facebook group will be created for you to (optionally) share your paintings, and enjoy and learn from the artwork of others. (However, if you are shy about posting your art, Lynn is always available to look at your work via email.)
• The class materials will be up and available for download indefinitely, if for some reason you need to miss a day (or a couple of weeks). • Upon registration, you will receive an email within 48 hours confirming your sign-up. On the Friday before your session begins, you will receive your class codes and a “test” video to make sure you can receive/view everything (if you can view the above video, you should be able to view the class videos).
• Class fee is good for participants living in a single household.
QUESTIONS? [email protected] FAQs – If you’ve never taken an online class before and would like to know more about our online classes, click HERE.
Big Bold Bloom Wild Painting!
A 5-Week Course with Lynn Whipple
10 Lessons
Class Dates: February 23 – March 24, 2016
___________________________
Lynn Whipple writes, “I am deeply grateful to live my life as an artist. Play and discovery are my dearest and most constant companions. There are a zillion tiny challenges in each art making experience, and so often I find, just as many small, sweet victories. Without a doubt, living creatively is the most enjoyable and satisfying game I know.”
Lynn shares a warehouse studio with her husband, John Whipple, in Winter Park, Florida. Lynn’s work includes found-object mixed-media assemblages; found images altered with a combination of drawing, painting, sewing and more; and her well-known Ninny Boxes, collages combined with found objects, and assembled within a box format. Her unique pieces have a playful, quirky, and often absurd, charm.
Lynn explains: “I allow myself to play and let my pieces reveal themselves to me…I have been fascinated by old books, history, and odd bits of memorabilia. I find the things that interest me the most are slightly absurd…My hope is to create something real and somehow poetic but not commonplace. My goal is to keep communicating in my language.”
Lynn’s work has been exhibited extensively throughout the United States. Visit Lynn’s website at www.lynnwhipple.com and her etsy shop at www.etsy.com/shop/lynnwhipple
NUTS & BOLTS
Here’s how this online class works:
• During the five weeks of class, you will receive an email each Tu-Th from Lynn with a reminder to visit the class blog for that day’s lesson.
• A password-protected blog dedicated to each class will serve as our clubhouse and where you will find all the class materials as they are uploaded.
• A facebook group will be created for you to (optionally) share your paintings, and enjoy and learn from the artwork of others. (However, if you are shy about posting your art, Lynn is always available to look at your work via email.)
• The class materials will be up and available for download indefinitely, if for some reason you need to miss a day (or a couple of weeks). • Upon registration, you will receive an email within 48 hours confirming your sign-up. On the Friday before your session begins, you will receive your class codes and a “test” video to make sure you can receive/view everything (if you can view the above video, you should be able to view the class videos).
• Class fee is good for participants living in a single household.
QUESTIONS? [email protected] FAQs – If you’ve never taken an online class before and would like to know more about our e-workshops, click HERE.
For the Love of a Tree
Instructor: Diane Culhane Drawing, Painting, Mixed-Media • $85 Now available as a self-study class.
_________________________________________ “For the Love of a Tree” is dedicated to celebrating the glory of a tree; the beauty and the magnificence of the blessings they bestow — from oxygen, shelter, shade, nutritious food, and a home to many creatures.
Trees are a source of design and composition for the artist: leaves, seeds, branches, to fruits, nuts, etc. . . . Trees give us a bountiful visual vocabulary from which to create paintings. It’s a set up for success.
We will begin by exploring — Seeing- Looking – Feeling – and just being in the presence of trees.
From there we will begin addressing forms with line, color and value, with value being the most important component; pushing and pulling color. Exercises are guides to develop skill for the next steps in creating a 18”x18” or 20”x 20” completed painting. We will also have conversations about problem solving and how to face the struggles we all encounter as artists.
As a tree reach and stretches for the sunlight, reach into your open blue sky of creativity . . .
Learn, Grow, Explore
Nurture your Art & Your Life.
Sign up today !
Much Love to you all,
Diane Culhane Class Itinerary: Lesson 1
Looking and synthesizing forms through drawing and creating inventive shapes. Lesson 2
Begin work on our large painting. Cover large cradle board, layering with color and line. Lesson 3
Use collage to explore a variety of forms, concentrating on size and value contrast, then translating these discoveries into small practice paintings on paper. Lesson 4
Work with value: practice pushing and pulling space using warm and cool colors and compliments by painting on small cradle boards and then taking these concepts to our larger painting. Lesson 5
Focus on our larger painting: add layers of paint, building volume, troubleshooting. Lesson 6
Add details; from blurry into focus.
_ _ _ _ _ _ _
SUPPLIES NEEDED FOR THIS CLASS: For the Supply List, click HERE.
_ _ _ _ _ _ _
Here’s the scoop for this class:
• On Tuesday, Thursday, and Friday of each week you will receive an email from Diane with a reminder to visit the class blog for that day’s lesson.
• A password-protected blog dedicated to each class will serve as our clubhouse.
• A facebook group will be created for you to (optionally) share your paintings, and enjoy and learn from the artwork of others. (However, if you are shy about posting your art, Diane is always available to look at your work via email.)
• The class materials will be up and available for download until “forever,” if for some reason you need to miss a day (or a couple of weeks). • Upon registration, you will receive an email within 48 hours confirming your sign-up. On the Wednesday before your session begins, you will receive a “test” email to make sure you can receive/view everything.
• What you will need: You will be able to read acrobat pdf files and view videos.
• Class fee is good for participants living in a single household.
QUESTIONS? [email protected]
_ _ _ _ _ _ _
SIGN UP TODAY!
_ _ _ _ _ _ _ Diane Culhane is a professional artist and art educator who lives West Seattle in a 1910 home, and works out of her studio in Ballard Building C. She received her BFA from the University of Utah and Master’s Degree from Seattle University.
Diane has taught for The Bellevue School District, Seattle Pacific University, Kirkland Arts Center, Bellevue Arts Museum and currently directs and owns Kelsey Creek Fine Art School for children in the summer.
Visit her website at: www.dianeculhaneart.com
– – – – – – – – – – – – – – – – – – – – – – – – – – – – – – – – – – – “Holiday Gift Paintings” with Fred Lisaius
A 3-Lesson, “Bite-Sized” Class Now available as a self-study class.
The holidays are approaching and there’s no better way to brighten someone’s season then with the gift of original art.
In this class Fred will walk you through three small acrylic paintings. Fred is known for his stunning acrylic paintings. Luckily for us, he’s a very generous artist and is happy to share his acrylic techniques with us! Class Itinerary Lesson 1 Supplies Overview & Paint the Backgrounds
Tuesday, December 8th Lesson 2: Masking Techniques
Wednesday, December 9th Lesson 3: Finishing the Paintings
Friday, December 11th
6-Class Pass
Purchase our 6-class pass, where you will get 6 classes for the price of 5. You can pick and choose which classes to take! (Lunch hour classes will run monthly starting in September 2015.) Pass valid through December 31, 2016. If you have already purchased a class pass and would like to take “Holiday Gift Paintings,” email me at carla[at]carlasonheim.com and let me know! I will put you on the list.
Fred Lisaius is a painter, sculptor, and a popular art teacher at Bellevue College, WA (“Fred is perfect!”). Fred is represented by the Patricia Rovzar Gallery in Seattle, and his work is in many private and corporate collections. Fred recently had a show at the Bainbridge Island Art Museum. From his statement: The deeper I go into the forest the closer I feel to the truth. Off of the trail, there is a quiet calm where ideas can be contemplated and refined. In my paintings and my sculptures, I utilize the forum of nature to explore our relationship to the natural world and to each other.
– Three 5 x 7 inch (or about this size) gessoed wood panels.
– Paint: Student or better grade (Titanium White, Mars Black, Cobalt Blue, Cadmium Yellow, Cadmium Red, Sap Green, Alizarin Crimson, Yellow Ochre)
– # 6 round acrylic brush
– “sponge” paint tool for varnish
– Paper towels
– A paper palette pad or paper plates work well .
– Acrylic varnish: Gloss or Satin recommended
_______________________
Lunch Hour Art!
This class is part of our “Lunch Hour Art!” series of “bite-sized” classes. (You don’t need to do them during an actual lunch hour, though!) For more info, click below:
– – – – – – – – – – – – – – – – – – – – – – – – – – – – – – – – – “Birds on Birds: Acrylic Painting” with Alison O’Donoghue
Two-Week Class; 6 Video Lessons Now available as a self-study class.
Join painter Alison O’Donoghue for a super fun class in acrylic painting, “Birds on Birds.” Alison shares her unique techniques for creating a stacked, interactive, and harmonious world within the bounds of an 11″x14″ wood panel. She will guide you expertly through six lessons — starting with preparing the panel with layers of gesso and finishing with varnish; and in-between, magic!
Alison likes the stacking up method of composing because it allows for a lot of images within the painting without any concerns for traditional perspective (a common folk art approach around the world). Through Alison’s process of layered washes and highlights, your painting will glow with light and color.
Plus… BIRDS!
A detail:
And more of Alison’s “bird” work using these techniques (click to enlarge):
Class Itinerary Lesson 1 – Supplies & Preparing Your Board
We’ll go over the supplies needed for this project and prep your board for painting. Lesson 2 – Drawing It Out
Here is a place to begin letting the ideas flow. Your birds don’t have to be realistically drawn and you can let go of the idea of right and wrong; instead do it your way. You do have a way. Lesson 3 – Painting the Simple Shapes
Create a palette of color choices ahead of time and have fun with color! It’s good to be aware of the negative spaces — or spaces between — the objects and imagery, because they are as important as the birds in creating a balanced and vibrant composition. Lesson 4 – Painting the Negative Shapes In this lesson you will create lines around your birds by NOT painting the lines, and paint in the negative shapes of the background. Lesson 5 – Transparent Color Washes
This part is really fun, and here is where the dimension, volume, sense of light and shadow and nuance are begun. We are staining the shapes we have painted with the washes. (It may feel as though you’re ruining the painting, but you aren’t!) Lesson 6 – Highlights and Details
In this step, my favorite step, we are adding a final layer to bring out the form, as well as adding pattern to some of the shapes. Add spots, stripes, patterns or follow the form of the object to highlight the form. All of this will create depth, a push and pull and sense of shifting light that is exciting and interesting to the eye. We’ll finish with a nice coat of varnish to give your painting more luminosity.
– – – – – – – – – – – – – – – – – – – – – – – – – – – – – – – – – – –
The artwork of Alison O’Donoghue can be described as contemporary folk art.
Partly naïve, sometimes illustrative, at times cartoony, with some of her pieces being heavily patterned. Her paintings are mostly playful with creatures and people that are quite often glowing with life… awash in dimensional color and shade in a mostly two dimensional world. In many of her paintings, she combines everyday objects such as; cups of coffee, fruit, plants, humans, birds and odd, made up animals, into a fluid motion of interaction of intertwined shapes. The playful next to the sinister, give the paintings a sense of humor and the complexity of an unfolding story.
In her larger work, Alison seems to have no intention of leaving a space unfilled or unpopulated as the figures become more of an overall pattern. It gives the viewer the feeling of looking at vines overtaking the world inside the painting in a kind of beautiful invasive force of nature.
Alison O’Donoghue’s contemporary folk art and patterned worlds invite us to explore visually the simple beauty, complexity, interactions and sometimes the humorously sinister aspects of everyday life.
Alison lives in Portland, Oregon. http://www.aliorange.com/alison.html
________________________________
SUPPLIES LIST:
– 11″x14″ smooth wood panel, gessoed and sanded then painted with two good solid coats of black acrylic.
– White watercolor pencil. Make absolutely sure it’s water soluble- as we will be washing away the lines with water after painting.
– Acrylic Paints: Back, white, and a your choice of variety of opaque colors.
– An assortment of transparent acrylic paint- red, brown, yellow, burnt orange, sap green are good choices
– Brushes: A variety of sizes, I prefer sable brushes for their ability to paint larger areas and also hold a point for detail.
– Varnish: Gloss polymer
– Optional: Hair Dryer to speed drying process
___________________________________
HOW IT WORKS—
• For the two weeks of class, you’ll receive an email on Tuesday, Wednesday and Friday with a reminder to visit the class blog for that day’s lesson and video.
• In the email, you’ll also get the information about how to log into the password-protected blog where the class material lives and the closed Facebook group link.
• The class materials will be up and available for download until “forever,” if for some reason you need to miss a day (or a couple of weeks).
• Upon registration, you will receive an email within 48 hours confirming your sign-up. On the Friday before your session begins, you will receive a “test” email to make sure you can receive/view everything.
• What you will need: You will need to be able to read Acrobat pdf files and view videos.
• Class fee is good for participants living in a single household.
QUESTIONS? [email protected]
– – – – – – – – – – – – – – – – – – – – – – – – – – – – – – – – – – “Making Art a Practice” with Cat Bennett
Six-Week Class; 6 Video Lessons Now available as a self-study class.
How can the sketchbook be a place of discovery and growth in our art practice?
In Cat Bennett’s 6-week course, “Sketchbooks: Making Art a Practice,” we’ll use the sketchbook to explore how to make our art practice a vital one. We’ll draw and paint in experimental ways, find inspirational images to include in our sketchbooks, look at where we’ve been and where we might go, and consider how to grow our ideas for our art. We’ll also grow our drawing skills and discover our own best strengths so we can build on them.
Each lesson includes a video with demonstrations of various drawing and painting techniques, regular assignments, and a Facebook group to share sketchbook explorations. Cat will also offer daily inspiration (Monday to Friday) with general comments on the work and some further exercises for the super motivated! COURSE OUTLINE Week 1:Making Marks—Drawing in an abstract way to grow our creativity. Week 2:Drawing Nature—Exploring different ways to draw what we see.
Week 3:Drawing Our Daily Life—Finding what speaks to us. Week 4:Portraits—Drawing people and finding our own style. Week 5:Bringing in Imagination—Playing with images and growing our vision. Week 6:Growing Our Ideas—Tracing our art history and seeing where we might go.
Each week, Cat also addresses issues we all face as artists—
1. What can we do when we feel blocked?
2. How can we overcome the inner critic or feelings of inadequacy?
3. How can we find the time to make art in the midst of busy lives?
4. How do we find our own style in our art?
5. What are great reasons for making art?
6. How do we keep our art practice vital?
Participants can also share positive suggestions of their own each week regarding these questions and on the Facebook page.
– – – – – – – – – – – – – – – – – – – – – – – – – – – – – – – – – – –
Join this class today, and spend 6 weeks together with Cat Bennett!
NOTE: Cat is offering to send a copy of her book, “Making Art a Practice” to the first 10 people who sign up! We’ve got the first 10… thank you!!
Cat Bennett is artist and author. In her Saturday Morning Drawing Club, she teaches drawing as a way to meet the true creative self. Her book, The Confident Creative: Drawing to Free the Hand and Mind,published by Findhorn Press 2010, was a gold medal winner in the 2011 Nautilus Book Awards. Her bookMaking Art a Practice: How To Be the Artist You Are, and her newest book, The Drawing Club of Improbable Dreams: How to Create a Club for Art, are also published by Findhorn Press.
Cat worked as an illustrator/designer for about thirty years. Her illustrations have appeared in The Boston Globe, The New York Times, The Atlantic Monthly, The Wall Street Journal, The Baltimore Sun and Time Magazine, Houghton Mifflin, Scholastic, Harcourt Brace and many other publications. She has also made short animations for CBC-Sesame Street, Nickelodeon TV, WHDH-TV, WGBH-TV and various non-profits. She has exhibited her art in group shows in Boston, New York, and Tokyo.
Her essays have appeared in The Huffington Post, The Los Angeles Times, LA Yoga Magazine, Yoga Magazine UK, Integral Yoga Magazine, Red, The American, Lightworker, High Spirit Magazine and others. www.catbennett.net Check out Cat’s wonderful books (#3 is forthcoming October 13, 2015).
________________________________
SUPPLY LIST FOR THIS CLASS:
• 9”x12” (or larger) mixed media sketchbook (Canson; Strathmore, etc)
• 3”x5” pocket sketchbook (Moleskine or similar for pencils and markers)
• 6”x9” (or larger) smooth paper for pencils and markers (Fabriano, Moleskine etc)
• ebony or 4B+ drawing pencils
• gum eraser
• steel pencil sharpener
• fine tipped drawing marker (Sharpie, Micron etc)
• scissors
• glue stick
• Set of colored pencils (Dick Blick, Prismacolor, Derwent etc)
• #3, #6, #12 student grade watercolor brushes (Princeton)
• Set of opaque cake watercolors (Pelikan) Note: Whatever brands you prefer are just fine!
___________________________________
HOW IT WORKS—
• Starting October 6th, you’ll receive an email every Tuesday with a reminder to visit the class blog for that day’s lesson and video. There are 2-3 exercises each week which you can move through at your own pace. (Cat recommends daily interaction with your sketchbook.)
• In the email, you’ll also get the information about how to log into the password-protected blog where the class material lives and the closed Facebook group link.
• The class materials will be up and available for download until “forever,” if for some reason you need to miss a day (or a couple of weeks).
• Upon registration, you will receive an email within 48 hours confirming your sign-up. On the Friday before your session begins, you will receive a “test” email to make sure you can receive/view everything.
• What you will need: You will need to be able to read Acrobat pdf files and view videos.
• Class fee is good for participants living in a single household.
QUESTIONS? carla[at]carlasonheim.com
– – – – – – – – – – – – – – – – – – – – – – – – – – – – – – – – – – – Acrylics: Painting Flowers with Fred Lisaius
Two-Week Class; 6 Video Lessons Now available as a self-study class
Create a beautiful floral diptych with Fred Lisaius!
Seattle artist Fred Lisaius is known for his stunning, unique floral paintings. Luckily for us, he’s a very generous artist and is happy to share his acrylic techniques with us!
Fred writes: Acrylics paints are beautiful. The medium is creamy, colorful, and very versatile. This class is designed to introduce beginners to this beautiful medium and to excite more advanced students with new information and techniques. I look forward to painting with you! Class Itinerary Lesson 1: Overview of Supplies; Design your Diptych Lesson 2: Squeegee & Brayered Underpainting Lesson 3: Masking Techniques Lesson 4: Paint the Flowers Lesson 5: Finishing the Flowers Lesson 6: Preparing the paintings for display
– – – – – – – – – – – – – – – – – – – – – – – – – – – – – – – – – – –
Supplies Needed: https://www.carlasonheim.com/acrylics-painting-flowers-supply-list/
– – – – – – – – – – – – – – – – – – – – – – – – – – – – – – – – – – – NUTS & BOLTS
Here’s how this online class works:
• A password-protected blog serves as our clubhouse; there you will find all of the lesson videos and class materials. This class is now a self-study class, so all of the lessons are available to you when you sign up and you can move through the material at your own pace. (Since it was originally in a blog format, you will find the lessons in reverse chronological order… just scroll down for the earlier lessons.)
• A Facebook group has been created for you to (optionally) share your paintings, and enjoy and learn from the artwork of others. (However, if you are shy about posting your art, Fred is always available to look at your work via email.)
• You have indefinite access to the class materials. • Upon registration, you will receive an email within 48 hours with the links to the class blog and Facebook group.
• Class fee is good for participants living in a single household.
QUESTIONS? carla[at]carlasonheim.com FAQs – If you’ve never taken an online class before and would like to know more about our classes, click HERE.
Fred Lisaius is a painter, sculptor, and a popular art teacher at Bellevue College, WA (“Fred is perfect!”). Fred is represented by the Patricia Rovzar Gallery in Seattle, and his work is in many private and corporate collections. Fred recently had a show at the Bainbridge Island Art Museum. From his statement: The deeper I go into the forest the closer I feel to the truth. Off of the trail, there is a quiet calm where ideas can be contemplated and refined. In my paintings and my sculptures, I utilize the forum of nature to explore our relationship to the natural world and to each other.
Creating a Modular Encaustic Painting
6 Lessons Total
Encaustic Painting Now available as a self-study class.
Push your encaustics to the next level!
In this class we will build a large, composite painting from individual smaller panels. With each panel, we will add a new technique including draw-through prints, graphite, oil paint, reticulated shellac, carving, and paper.
Throughout the process you will be encouraged to work on each panel as a complete piece in itself, and then look for ways to bring them together to create an interesting, rich, varied whole.
If you are familiar with encaustics, you can jump right in to this class! If you are new to encaustics, consider taking Stephanie’s “Intro to Encaustic Painting” as a self-study first. Class Itinerary Week 1: Tuesday: Lesson 1 – Review and Layering Color Wednesday:Lesson 2 – Draw-Through Prints Friday:Lesson 3 – Graphite Week 2: Tuesday: Lesson 4 – Creating Line with Oil Paint Wednesday: Lesson 5 – Reticulated Shellac Friday: Lesson 6 – Assemblage and Presentation Note: Materials used in this class may contain ingredients that are harmful to your health. We want you to be safe so follow manufacturer’s instructions carefully and work in well-ventilated areas. NUTS & BOLTS
Here’s how this online class works:
• A password-protected blog serves as our clubhouse; there you will find all of the lesson videos and class materials. This class is now a self-study class, so all of the lessons are available to you when you sign up and you can move through the material at your own pace. (Since it was originally in a blog format, you will find the lessons in reverse chronological order… just scroll down for the earlier lessons.)
• A Facebook group has been created for you to (optionally) share your paintings, and enjoy and learn from the artwork of others. (However, if you are shy about posting your art, Stephanie is always available to look at your work via email.)
• You have indefinite access to the class materials.
• Upon registration, you will receive an email within 48 hours with the links to the class blog and Facebook group.
• Class fee is good for participants living in a single household.
QUESTIONS? carla[at]carlasonheim.com FAQs – If you’ve never taken an online class before and would like to know more about our classes, click HERE.
_____________________________________________
Sign up today!
Or sign up for both “Intro to Encaustic Painting” and “Creating a Modular Encaustic Painting” and save $15:
_____________________________________________
Order Wax and wood boards directly from Stephanie:
“StephiWax” will ship via USPS Priority Mail within two days after purchase. Priority Mail shipping included in price (US orders only — so sorry!).
Also! Stephanie has gathered together the Cradled Birch Panels (one each: 4×4, 5×5, 5×7, 8×8 and 8×10) you will need for this project. Order by June 16, 2015 to receive by first day of class. Priority Mail shipping included in price (US orders only — so sorry!).
_____________________________________________ I’ve been both painting and working in clay since college, where I studied color theory, ceramics, sculpture, drawing and painting. I started a line of functional ceramics as a small business in 1997 after studying with Carol Gouthro, and have worked with metal, oil paint, and acrylics over the years, but my medium of choice is bee’s wax. I learned a great deal studying with Jef Gunn and Larry Caulkins at Pratt Fine Arts Center, and have been focusing for the past 9 years exclusively on encaustics. It is the one medium that affords all the other materials I’ve worked in to overlap and inform one another.
I find bee’s wax to be inherently lovely, and work with it always mindful of how its natural beauty and transparency can coexist with my ideas and imagery.
See more wonderful art at Stephanie’s website: www.stephaniehargrave.com _____________________________________________ MATERIALS & EQUIPMENT
Click HERE for supply list for this class.
Cats! Three-Lesson Class with Carla Sonheim Drawing, Watercolor, Mixed Media • $25
Now available as a self-study class.
A 3-Lesson, “bite-sized” Lunch Hour Art class!!
* * *
Cat lovers unite!
In this drawing and painting class you will become the cat lady (or gentleman!) you never-wanted-but-secretly-DO-want to be, with cats, cats, and more cats in your home and sketchbooks.
We will create a menagerie of imaginary cats with watercolors, markers, acrylics, and fabric! Each lesson includes a short drawing assignment and a main mixed-media lesson. Watching cat videos optional.
Join me!
(Of course dog lovers are welcome to join, too! I’m working on a “dog” class for Fall 2015.)
Your itinerary:
Lesson 1: Watercolor & Imagination layered watercolor cat “blob” paintings & a gaggle of kitties from imagination
Tuesday, June 16th
Lesson 2: Markers & Life loose, expressive cats and drawing from photos and life
Wednesday, June 17th
Lesson 3: Acrylics & Fabric the quickest acrylic paintings you’ll ever make, and a “bonus” cat pillow lesson
Friday, June 19th
* * *
Join this fun class today! Now available as a self-study class.
Questions?
I’m happy to answer any questions! Please email me at carla[at]carlasonheim.com and I’ll get right back to you!
Supplies?
For this class you will need watercolors, water soluble markers, watercolor paper, white or cream acrylic paint, white paint pen, watercolor paper and a #12 round brush. Pillow supplies: printer, Fabric Inkjet Sheets, sewing machine, fabric scraps.
Elements: Building Blocks of Painting
with Karine Swenson
5-Week Class; 10 Lessons Total Now available as a self-study class.
Have you ever wanted to take a course learn the basics of painting?
Are you curious, but don’t have a Studio Art background?
Do you need a refresher on how artists approach painting?
What are the elements that make a painting come to life?
Karine Swenson’s 5-week course gives you a unique opportunity to build upon the fundamental building blocks of painting. In this accessible and welcoming course, Karine will walk you through the basics of:
A professional artist for over 10 years, Karine has lots of experience using color and abstract expression to evoke light, movement and emotion. If you take the time to learn how to use these tools, and put them in your own tool belt, you’ll look at painting differently by the end of 5 weeks.
And if you’re interested in trying oils for the first time, this class is a fun way to begin! (And although Karine will be using her oil paint, you can absolutely use acrylics.)
Most importantly, you will get personal feedback: You can share your work in the class Facebook group, or if you’re feeling shy, you can email it to Karine directly.
The weeks will go roughly like this:
Week 1: The Line (and all its variations!)
Week 2: The differences between Shape and Form
Week 3: Exploring Depth, Color and Value
Week 4: Value and Composition
Week 5: Composition
Lessons will be geared towards abstract painting; however, the topics will be beneficial to any artist – even those pursuing more representational subject matter. (This class is meant to be a continuation of Karine’s first abstract painting class, although you do not need to have taken Intro to Abstract Painting to benefit from this class.) ************************
Click for supply list: Elements Supply List ************************ NUTS & BOLTS
Here’s how this online class works:
• A password-protected blog serves as our clubhouse; there you will find all of the lesson videos and class materials. This class is now a self-study class, so all of the lessons are available to you when you sign up and you can move through the material at your own pace. (Since it was originally in a blog format, you will find the lessons in reverse chronological order… just scroll down for the earlier lessons.)
• A Facebook group has been created for you to (optionally) share your paintings, and enjoy and learn from the artwork of others. (However, if you are shy about posting your art, Karine is always available to look at your work via email.)
• You have indefinite access to the class materials.
• Upon registration, you will receive an email within 48 hours with the links to the class blog and Facebook group.
• Class fee is good for participants living in a single household.
QUESTIONS? carla[at]carlasonheim.com FAQs – If you’ve never taken an online class before and would like to know more about our classes, click HERE.
___________________________
SIGN UP TODAY!
Or take both of Karine’s classes for 10% off! “Intro to Abstract Painting” is a self-study class and you will get the links immediately.
************************ Karine Swenson grew up just outside of a town called Rapid City, South Dakota in the Black Hills. The closest neighbor was a mile away. Reared in this environment, Swenson’s connection with the natural world was strong. After receiving her BA in painting from Augustana College in Sioux Falls, South Dakota, she moved to Colorado. She has spent most of her life in small towns that sit right next to the last remaining bits of wilderness. From the mountains of Colorado, the ocean surrounding Maui, Hawaii and now the desert near Joshua Tree, California, she feels the most at home out in nature. In the studio, her second home, she can explore her relationship with the natural world. Her oil paintings are reflections of this relationship. Swenson has been a full time artist for the past ten years.
To watch a short video introducing Karine, click HERE.
See more wonderful art at Karine’s website: www.karineswenson.com.
This class is about exploring your Do-o-dling!
Doodle your way into a big painting!
Doodling is really just mark making… marks that happen when you are otherwise occupied.
These marks that flow from you naturally while you are doodling can be an expression of your style, like your handwriting. In this class we will look at our doodles as resources; treasures from which we can create full-sized paintings.
Even if you don’t consider yourself a doodler, the exercises and techniques in this class will give you a fun way to tap into your personal style. We will:
– Dig for treasure/doodle
– Observe & Arrange & Study
– Make folded books for doodle-ready surfaces
– Copy your images with hand/eye coordination
– Scan & enlarge your doodles
– Add color combinations with colored pencil & acrylic paint
– Create compositional grid paintings, and
– Create a Large Do-o-dle Painting!!
I hope you will join me!
Buckets of Joy,
Diane Culhane * * * * * * * * * * *
SUPPLIES NEEDED FOR THIS CLASS: For the Supply List, click HERE. * * * * * * * * * * * NUTS & BOLTS
Here’s how this online class works:
• A password-protected blog serves as our clubhouse; there you will find all of the lesson videos and class materials. This class is now a self-study class, so all of the lessons are available to you when you sign up and you can move through the material at your own pace. (Since it was originally in a blog format, you will find the lessons in reverse chronological order… just scroll down for the earlier lessons.)
• A Facebook group has been created for you to (optionally) share your paintings, and enjoy and learn from the artwork of others. (However, if you are shy about posting your art, Diane is always available to look at your work via email.)
• You have indefinite access to the class materials.
• Upon registration, you will receive an email within 48 hours with the links to the class blog and Facebook group.
• Class fee is good for participants living in a single household.
QUESTIONS? carla[at]carlasonheim.com FAQs – If you’ve never taken an online class before and would like to know more about our classes, click HERE. * * * * * * * * * * * SIGN UP TODAY!
* * * * * * * * * * *
Diane Culhane is a professional artist and art educator who lives West Seattle in a 1910 home, and works out of her studio in Ballard Building C. She received her BFA from the University of Utah and Master’s Degree from Seattle University.
Diane has taught for The Bellevue School District, Seattle Pacific University, Kirkland Arts Center, Bellevue Arts Museum and currently directs and owns Kelsey Creek Fine Art School for children in the summer.
Visit her website at: www.dianeculhaneart.com
Flower Crazy Mini
Instructor: Carla Sonheim
3 Lessons
Now available as a self-study class.
Hi! It might be cold and rainy in my neck of the woods, but NOT here inside my studio! Here we have imaginary flowers!
Take the cold weather into your own hands with gesso, watercolor, and a healthy dose of flower fun… join me for this “mini” session (re-edited) of my longer painting class “Flower Crazy.”
In this three-lesson mini class we will create a greenhouse of imaginary flowers while working with watercolors, markers, colored pencils, white ink, white gesso and pencil on watercolor paper.
Blobimal Artist Books
Instructor: Carla Sonheim
5-Lesson Repeat Class (with bonus 6th lesson) • $35 Drawing, Painting, Mixed Media Now available as a self-study class.
BLOBIMAL ARTIST BOOKS In this class we will construct three small artist books, with “found” animals as our main subject matter.
The irregularly shaped pages of each of the three books will be constructed so that artwork from the subsequent and following pages will be peeking through… like a puzzle!
In Book #1 Well start with layers of watercolor and then add layers of colored pencil, marker, ink, and more to create unique “blobimals” (“blobs” + “animals”) found only in your imagination.
In Book #2 we’ll combine collage and drawing by collaging your “blob” shapes and then finishing your artist book with ink, white gesso, black paint, and a white paint pen (that’s it).
In Book #3 we’ll combine collage, drawing, and words to create a story…
And for this repeat session, you’ll create a bonus “mini book” in the new 6th lesson.
This is one of my favorite “live” classes to teach, and I’m excited to bring this class to you in online form! Note: This class originally ran as an intensive one-week class in the summer of 2013. This session we are running it over a two-week period and adding a sixth “bonus” lesson.
* * *
SUPPLIES NEEDED FOR THIS CLASS: For the Supply List, click HERE.
* * *
CLASS OUTLINE Lesson 1: Watercolor Beginnings Lesson 2: Bind Three Books Lesson 3: Book #1: Blobimals Mixed-Media Lesson 4: Book #2: Collage + Drawing Lesson 5: Book #3: Story Lesson 6: Bonus Mini Book
* * *
NUTS & BOLTS
Here’s how this online class works:
• Each M-W-F you will receive an email from me with a reminder to visit the class blog for that day’s lesson.
• A password-protected blog dedicated to each class will serve as our clubhouse and where you will find all the class materials as they are uploaded.
• A facebook group will be created for you to (optionally) share your paintings, and enjoy and learn from the artwork of others. (However, if you are shy about posting your art, I am always available to look at your work via email.)
• The class materials will be up and available for download indefinitely if for some reason you need to miss a day (or a couple of weeks). • Upon registration, you will receive an email within 48 hours confirming your sign-up. On the Friday before your session begins, you will receive your class codes and a “test” video to make sure you can receive/view everything (if you can view the above video, you should be able to view the class videos).
• Class fee is good for participants living in a single household.
QUESTIONS? [email protected] FAQs – If you’ve never taken an online class before and would like to know more about our e-workshops, click HERE.
========================
Register today! ____________________ SIGN UP TODAY! ____________________
Junk Mail Artist’s Book
Instructor: Carla Sonheim
5-Lesson Repeat Class (with bonus 6th lesson) • $35 Drawing, Painting, Mixed Media Now available as a self-study class.
*************
JUNK MAIL ARTIST’S BOOK
This is a mixed-media-junkie’s dream project! Junk mail combined with gesso, watercolor, a little swirly technique here, some packing tape there, creates beautiful and complicated textures that you can use as backgrounds for any mixed media projects you currently have going.
In this class we’ll use our pages to create an irregularly shaped book. Then, we’ll DRAW! You will begin a drawing on one spread, with the goal of having each image connect to and work with the images from other spreads. The drawing exercises throughout the week will build up to you being able to see more creatively and embrace the “puzzle” nature of this beautiful artist’s book.
Take this class if you love textures, layers, and everything mixed media. This one is just FUN! Note: This class originally ran as an intensive one-week class in the summer of 2011. This session we are running it over a two-week period and adding a sixth “bonus” lesson.
– – – – – – – – – – – – – – – – – – – – – – – – – – – – – – – – – – – SUPPLIES
For the Supply List, click HERE.
– – – – – – – – – – – – – – – – – – – – – – – – – – – – – – – – – – – CLASS ITINERARY
Lesson 1: One-Liners & Gesso on Junk Mail
Lesson 2: Watercolors & Rub ‘n Buff
Lesson 3: Flow Exercise & Building Your Book
Lesson 4: Drawing! & More Gesso Lesson 5: Final Details
NUTS & BOLTS
Here’s how this online class works:
• Each M-W-F you will receive an email from me with a reminder to visit the class blog for that day’s lesson.
• A password-protected blog dedicated to each class will serve as our clubhouse and where you will find all the class materials as they are uploaded.
• A facebook group will be created for you to (optionally) share your paintings, and enjoy and learn from the artwork of others. (However, if you are shy about posting your art, I am always available to look at your work via email.)
• The class materials will be up and available for download indefinitely if for some reason you need to miss a day (or a couple of weeks). • Upon registration, you will receive an email within 48 hours confirming your sign-up. On the Friday before your session begins, you will receive your class codes and a “test” video to make sure you can receive/view everything (if you can view the above video, you should be able to view the class videos).
• Class fee is good for participants living in a single household.
QUESTIONS? [email protected] FAQs – If you’ve never taken an online class before and would like to know more about our e-workshops, click HERE.
– – – – – – – – – – – – – – – – – – – – – – – – – – – – – – – – – – – “The Joy of Mixed-Media Assemblage” Instructor: Lynn Whipple
Mixed-Media, Collage, 3D
2-Week Class; 6 Lessons Total Now available as a self-study class.
Hello and a great big GigAntic welcome to the JOy of Mixed Media Assemblage!!
Working with found objects inside a boX!
What could be more fun than combining all of our favorite things and working within a box format?? Mixed-Media Assemblage allows us to explore collage, drawing, altering photos, painting, altered found objects, storytelling, composition and more!
I would be thrilled to share with yOu all the techniques, tricks and tips that I have learned working in assemblage. It is so much fun… from finding the perfect box to laying down and collaging a background to altering photos and found objects, to attaching and gluing and to special little ways I have developed to make your work finished, framed and ready to hang on the wall.
This class is all about yOU, and using your voice to make things that make your heart sing! You will play the “pieces-parts” game, which is fantastic way of seeing how many fresh combinations that you can come up with. If you have a fabulous stash of found objects and old photos, this is the perfect project, if you need more, its a great excuse to go “on the hunt!” We will work with “found” boxes and/or cradled wood panels.
Please join us for an artistic, mixed-media romp chock full of encouragement, learning, sharing, play, imagination, exploration and most of all fun!
xoxo Lynn
The hunt for boxes is always fun, find some additional pieces and parts while you are at it!
Lesson 2: Design Your Piece
Here is where we begin to play with your pieces and parts and make fresh combinations.
Lesson 3: Collage Your Background
Great way to begin a piece using time tested collage techniques for gluing and aging.
Lesson 4: Altering Pieces & Parts
Time to make it your own by altering elements and making things work. Storytelling will take place at this stage as well.
Lesson 5: Gluing & Final Touches
Let’s tweak all the little things and glue everything in place, an important step.
Lesson 6: Presentation
Let’s give it the big finish! Time to wire the back and hang your work on the wall! Adding plexiglass will finish everything and make all you do look fantastic.
NUTS & BOLTS
Here’s how this online class works:
• Each M-W-F you will receive an email from Lynn with a reminder to visit the class blog for that day’s lesson.
• A password-protected blog dedicated to each class will serve as our clubhouse and where you will find all the class materials as they are uploaded.
• A facebook group will be created for you to (optionally) share your paintings, and enjoy and learn from the artwork of others. (However, if you are shy about posting your art, Lynn is always available to look at your work via email.)
• The class materials will be up and available for download for one year if for some reason you need to miss a day (or a couple of weeks). • Upon registration, you will receive an email within 48 hours confirming your sign-up. On the Wednesday before your session begins, you will receive your class codes and a “test” video to make sure you can receive/view everything (if you can view the above video, you should be able to view the class videos).
• Class fee is good for participants living in a single household.
QUESTIONS? [email protected] FAQs – If you’ve never taken an online class before and would like to know more about our e-workshops, click HERE.
– – – – – – – – – – – – – – – – – – – – – – – – – – – – – – – – – – – SIGN UP TODAY!
Lynn Whipple writes, “I am deeply grateful to live my life as an artist. Play and discovery are my dearest and most constant companions. There are a zillion tiny challenges in each art making experience, and so often I find, just as many small, sweet victories. Without a doubt, living creatively is the most enjoyable and satisfying game I know.”
Lynn shares a warehouse studio with her husband, John Whipple, in Winter Park, Florida. Lynn’s work includes found-object mixed-media assemblages; found images altered with a combination of drawing, painting, sewing and more; and her well-known Ninny Boxes, collages combined with found objects, and assembled within a box format. Her unique pieces have a playful, quirky, and often absurd, charm.
Lynn explains: “I allow myself to play and let my pieces reveal themselves to me…I have been fascinated by old books, history, and odd bits of memorabilia. I find the things that interest me the most are slightly absurd…My hope is to create something real and somehow poetic but not commonplace. My goal is to keep communicating in my language.”
Lynn’s work has been exhibited extensively throughout the United States. Visit Lynn’s website at www.lynnwhipple.com and her etsy shop at www.etsy.com/shop/lynnwhipple
“The Joy of Collage” with Lynn Whipple from Silly U on Vimeo. – – – – – – – – – – – – – – – – – – – – – – – – – – – – – – – – – – –
“The Joy of Collage”
Mixed-Media, Collage
2-Week Class; 6 Lessons Total This class is now available as a self-study class.
A great BIG Welcome to the Joy of Collage!
I would be honored to share with you all of my favorite collage techniques as well as a handful of time-tested special tricks for making a great finished work of art. My greatest hope is that you will have fun and enjoy the process.
We will explore great ways to create fresh collages with a focus on building a story and surface. I will show you how to age your collage for a unifying look and we will incorporate drawing, painting, smudging, stamping and a little poetic thing I like to call … dot dot dot.
My overall philosophy is one of freedom, play, exploration and most of all FUN!!!!!! This class is all about YOU, and using your voice to make the things that make your heart sing!
One of my favorite things in my in-person workshops is the show-and-tell and positive feedback session at the end of each class. I love hearing what each artist has to say about what they learned and how their pieces developed! Happy accidents and revelations are the best! I am so glad we will be able to learn from each other this way in this online format.
xoxo lynn
– – – – – – – – – – – – – – – – – – – – – – – – – – – – – – – – – – –
SUPPLIES
For the Supply List, click HERE. – – – – – – – – – – – – – – – – – – – – – – – – – – – – – – – – – – –
CLASS ITINERARY
You will complete two collage paintings. Lesson 1: Glue & Trust
My “go to” gluing technique. This “wet” way of putting down our papers is what I use every day. This is where we play fast and loose with your found images and papers! Let ’em fly! Lesson 2: Aging & Editing with Paint
We will take acrylic paint and water it down to make a wash and quickly cover your page, then wipe it off, leaving just the amount that feels right to you! It will shift the color slightly and give it beautiful antique feeling. Next, we will cover up some of our image and collage with acrylic paint. We can totally create new shapes and play with composition here…..this is where Ninnies were born!! Lesson 3: Smudging & Words
My favorite thing is to use a #3 pencil and go over the great layers that may now be covered with paint, an amazing, yet subtle thing happens and you start to move things forward and backwards. Then we will chose a few choice words that are a great graphic design element as well as a storytelling tool. Lesson 4: Dot Dot Dot
OH YEAH!! now to the dot dot dot tool!! It is a simple sewing wheel used in marking patterns, when rolled in paint, makes a lovely poetic line that really gives a detail that will pull your viewer in. Lesson 5: Begin Second Collage Painting
We’ll begin a second collage piece using the same techniques but taking it in a totally different direction. Lesson 6: The Finish!
We’ll finish up our second collage and spend a few moments talking about finishing your work so it is ready to hang. Sometimes something as simple as detail to the edges of a piece will give it a framed feeling that looks great!
NUTS & BOLTS
Here’s how this online class works:
• Each M-W-F you will receive an email from Lynn with a reminder to visit the class blog for that day’s lesson.
• A password-protected blog dedicated to each class will serve as our clubhouse and where you will find all the class materials as they are uploaded.
• A facebook group will be created for you to (optionally) share your paintings, and enjoy and learn from the artwork of others. (However, if you are shy about posting your art, Lynn is always available to look at your work via email.)
• The class materials will be up and available for download until “forever,” if for some reason you need to miss a day (or a couple of weeks). • Upon registration, you will receive an email within 48 hours confirming your sign-up. On the Wednesday before your session begins, you will receive your class codes and a “test” video to make sure you can receive/view everything (if you can view the above video, you should be able to view the class videos).
• Class fee is good for participants living in a single household.
QUESTIONS? [email protected] FAQs – If you’ve never taken an online class before and would like to know more about our e-workshops, click HERE. – – – – – – – – – – – – – – – – – – – – – – – – – – – – – – – – – – – SIGN UP TODAY!
Lynn Whipple writes, “I am deeply grateful to live my life as an artist. Play and discovery are my dearest and most constant companions. There are a zillion tiny challenges in each art making experience, and so often I find, just as many small, sweet victories. Without a doubt, living creatively is the most enjoyable and satisfying game I know.”
Lynn shares a warehouse studio with her husband, John Whipple, in Winter Park, Florida. Lynn’s work includes found-object mixed-media assemblages; found images altered with a combination of drawing, painting, sewing and more; and her well-known Ninny Boxes, collages combined with found objects, and assembled within a box format. Her unique pieces have a playful, quirky, and often absurd, charm.
Lynn explains: “I allow myself to play and let my pieces reveal themselves to me…I have been fascinated by old books, history, and odd bits of memorabilia. I find the things that interest me the most are slightly absurd…My hope is to create something real and somehow poetic but not commonplace. My goal is to keep communicating in my language.”
Lynn’s work has been exhibited extensively throughout the United States. Visit Lynn’s website at www.lynnwhipple.com and her etsy shop at www.etsy.com/shop/lynnwhipple
We will explore six different painting techniques that deal with how we touch the surface of our paintings and the characteristics of the paint itself, including:
Sgraffitto , Masking, Frottage Texturing & Blown Blots.
These techniques will become essential tools, not only for creating areas of mystery and intrigue in your work, but also for inspiring new ideas as your paintings evolve.
We will start by making test paintings of each technique to discover how viscosity and the physicality of the surface play a foundational role in the creation of a painting.
Our test paintings will then become an opening conversation, leading the way to three completed paintings of your garden, real or imaginary.
CLASS ITINERARY
Lesson #1: Sgraffito & Stippling
Lesson #2: Paint Your Garden!
Lesson #3:Masking & Drawing Gum
Lesson #4: Paint Your Garden!
Lesson #5: Frottage & Blown Blots
Lesson #6: Paint Your Garden!
SUPPLIES NEEDED FOR THIS CLASS: For the Supply List, click HERE.
Here’s the scoop for this class:
• Each M-W-F you will receive an email from Diane with a reminder to visit the class blog for that day’s lesson.
• A password-protected blog dedicated to each class will serve as our clubhouse.
• A facebook group will be created for you to (optionally) share your paintings, and enjoy and learn from the artwork of others. (However, if you are shy about posting your art, Diane is always available to look at your work via email.)
• The class materials will be up and available for download until “forever,” if for some reason you need to miss a day (or a couple of weeks). • Upon registration, you will receive an email within 48 hours confirming your sign-up. On the Wednesday before your session begins, you will receive a “test” email to make sure you can receive/view everything.
• What you will need: You will be able to read acrobat pdf files and view videos.
• Class fee is good for participants living in a single household.
QUESTIONS? [email protected]
___________________________ SIGN UP TODAY!
* * * Diane Culhane is a professional artist and art educator who lives West Seattle in a 1910 home, and works out of her studio in Ballard Building C. She received her BFA from the University of Utah and Master’s Degree from Seattle University.
Diane has taught for The Bellevue School District, Seattle Pacific University, Kirkland Arts Center, Bellevue Arts Museum and currently directs and owns Kelsey Creek Fine Art School for children in the summer.
Visit her website at: www.dianeculhaneart.com.
12 Lessons Total
Encaustic Painting Now available as a self-study class.
Encaustic painting is using melted and pigmented beeswax to create exciting, luminous paintings. If you have ever been curious about encaustics, you’re in for a treat! This 12-lesson online workshop covers a brief history of this ancient medium, what equipment is needed, setting up your work space, mixing colors, adding other media like paper and thread, safety… everything you need to know to start making your own encaustic paintings. Olivia I — 36″x36″ Blood Flowers 2 — 24″x30″ April — 8″x8″ Class Itinerary Session 1: April 28 – May 2, 2014 Monday: Set-up and Safety Wednesday:Brief History and Fusing Clear Wax Friday:Adding One Color Session 2: May 19-23, 2014 Monday:Working with Opaque Colors Wednesday: Working with Transparent Colors Friday: Mixing Colors Session 3: June 9-13, 2014 Monday: Burnishing Tissue Paper Wednesday: Japanese Paper with Drawings Friday: Charcoal Transfer Session 4: June 30 – July 4, 2014 Monday:Carving and Inlaying Line Wednesday: Thread and Linen Paper Friday: Finishing/Polishing your Paintings Note: Materials used in this class may contain ingredients that are harmful to your health. We want you to be safe so follow manufacturer’s instructions carefully and work in well-ventilated areas. Petalous 3 — 28″x28″
How the Class Works
On Monday-Wednesday-Friday of each session you will receive an email reminding you to visit the class blog for your new assignment and video lesson. Videos are professionally produced and instructor feedback will be given via a private facebook page (or via email with Stephanie, if you prefer). If you need to miss a week, don’t worry! The class material will be up and available to you for one year from the date of purchase.
_____________________________________________
Sign up today!
_____________________________________________
“StephiWax” will ship via USPS Priority Mail within two days after purchase. US orders only (so sorry!).
_____________________________________________ I’ve been both painting and working in clay since college, where I studied color theory, ceramics, sculpture, drawing and painting. I started a line of functional ceramics as a small business in 1997 after studying with Carol Gouthro, and have worked with metal, oil paint, and acrylics over the years, but my medium of choice is bee’s wax. I learned a great deal studying with Jef Gunn and Larry Caulkins at Pratt Fine Arts Center, and have been focusing for the past 9 years exclusively on encaustics. It is the one medium that affords all the other materials I’ve worked in to overlap and inform one another.
I find bee’s wax to be inherently lovely, and work with it always mindful of how its natural beauty and transparency can coexist with my ideas and imagery.
See more wonderful art at Stephanie’s website: www.stephaniehargrave.com _____________________________________________ Materials Needed — Two 24”x24” Drywall Panels (to protect your tabletop)
— Pancake Griddle (with temperature gage)
— Heat Gun or Propane Torch
— Encaustic Medium – 1 Brick (Recommended: R&F Encaustic Medium, 333 ml. OR you can buy handmade “StephiWax.” Click below for details.)
— Encaustic Colors: 1 small brick each of Red, Yellow, Blue, Black, White (R&F, or you can buy handmade “StephiWax.” See below for details.)
— metal tins – several (to hold melted wax)
— Several 1″ – 1 1/2” Bristle Brushes
— Smaller bristle brushes for detail work
— Small Birch Panels (5”x7” and 6”x6”) – 3 each
— Two 9”x12” Cradled Birch Panels
— Painter’s tape (blue tape)
— Rags
— Fan
— Fire Extinguisher
Want more? Stephanie talks about encaustic painting:
In this video, artist/teacher Diane Culhane demonstrates an acrylic painting project using both the positive and negative spaces. Have fun!
_____ Diane is a painter and art educator living in Seattle. She has held two online classes through us, “Between Speech & Silence” and “Table Top: Drawing & Painting.” Both are available as self-study classes now.
Here is a quick and fun way to make original paper dolls… a perfect thing to do with your kids or to nurture the kid inside you… because we’re never too old to play with paper dolls! Have fun!
Carla Sonheim
P.S. This tutorial was made in anticipation of my next online art class, “2014: Year of the Fairy Tale.”
__________________ Supplies Needed
– a small watercolor set
– #12 round paintbrush (or similar)
– 8″x10″ sheet of 140# hot press watercolor paper (or similar)
– a regular pencil
– an eraser (I like kneaded rubber erasers)
– scissors
__________________
Now available as a self-study class. ________________________________________
Diane Culhane’s Online Class: Table Top Drawing & Painting (via Carla Sonheim) from Silly U on Vimeo.
Hi, my name is Diane Culhane.
“Table Top” is a term I have created to explore the traditional “Still Lifes” within our contemporary lives. Joining the definition of still life: a visual fine art term, representational painting or drawing of inanimate objects, such as fruits, flowers, etc. “Table Tops” will echo the same type of inanimate objects.
Inside of this class, the foundation will be set based on fabulous old master’s still life paintings, such as; cubist painter Paul Cezanne, Pierre Bonnard, and Matisse.
Students – you – will transform your experience with the tradition of still life, practiced by many throughout the ages, into something uniquely all your own, changed by imaginative approaches via various innovative approaches in this class.
Starting with drawing, during a dining experience, ending up with acrylic painting. Line will be deeply explored and color of prismacolor pencils too on to various surfaces.
See. Experience.Draw.Color.Paint.
get ready get ready get ready.
HOW THIS ONLINE CLASS WORKS
• Each M-W-F you’ll wake up to a morning peptalk email with links to your demonstration video and drawing or painting assignment. Tuesdays and Thursdays are “work/comment” days. Weekends are off.
• A password-protected blog dedicated to your class will be the meeting place for the above.
• A flickr group will be created for this class so you can (optionally) share your drawings, paintings, and enjoy and learn from the artwork of others. (However, if you are shy about posting your art, Diane is always available to look at your work privately via email.)
• Class material great for both kids and adults (class fee is good for participants living in a single household).
• The class materials will be up and available for one year after your class purchase. • Upon registration, you will receive an email within 48 hours confirming your sign-up. The week before your workshop begins, you will receive a “test” email to make sure you can receive/view everything.
• What you will need: You will need to be able to view videos via vimeo.
CLASS OUTLINE Lesson 1: Gathering Together/Dining Start the class by drawing your dining experience. Will talk about line quality, perspective, editing, and more. Lesson 2: Table Top/Basket, Bowl, Fruit Playing with and understanding color choices; composition; Prismacolors on black substrate Lesson 3: Table Tops/Glass Bottles Will move to transparent bottles of various shapes, sizes, colors; Prismacolors on vellum Lesson 4: Glazing Glaze with acrylic paints and gel mediums on watercolor paper Lessons 5 & 6: Table Top Acrylic Paintings Layering from bottom to top with acrylics paints and light molding paste; wood and/or canvas.
* * *
ABOUT THE INSTRUCTOR Diane Culhane is a professional artist and art educator who lives West Seattle in a 1910 home, and works out of her studio in Ballard Building C. She received her BFA from the University of Utah and Master’s Degree from Seattle University. Diane has taught for The Bellevue School District, Seattle Pacific University, Kirkland Arts Center, Bellevue Arts Museum and currently directs and owns Kelsey Creek Fine Art School for children in the summer. Visit her website at: www.dianeculhaneart.com.
* * *
SUPPLIES NEEDED FOR THIS CLASS
– basket, bowl, tablecloth, fruit, bottles
– black tag board or black construction paper
– Prismacolor colored pencils: set of 12 or 24 (Diane recommends “Premier Soft Core Colored Pencils“)
– pencils — soft 2B-6B
– ball point pen, vellum paper
– gessoed watercolor paper – 6″x6″
– gel media gloss
– 2 canvases – small sizes 8″ x 8″ , or wood panels ,
– Liquitex Gloss Super Heavy Gel
– Golden Light Molding Paste
– fluid acrylic paints, such as Golden, Liquitex, or Daniel Smith (red, yellow, blue, white)
– sketchbook, pens – Diane loves to use Micron archival ink sizes 03, 05, 08.
– two flat brushes; one medium and one small
– a fan brush and a liner brush
Welcome to the THIRD Annual Online Summer Art Camp!
This year I am excited to present new classes taught by Diane Culhane, Steve Sonheim, Krista Peel, and myself.
• Workshops in Photography, Drawing, Painting, and Mixed-Media
• Each week-long class consists of five instructional videos
• Classes designed so that you can spend between 1-3 hours per day
• Class content will remain online indefinitely
• Instructor feedback
• Each class will have its own flickr group to share images of your artwork
• NEW! A single facebook group page for the entire camp (so you can see what those in other sessions have been working on, too!).
• Class fee good for participants living in a single household
• Prizes? Of course!
• EARLY SIGN-UP BONUS! The first 100 people to sign up will receive 8 printable PDF greeting cards featuring two images from each of the four instructors.
———————————————————————————————-
Click the images below for class descriptions and to sign up!
———————————————————————————————-
Hello! Today’s tutorial is sort of a Take It Further option of Chapter 5 from “Drawing and Painting Imaginary Animals“: Abstract Watercolor Starts.
I will be showing you how I made the above drawing/painting (kind of interchangeable in my mind). However, this only outlines how I happened to finish this particular piece, and it could have gone many different ways and still have been successful (or not). If you choose to try the steps outlined below, remember that the result will — and should — turn out differently… your own unique hand will enter the process, a very good thing!
(Click to enlarge images.)
*************************
SUPPLIES NEEDED
One piece of hot press 140# watercolor paper, about 7″x10″
watecolors, brushes (I like a #12 round)
white gesso
mechanical pencil
spray fixative
*************************
STEP 1 (This first step is really two steps combined, as i hadn’t originally planned to make this a tutorial and didn’t scan the very first step.)
Step 1a. Using red watercolor and a #12 round brush, mix up a very watery amount and make a mark. I started with the tail in this case. Once I had a shape I liked, I picked up the paper and added more watercolor to the base of the tail, and then tipped my paper so that the pigment would slide across the page. I had a dog in mind, and just kept repeating the mark/dripping process until I had a recognizable animal (head, body, four legs). Also, load your brush with pigment and then “splatter” it onto the page randomly by hitting the brush against your hand.
While the paint was still wet, I went in to some of the areas and pulled out little lines (fur!) from some of the areas with a sharp stylus (though you can also use a mechanical pencil or even a shish kabab skewer). Here’s a detail:
Step 1b. Once your red watercolor is dry, mix up another color of your choice and color in your animal, leaving the areas where you want the eyes, white.
*************************
STEP 2
Step 2. Here I added some blue watercolor on the body, and some pencil iines as fur once that dried. In addition, I decided to “take a risk” and turn the head a bit, as I was feeling the original was a little boring. (At this point the “dog” became a bull.) I also decided to pencil in the eyes, and changed their shape a bit at this step as well. Let dry.
*************************
STEP 3
Step 3. After changing the head direction, I felt it would be too difficult to hide the original lines without the help of the big guns — gesso. Using a small, round, dry brush I added the fur on the body. Then, I wet the brush a little when i applied it on the face. I also added a white layer to the eyes with a very small brush. Let dry completely.
*************************
STEP 4
Step 4. All the shading and details were then pulled out using a regular, cheap mechanical pencil (2B). When applying your pencil lines for fur especially, keep your hand very loose and apply more pressure at the beginning of the stroke than at the end of the stroke. Work fairly quickly so you don’t over-think it — fur is usually scraggly!
Here’s a detail:
Spray with fixative. Done!
*************************
For more tutorials and assignments, click HERE!
• Watercolors • Mixed Media Paintings • Collage • Board Books • and More!
5-Week Painting Class (REPEATING)
with Carla Sonheim
October 28 – November 29, 2013
Hi, I’m Carla Sonheim. It’s cold and rainy in my neck of the woods, but NOT here inside my studio!
If you want to take the cold weather into your own hands with gesso, watercolor, and a healthy dose of flower fun, join me for an extended five-week long play time.
Over the past 15 years I’ve developed my own unique way of working with watercolors alone and combining them with gesso and other media that result in luminous, rich painted surfaces.
These techniques can be taken to paper, wood, and canvas, and we’ll work with all three surfaces during the course (plus a few other surprises!).
Some of the things we’ll play with:
watercolors
white gesso
pencil
permanent markers
watersoluable markers
colored pencils
white ink
cardboard
wood
This painting class (which will also include both drawing and collage assignments) builds week-by-week, so that by the end you can take your new-found tips, tricks, and flower love to your journals, paintings, altered books, and even your furniture, if you like!
With your sign-up you will receive:
• 15 professionally produced instructional HD Videos
• Weekly step-by-step photo tutorials at the blog
• Daily inspirational posts (M-F)
• Daily drawing assignments (optional)
• Dedicated flickr site where you’ll receive encouragement and feedback
from me and your fellow travelers
• Password-protected blog,which will serve as our meeting place (when not over at flickr)
• Unlimited access to the class material (That’s right! Once you’ve paid,
the class will be up and available for you to access “forever.”)
• Your itinerary:
Week One: Watercolor Crazy
markers and pencils
watercolors made easy
layering, dry brush, and experimental mark-making
flower vocabulary
Week Two: Gesso Crazy
gesso on watercolor
watercolor on gesso
texturing 101
rub and buff
Week Three: Wood Crazy
preparing the wood
white out
gesso on wet watercolor
layers and layers
Week Four: Collage Crazy
making your own fodder
collage first
collage last
troubleshooting
Week Five: Flower Crazy Board Books (and other fun stuff)
preparing the books
going nutty
installation idea
fabric tips
and more!
========================
Register today!
========================
Questions?
I’m happy to answer any questions! Please email me at [email protected] and I’ll get right back to you!
Hello!
Those of you who have been in my workshops know that I like to build color very slowly, using multiple layers of transparent colors. This step-by-step shows an example of the process (though remember it’s unlikely you will have the exact colors, types of pens, etc. that I have, so of course whatever you do will be different!).
STEP 1
Using brown watercolor with a little green mixed in, I free-hand painted the alligator shape. The color should be very pale at this stage. (I didn’t use a pencil first… the darker green outline you see around the edges is green watercolor.)
STEP 2
When the first layer of watercolor was COMPLETELY dry, I added a second light layer of green right on top of the previous layer.
STEP 3
Using a light pink Copic marker, I added the “orange” lines you see. (They look orange because the pink is mixing with the greenish-yellow underneath.) Keep your hand loose.
STEP 4
I repeated Step 3 using a light gold Copic marker.
STEP 5
I grabbed a black ballpoint pen and started adding outlines, scales, and cross-hatching, again, keeping my hand loose and squiggly.
STEP 6
Keep working the ballpoint pen until you feel done!
_ _ _ _ _ _ _ _ _
For more tutorials and assignments, click HERE!
This little tutorial will hopefully dispel some myths about watercolor being “impossible.” Yes, it does have kind of mind of its own sometimes, but that’s part of the fun (and is usually completely “fixable,” as you will see)!
These birds are super easy. Follow the steps below, but remember your birds will (and should) come out differently than mine! The way you lay down the paint, the colors you choose, the shape of your bird, and your unique “hand” when adding pencil detailing will all contribute to a bird that is uniquely yours. And that is a good thing! STEP ONE
1. Gather your supplies. You will need a pencil, a set of watercolors (cake or tube is fine), some watercolor paper (I like using a “hot press,” which is smoother), a rag or paper towel for blotting paint, a container with water, and a watercolor brush (I use a #12 round). STEP TWO
2. Using lots of water, mix up a little pool of the color of your choice. Test the paint on a scrap piece of paper. The pigment should be watered down and the color should be quite light. (This will feel strange to Bright-Color People, but don’t worry! It won’t stay this pale.) STEP THREE
3. Load your paint brush. Blot a little of the excess water on to your rag or paper towel. Your brush will still be quite wet; this just takes the drippiness out. STEP FOUR
4. Start painting a bird. I usually do not draw in pencil first, as I like to see how the bird unfolds using paint only. (But you are allowed to draw it in lightly first if you must!) Work fairly quickly; you want the paint to remain wet as you move it into the shape of your bird. If desired, leave a space unpainted for the eye, as shown here:
In the case of my first bird, I the paint was a little too wet… I wanted it to dry a bit more before I added the next step, so I used this time to paint in a second bird. STEP FIVE
5. While the paint is still wet, go back to your watercolor palette and grab some darker pigment with your paintbrush (not watered-down this time). Dip the heavier pigment into the wet paint here and there (I like to go around the eyes and on the bottom edge of the bird). Just dab it; the watercolor will begin to spread out on its own. Repeat with the second bird: STEP SIX
6. Let dry completely. (Very important!) You can see here that the green spread out quite a bit when it dried. This wasn’t exactly what I intended (oops), and occurred because my original layer of paint was “too wet.” No worries, though! We can fix it on the second layer. STEP SEVEN
7. Now you are basically going to repeat steps 2-6, but with different colors. In this case I used a very light orange-red for my second transparent layer (steps 2-4)…
… and a darker blue for my more pigmented drop-ins (step 5).
Repeating now for the second bird. STEP EIGHT
8. Once the second layer of paint is COMPLETELY dry (very important!) you can add details with pencil. I usually add the eyes, some shading around the eyes perhaps, and some shading on the wings and bottom of the bird.
Keep your hand loose; if the pencil lines seem too harsh, use your finger to soften the effect: STEP NINE
10. Finished! Here’s a detail:
____________________________
For more tutorials and assignments, click HERE!
About 8 – 5″x7″ pieces of watercolor paper (hot or cold press)
#12 round watercolor brush
Optional: black Micron pen, size 01
(Note: If you do not have these items on hand, don’t worry! Use any watersoluable marker, any paper, and any brush, and do your best. If you like the process, THEN go out and purchase the nicer stuff!)
* * * * * * * * *
* * * * * * * * *
BUNNY POWER: Easy Tombow Rabbits
STEP 1
This is a V.I.S. — Very Important Step. Take about two minutes and go to the following link, and just LOOK. You don’t need to draw anything, but just look at photos of rabbits for about two minutes. Googly Rabbits.
* * * * * * * * * STEP 2
Now take your Tombow marker and draw a simple outline of a rabbit. You can draw from your imagination or from a reference (your choice). Keep it simple!
* * * * * * * * * STEP 3
Dip your watercolor brush in clean water, and tap off a little of the excess, either on a paper towel or the side of the water container. (You want your brush “loaded”, but not “too loaded.” You will probably need to experiment with a few rabbits before you get the hang of it.) Start painting on the line, being careful to leave the outside edge of the line intact:
A quick demo of the whole painting process:
Tips while painting:
you will probably need to re-wet your brush several times.
work fairly quickly so that the water doesn’t have time to dry before you get the whole inside of the bunny painted.
even though it is a “black” marker, when wetted down the colors will separate into pinks, light blues, etc.
Leave some white spaces.
Take extra care around the eyes (see Step 3b)
If you make a mistake, don’t worry! Just stop, let dry, and go to Step 5.
* * * * * * * * * STEP 3b
Here is a slower demonstration of the painting process. Take care around the eyes, as shown.
* * * * * * * * * STEP 4
Let dry completely. In some cases, this is the last step… your bunny is done, and doesn’t need anything else!
* * * * * * * * * STEP 5
Sometimes, though, you may need to go back in to your drawing, either with your Tombo marker or other fine-tipped black marker, and re-draw any lines that may have been obscured by the painting step:
You can even add other details:
Done!
* * * * * * * * *
For more tutorials and assignments, click HERE!
Hello!
When I posted the above flowers a few weeks ago, many of you expressed an interest as to how I made them! So following is a quick tutorial (though, after several weeks of experimenting, I still haven’t been able to replicate the above flowers exactly… oh well! Just remember to have fun and not worry about the end product very much; because it is such a fast and loose process, you won’t be able to control it that much anyhow!)
SUPPLIES YOU’LL NEED
• #140 hot-pressed (smooth) watercolor paper (or similar), cut or torn to any size
• watercolors (pan or tube, either is fine)
• white gesso (I use Golden brand, because it is a bit thicker than some of the other brands)
• one or two flat brushes (between 1/4″ – 3/4″)
• pencil (I use a cheap mechanical pencil)
• eraser (I prefer kneaded rubber erasers)
STEP-BY-STEP DIRECTIONS Step 1. Randomly “splotch” 3-6 different colors of watercolors onto your paper. This can be done in one step, and it’s okay if the colors overlap and run a bit. (I usually use a half-inch flat watercolor brush.) Leave some whites spaces. Let dry completely. Step 2. Once your watercolors are dry, get out your white gesso. Using a DRY brush (or one that you’ve squeezed most of the water out of), start painting gesso circles around areas of the watercolor, as shown above. Once you paint a circle, immediately turn the brush around and “draw into” the gesso with the brush handle. Draw lines for petals, circle-y scribbles, etc.
Here it is at the next stopping point. Notice I covered the in-between areas with white gesso, too. (Also, the white “stars” above are made by putting a dollup of gesso in the middle of a color patch, and then turning the brush around and drawing into it.) Let gesso layer dry completely. Step 3. Next, add pencil to pull out your flower shapes even more. Keep your hand as loose as possible. Step 4. I went back in with gesso and added a few more star shapes, as it seemed a little bare after step 3. Step 5.Fill in the areas between the flowers with a light layer of pencil. Vary your directions a bit, and then smear with your finger to soften. Step 6. This is hard to see here, but this step involves lightly going back in with an eraser here and there. (This is an optional step; I just felt I was a little too heavy-handed with my pencil in Step 5, so I wanted to soften it a bit.) Step 7. Finally, I gave the entire piece a VERY LIGHT layer of sepia brown watercolor to unify the piece. (Again, an optional step for you!)
_____________________
These last few weeks I have been FLOWER CRAZY! As I got into trying to get this tutorial ready for you, things kind of exploded and I found I could approach the flowers in many different ways on many different surfaces, using all the layered painting techniques I’ve been sort of making up the last 15 years. (Gesso plus watercolor? Yes! And on wood? And collage, too? Yes and yes!)
For a longer, more in-depth online painting class, you might be interested in the FLOWER CRAZY online class!
——————————
For more tutorials and assignments, click HERE!

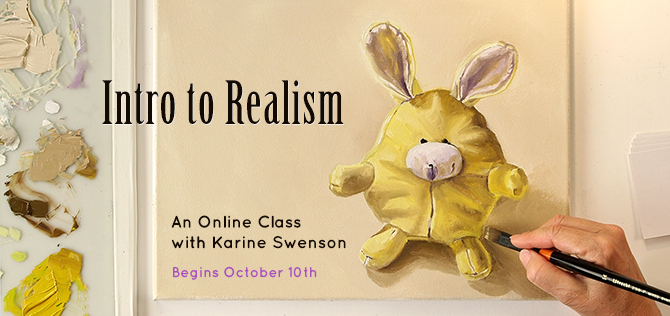
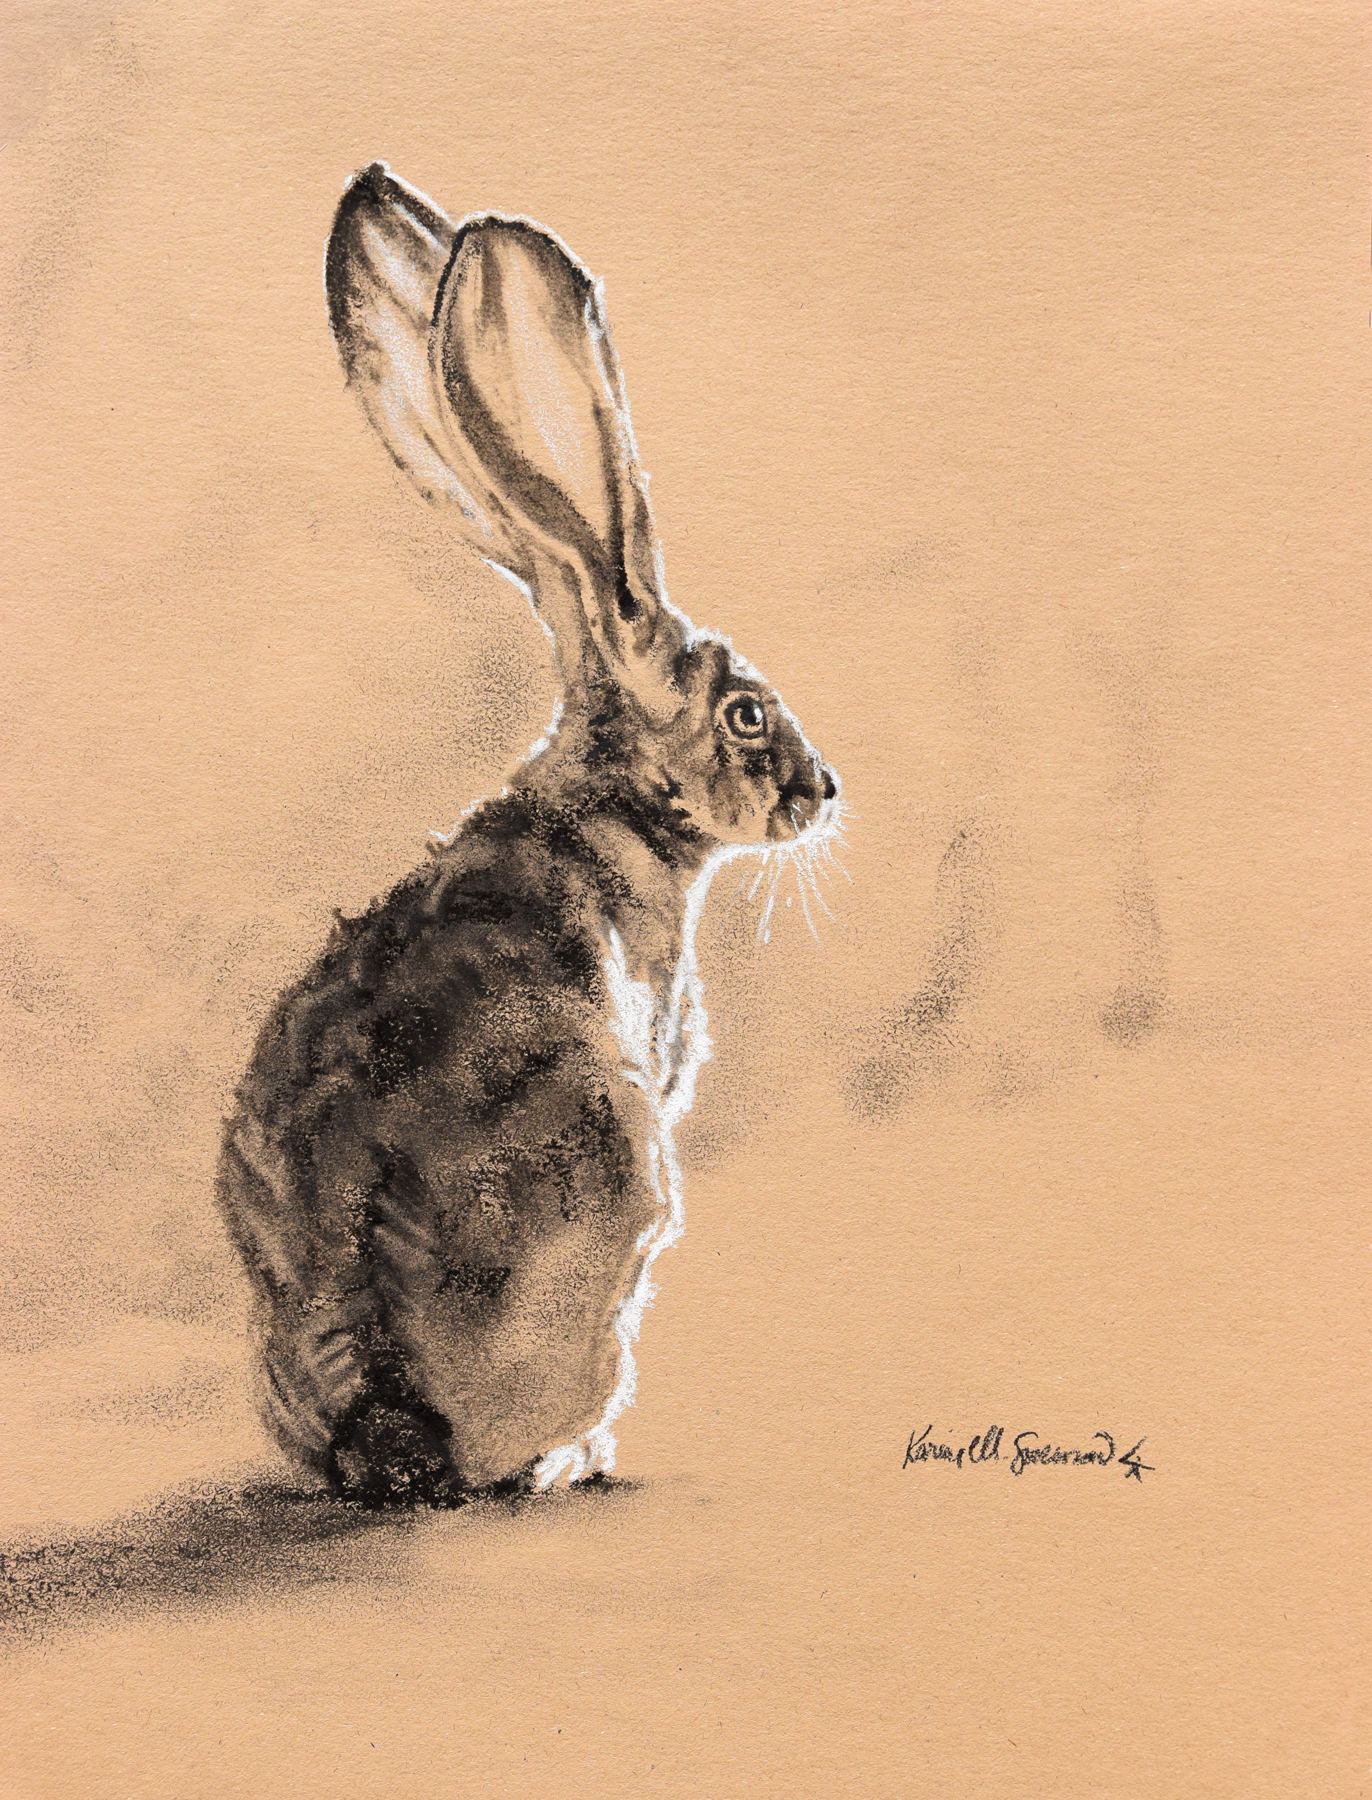
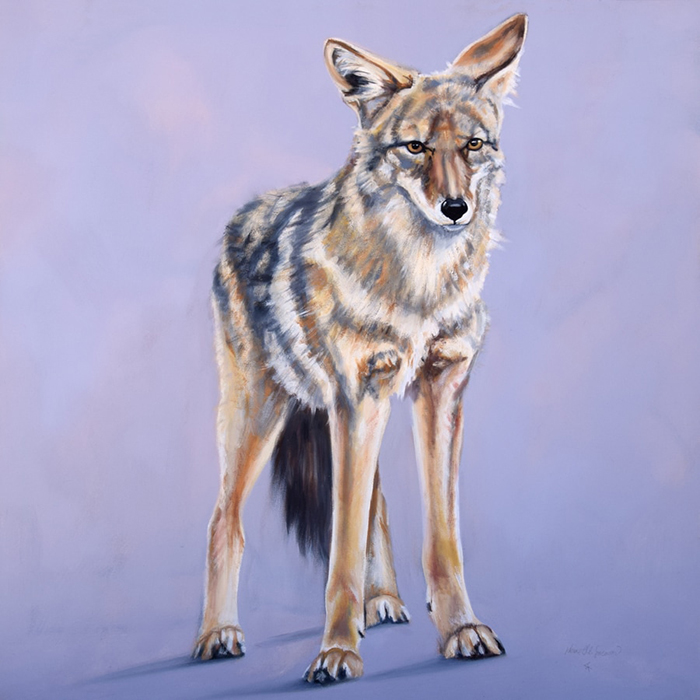
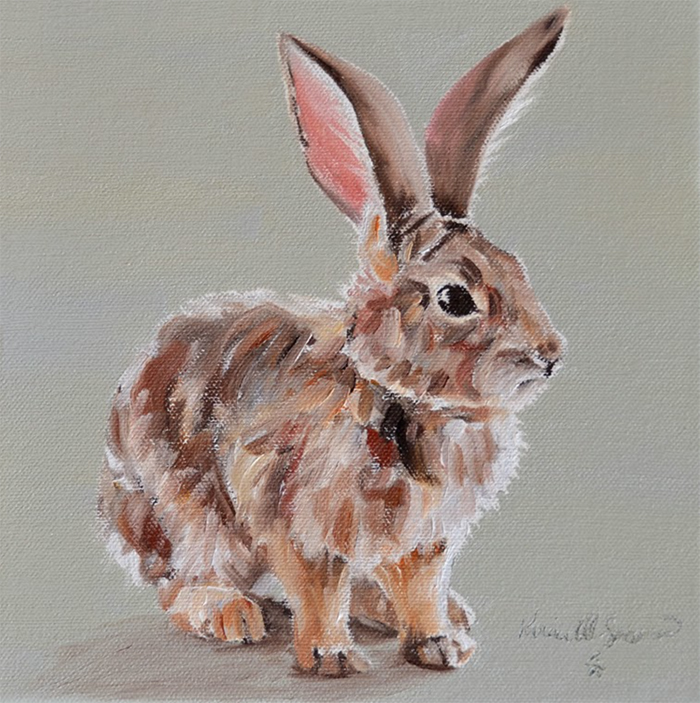
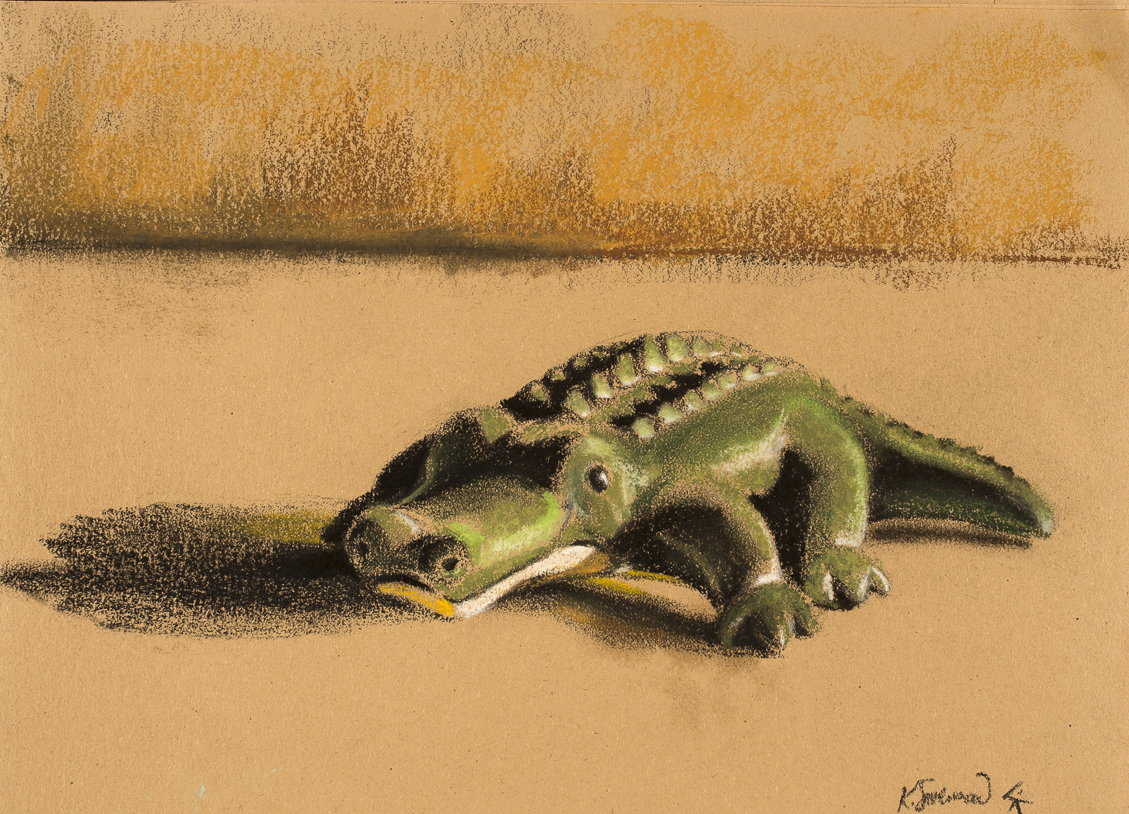
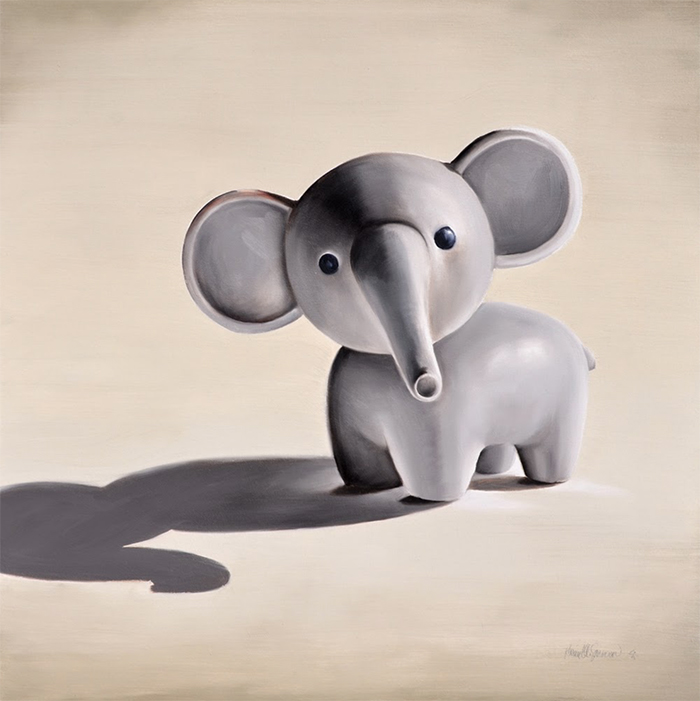
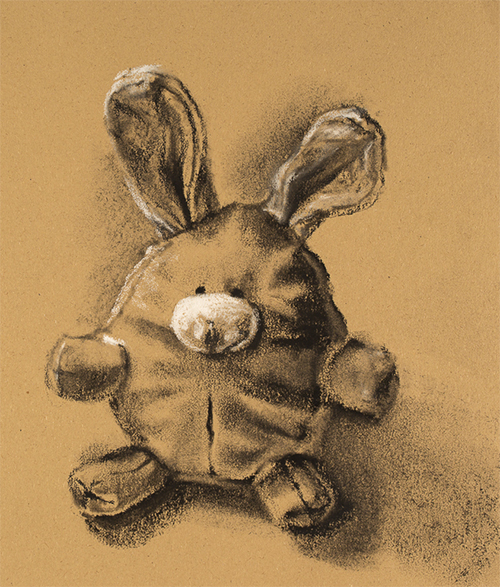
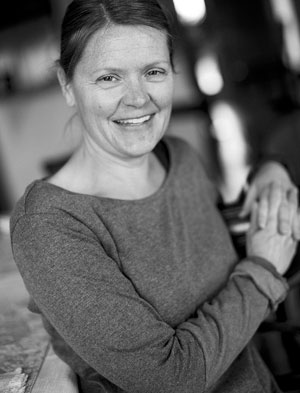 Karine Swenson grew up just outside of a town called Rapid City, South Dakota in the Black Hills. The closest neighbor was a mile away. Reared in this environment, Swenson’s connection with the natural world was strong. After receiving her BA in painting from Augustana College in Sioux Falls, South Dakota, she moved to Colorado. She has spent most of her life in small towns that sit right next to the last remaining bits of wilderness. From the mountains of Colorado, the ocean surrounding Maui, Hawaii, the desert near Joshua Tree, California, and now the high desert outside of Santa Fe, New Mexico, Karine feels the most at home out in nature. In the studio, her second home, she can explore her relationship with the natural world. Her oil paintings are reflections of this relationship. Swenson has been a full-time artist for the past ten years.To watch a short video introducing Karine, click HERE.See more wonderful art at Karine’s website: www.karineswenson.com.
![states-of-being[1]](https://www.carlasonheim.com/wp-content/uploads/2016/03/states-of-being1.jpg)
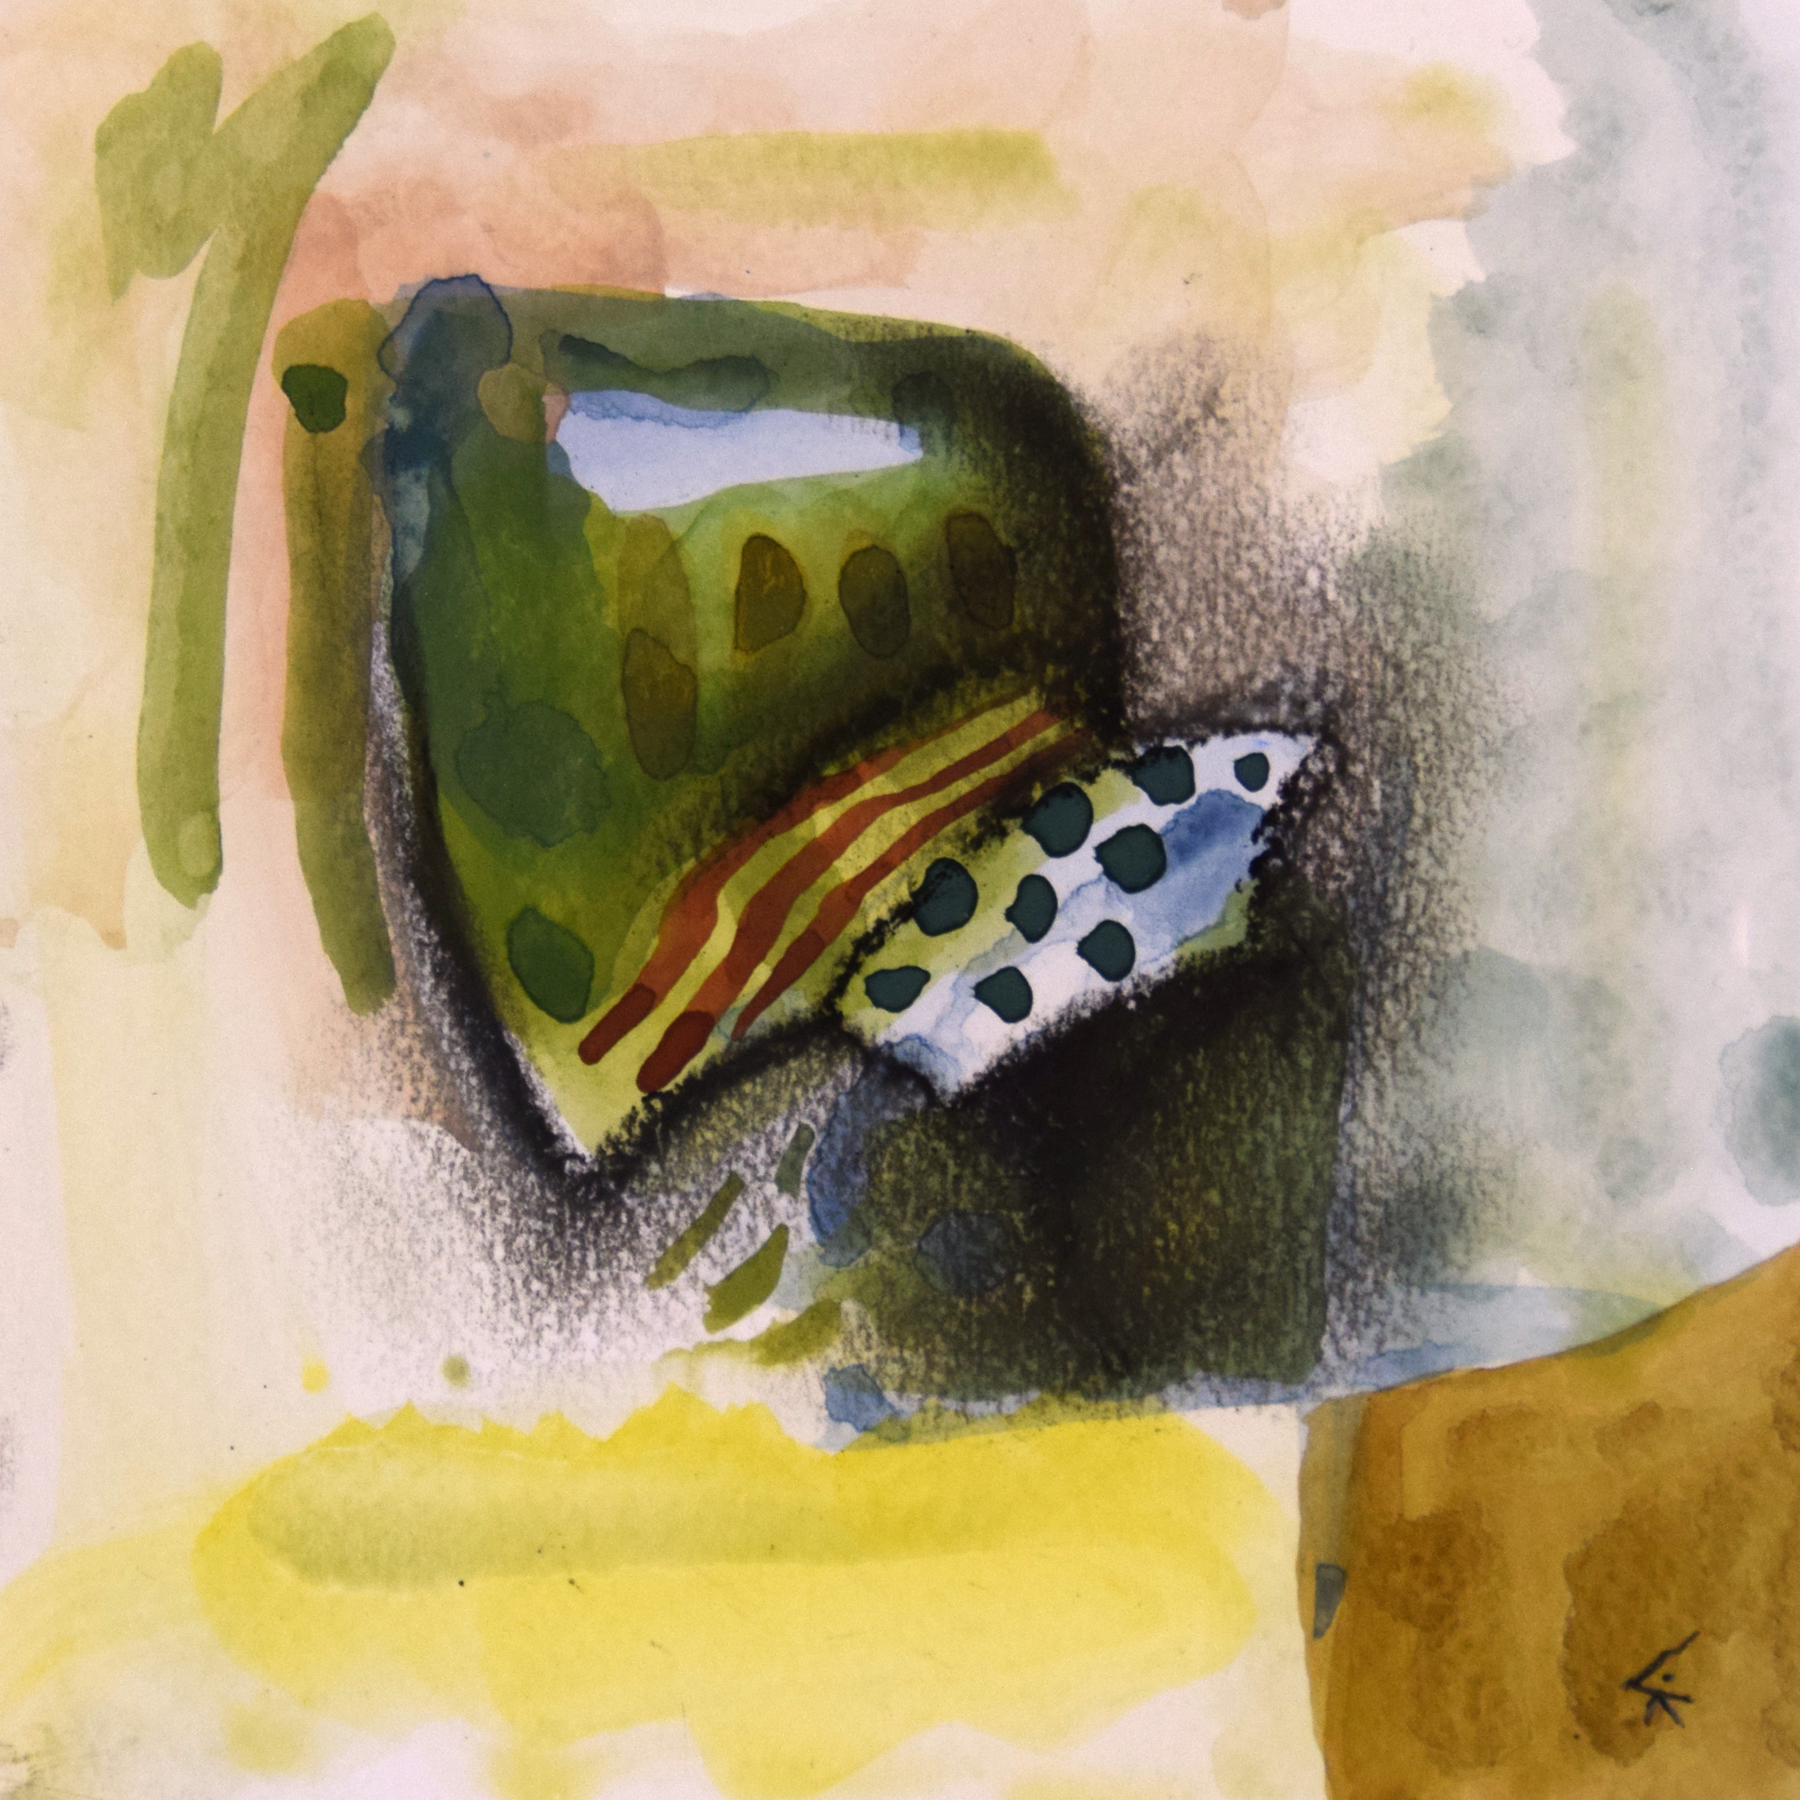
![fredom-of-speech[1]](https://www.carlasonheim.com/wp-content/uploads/2016/03/fredom-of-speech1.jpg)

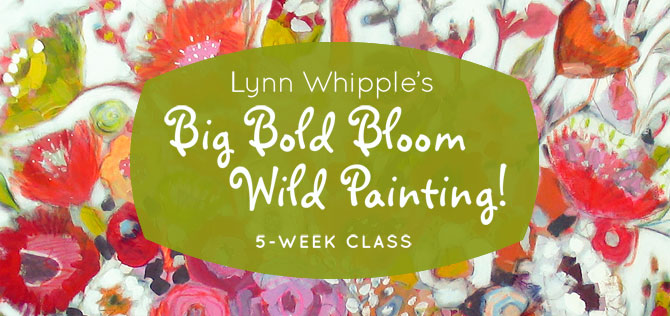
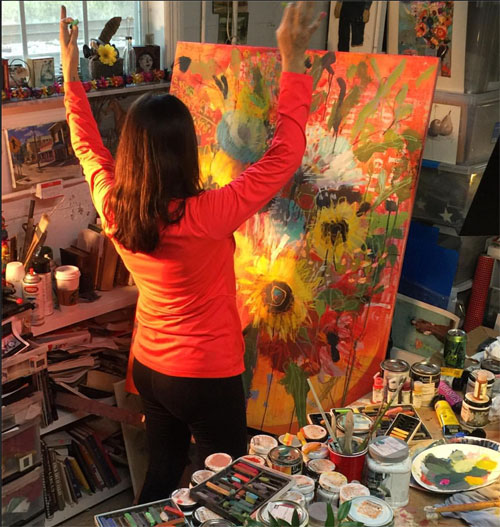
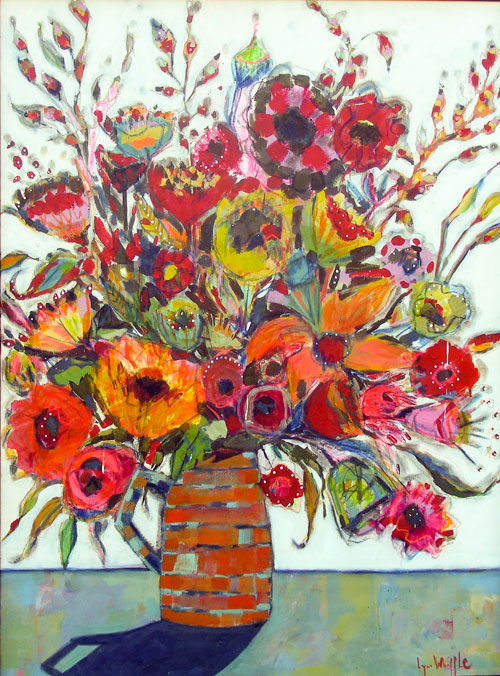
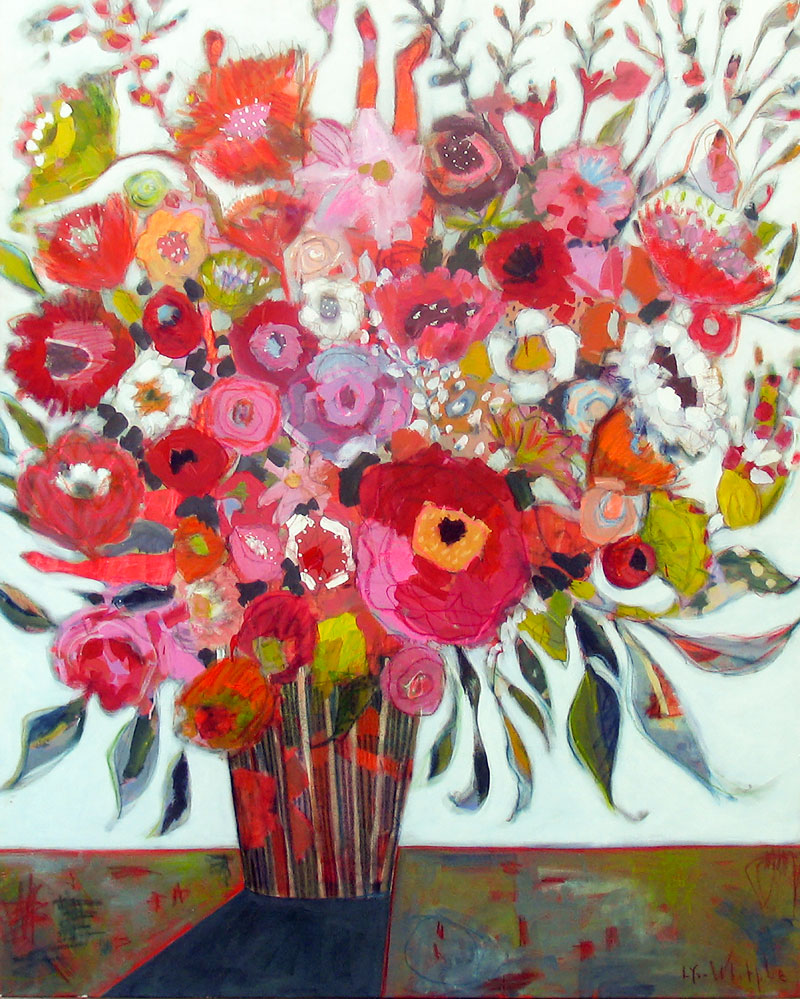
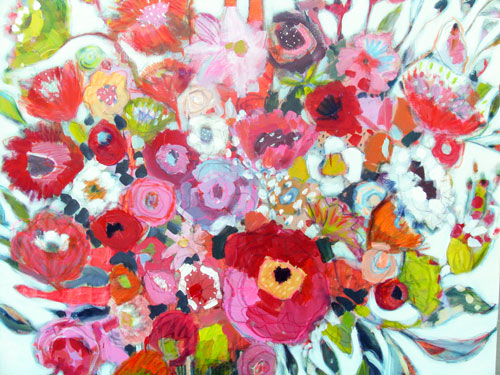
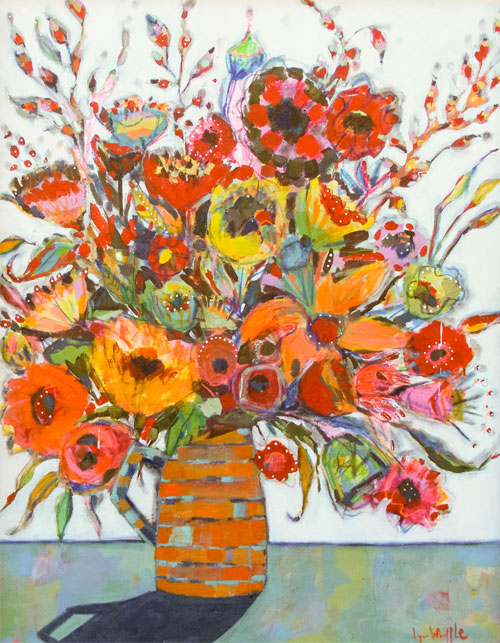
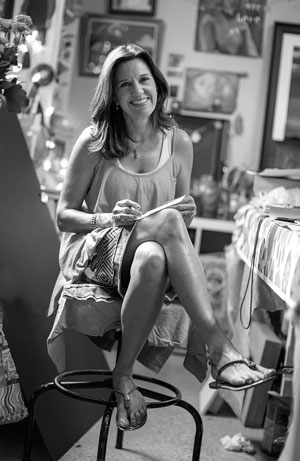
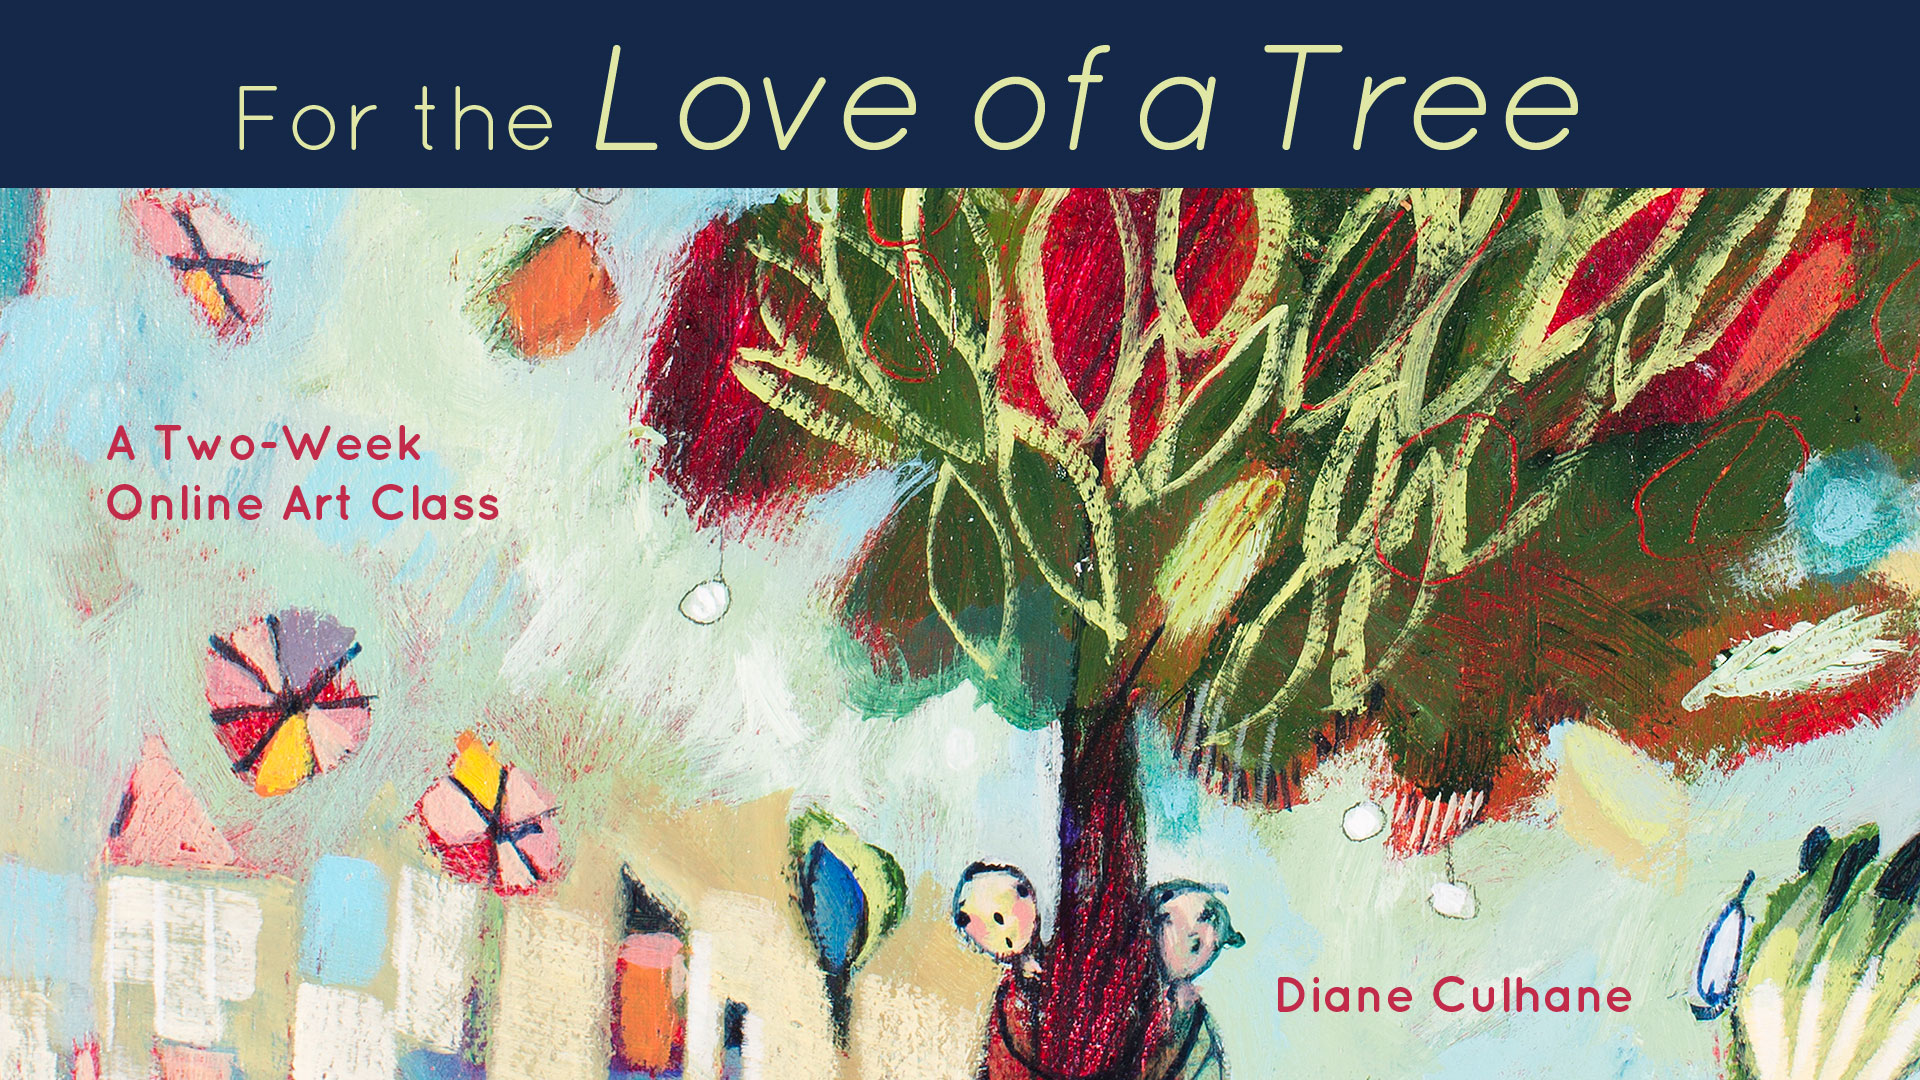
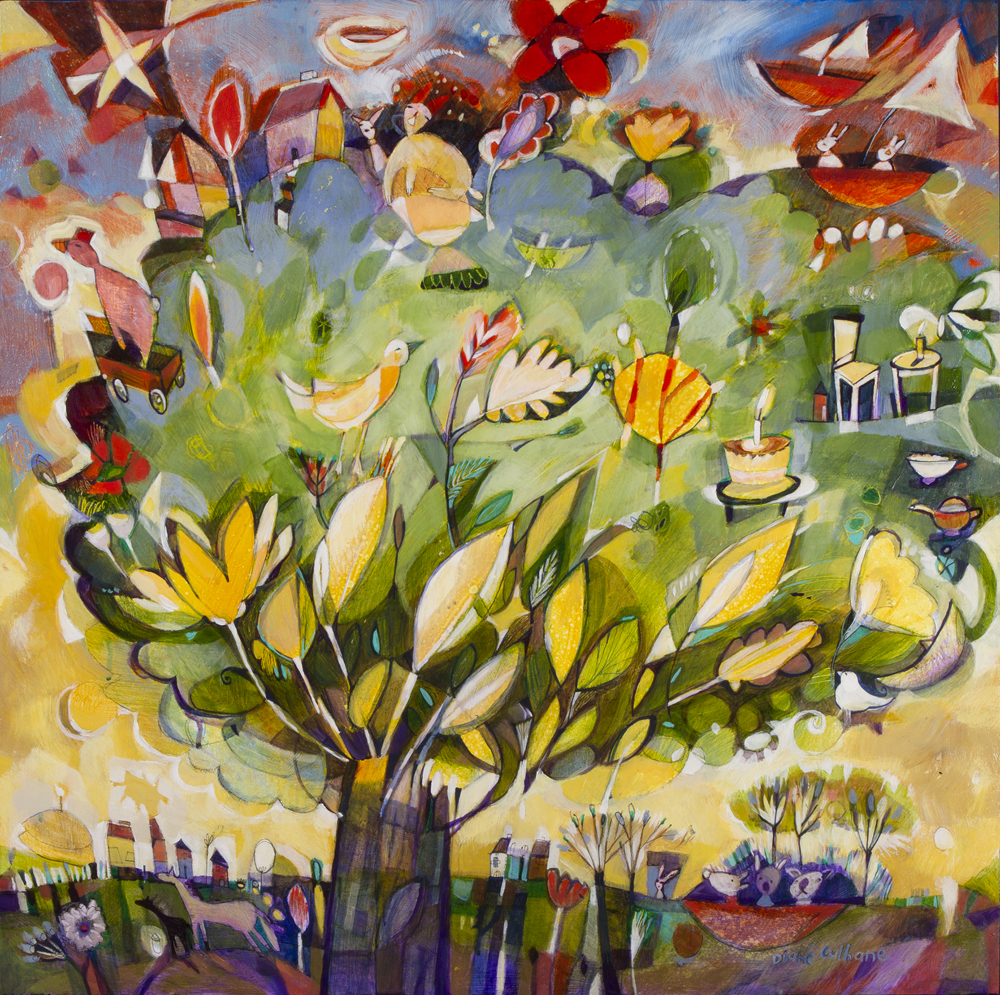
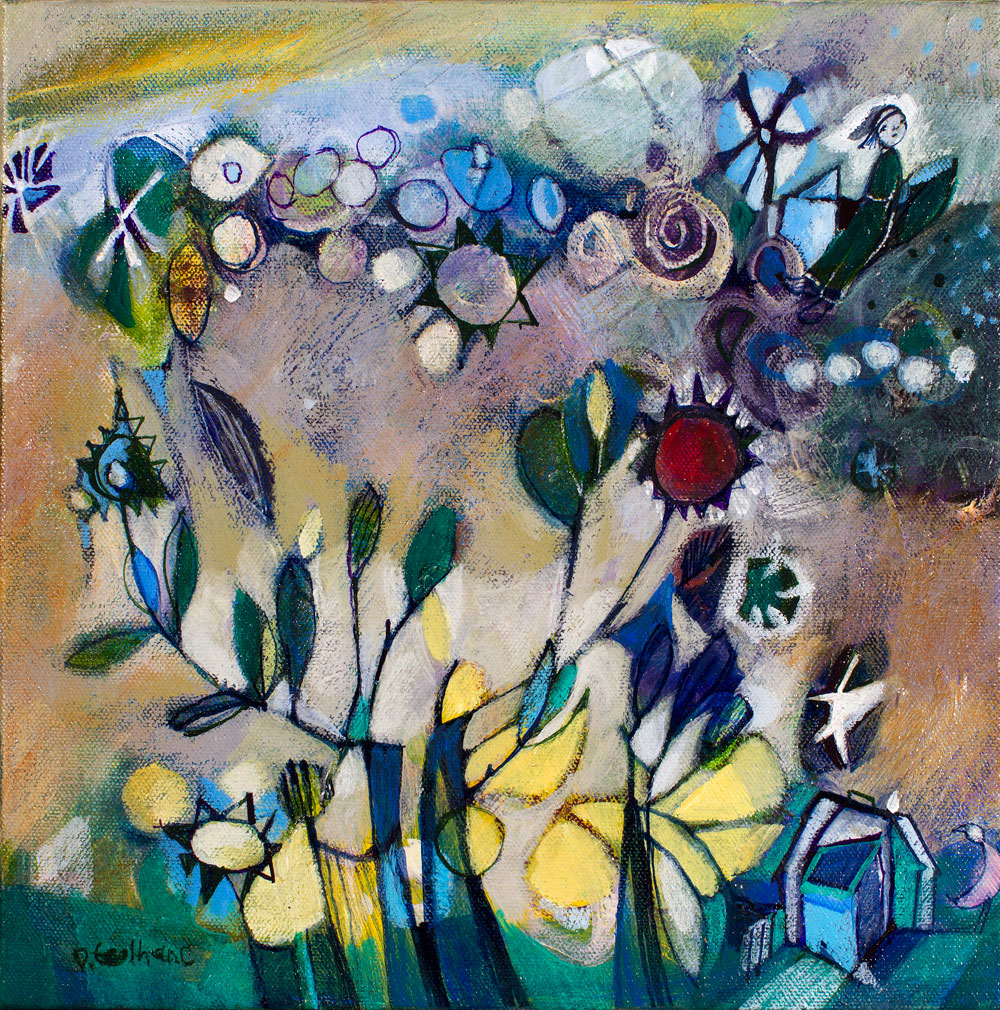
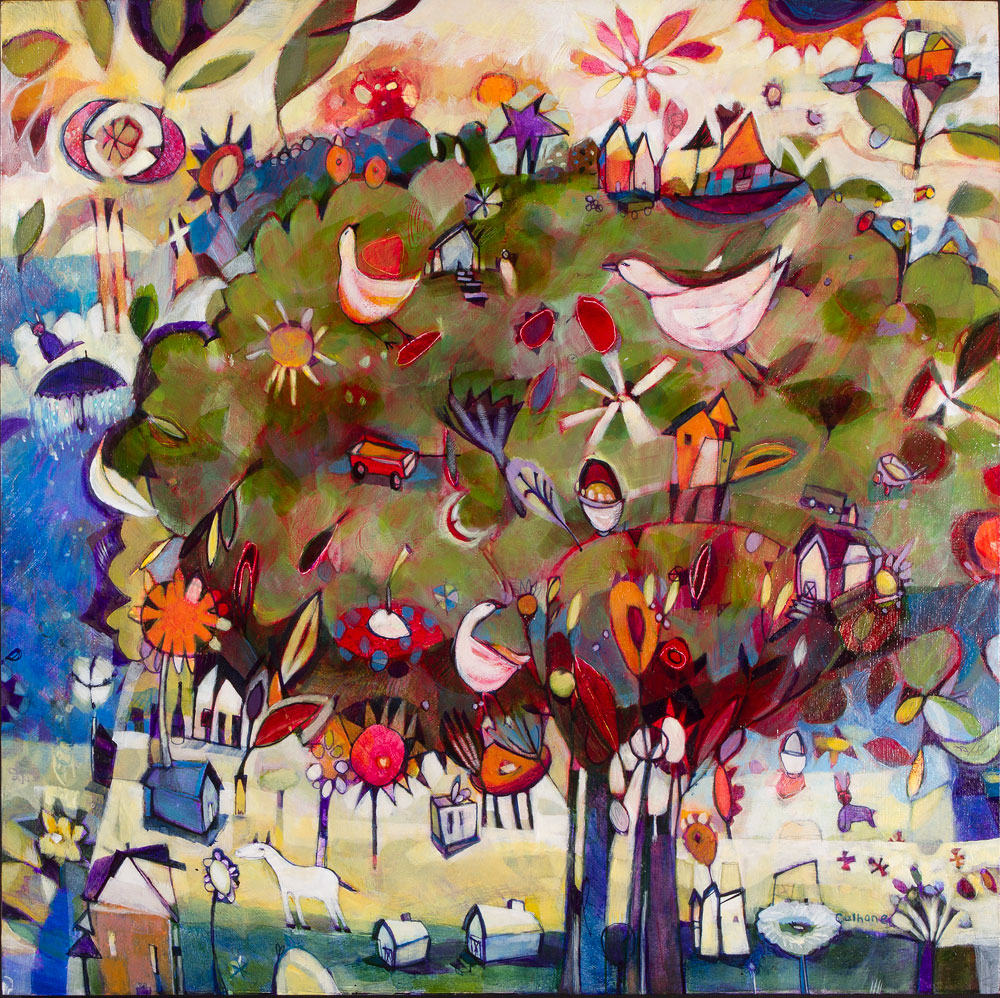
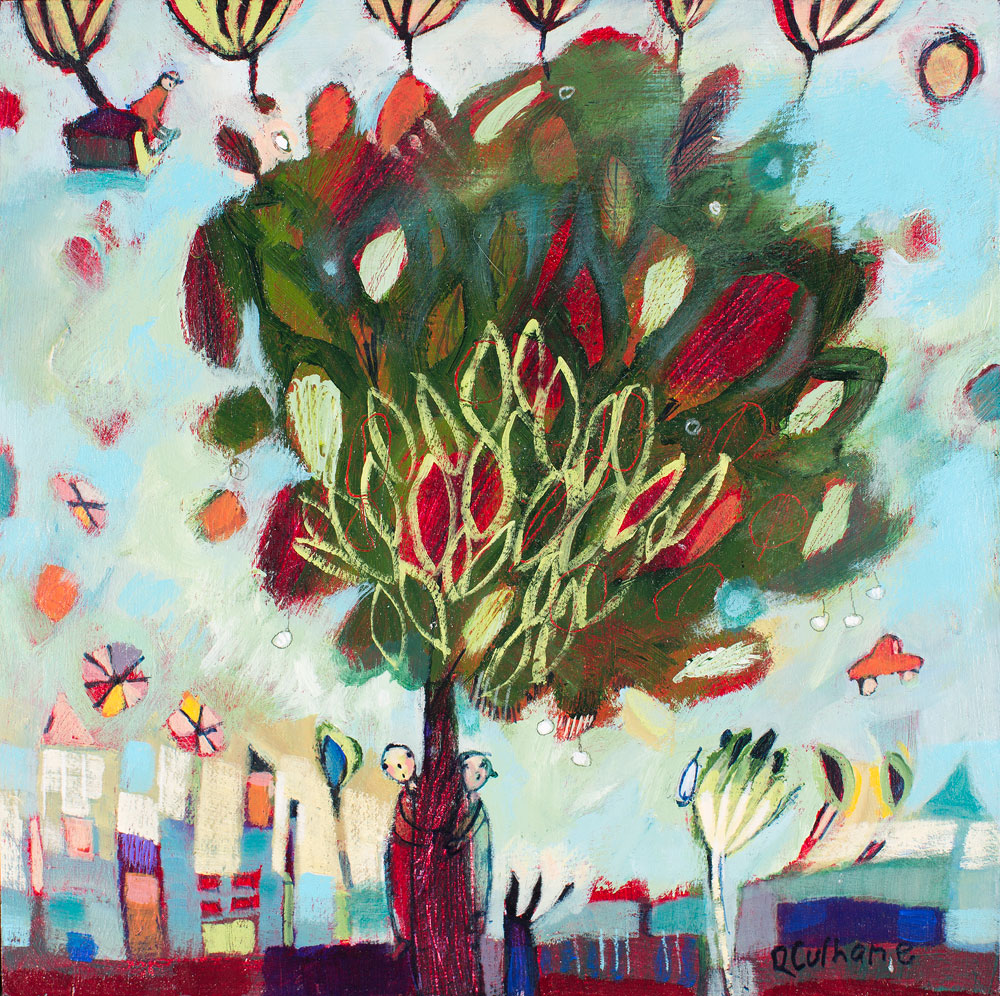
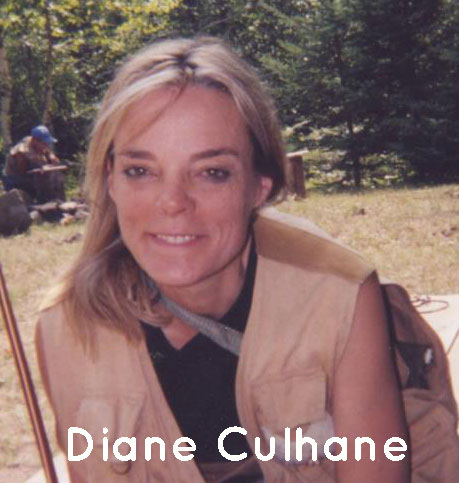 Diane Culhane is a professional artist and art educator who lives West Seattle in a 1910 home, and works out of her studio in Ballard Building C. She received her BFA from the University of Utah and Master’s Degree from Seattle University.
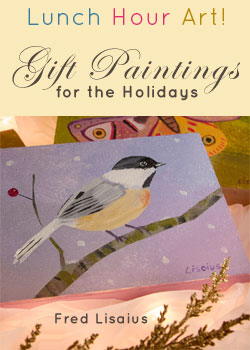
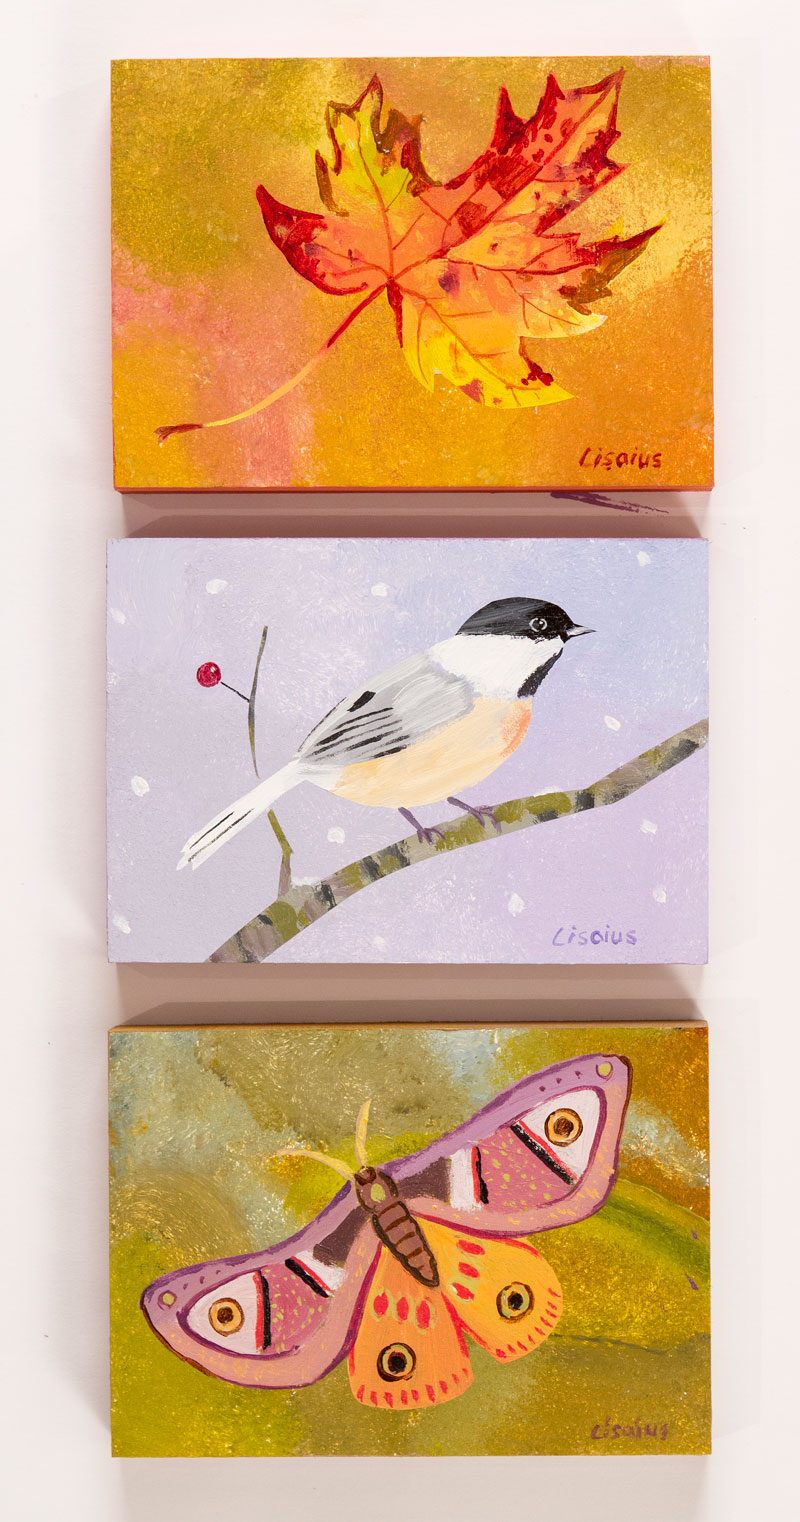
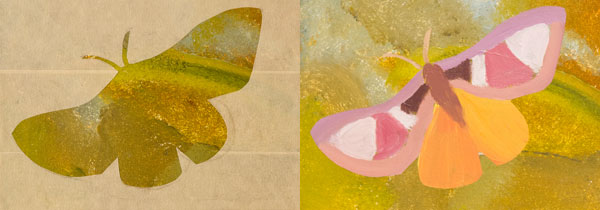
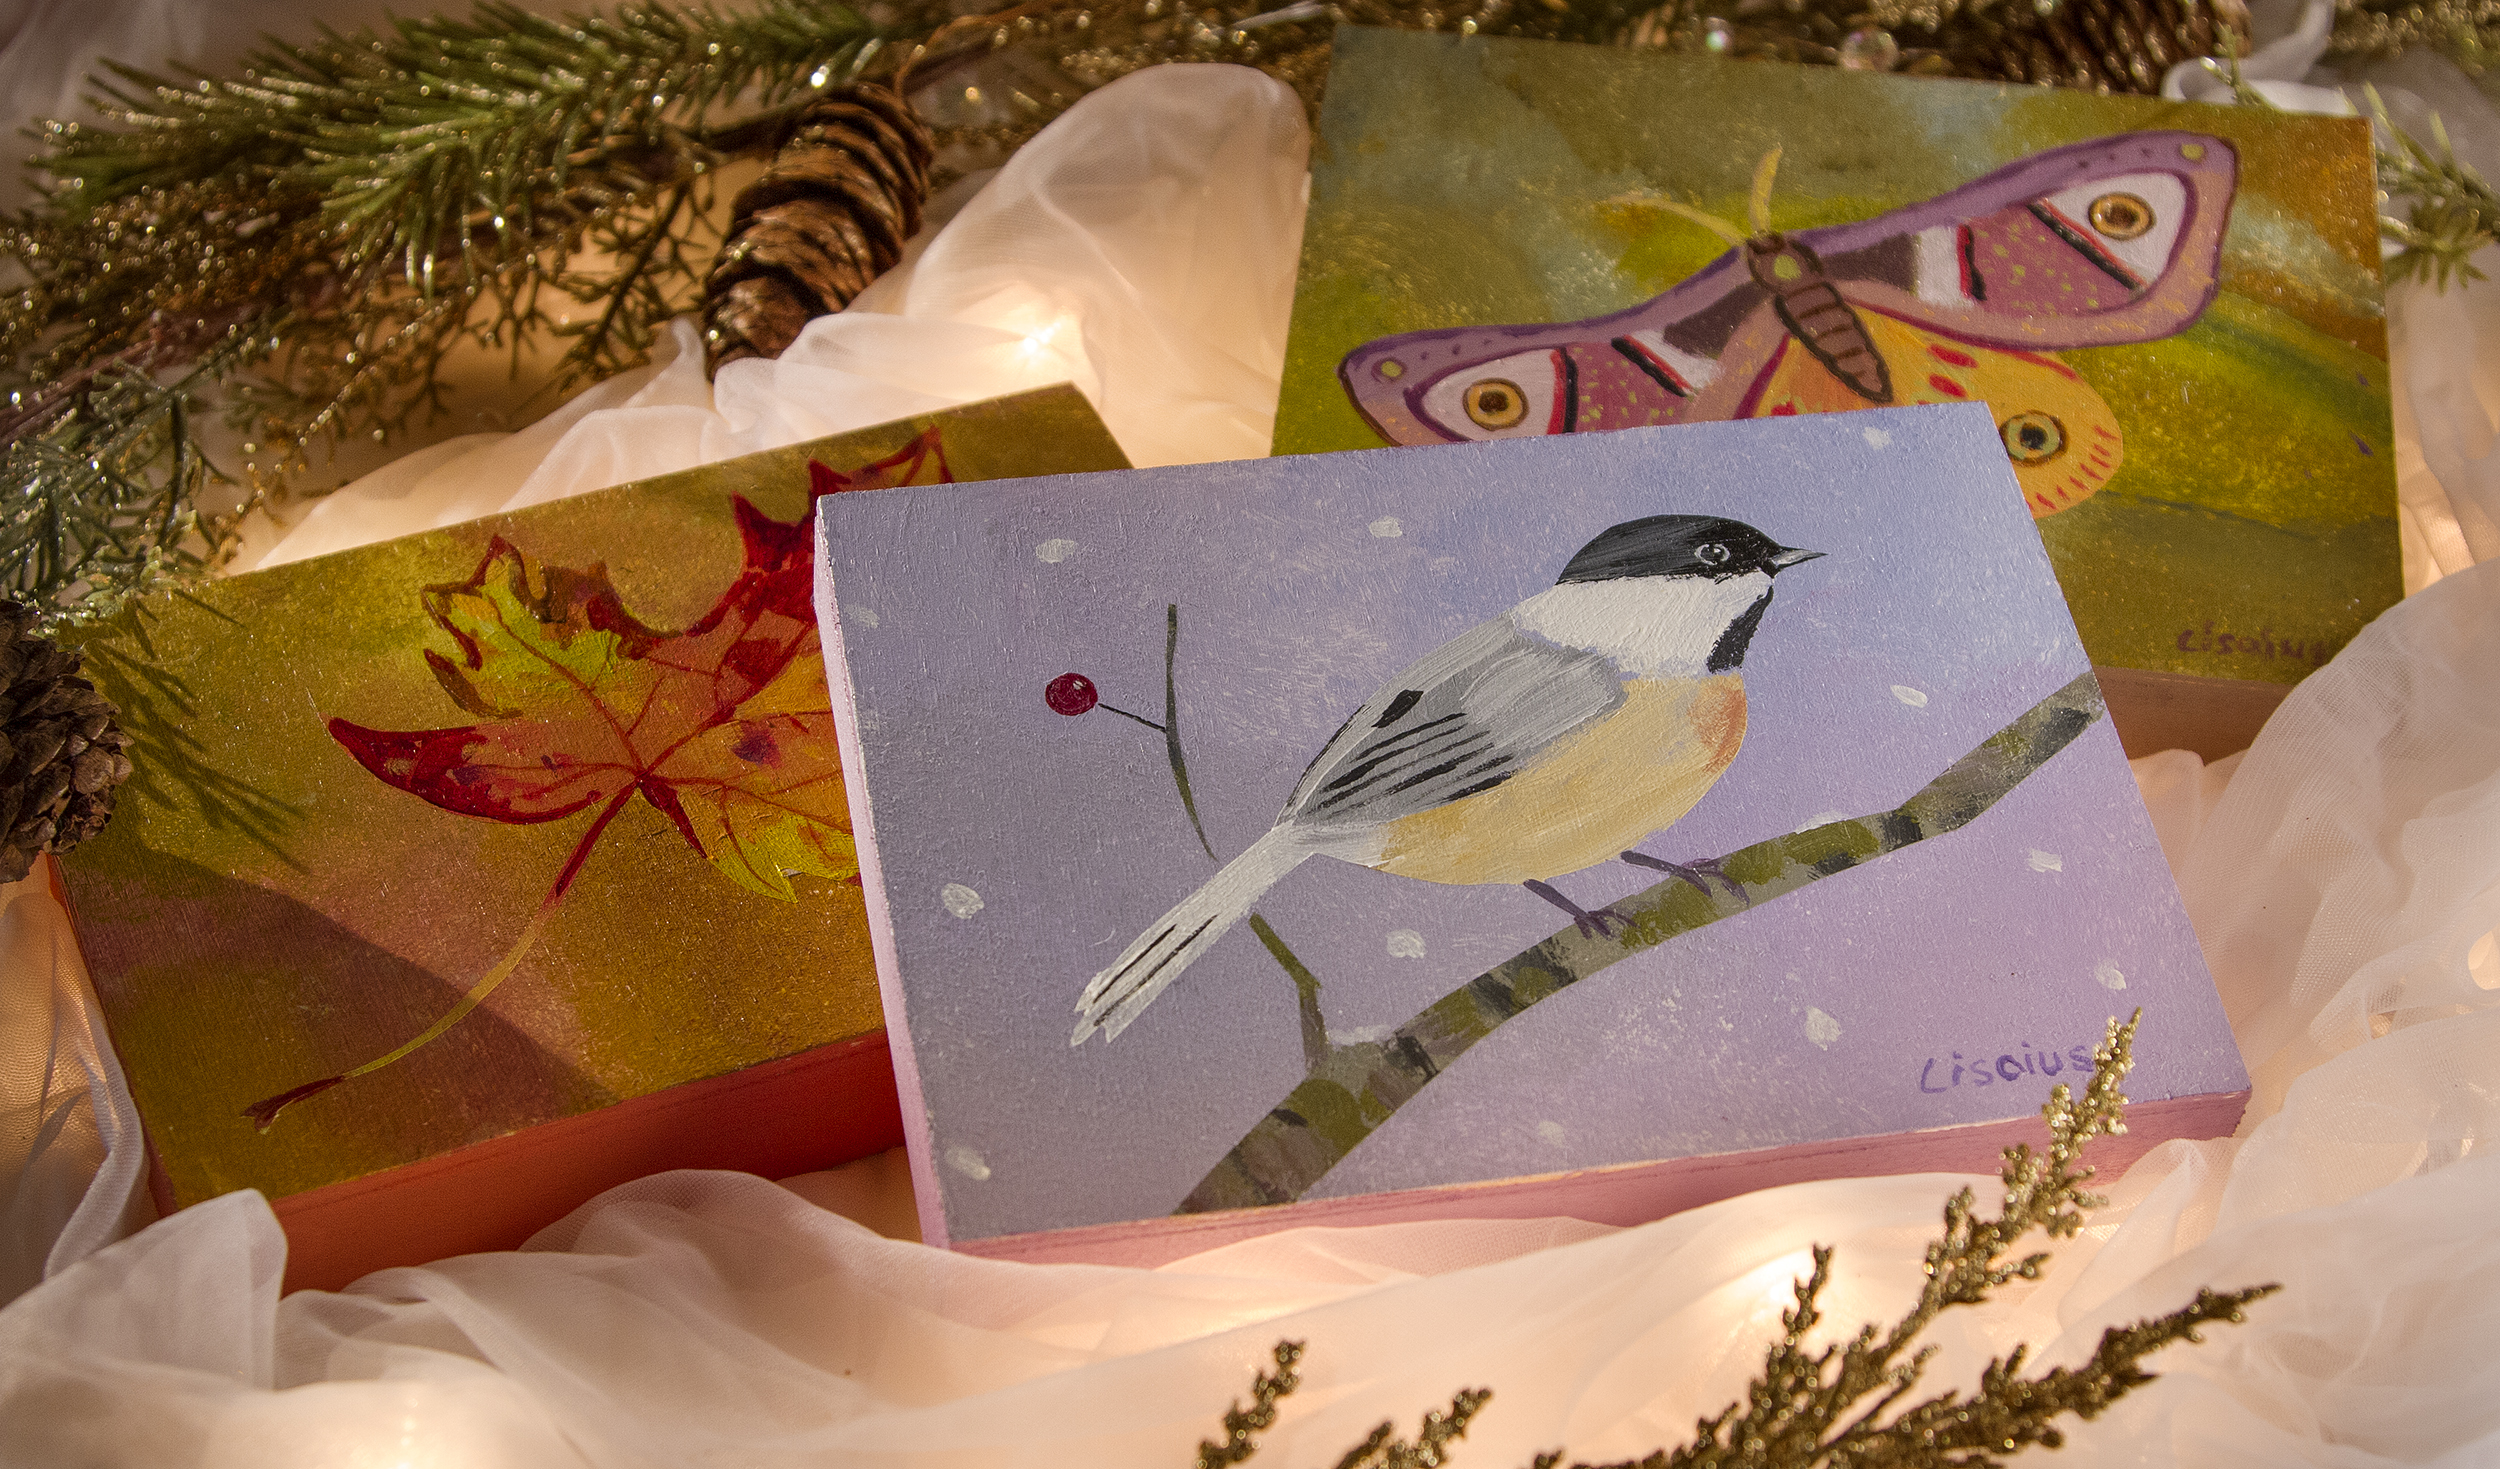
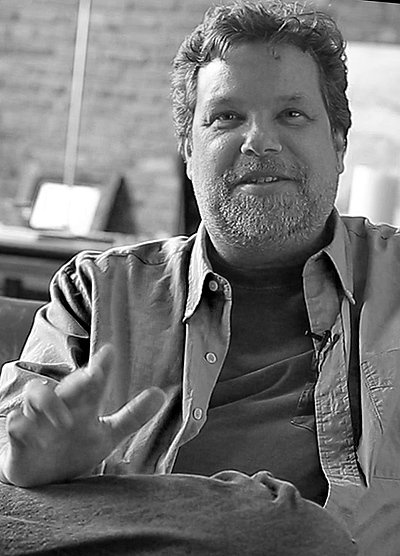
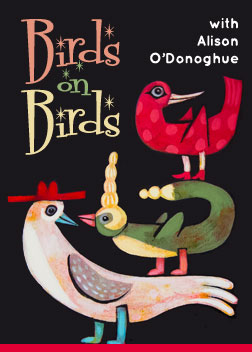
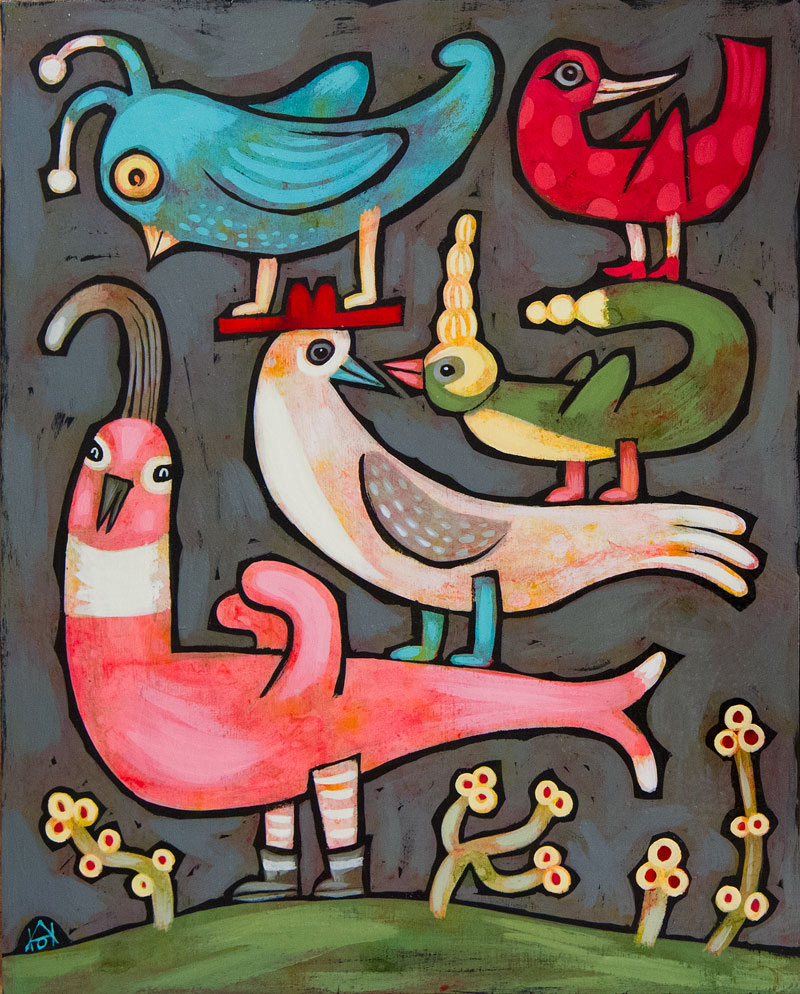
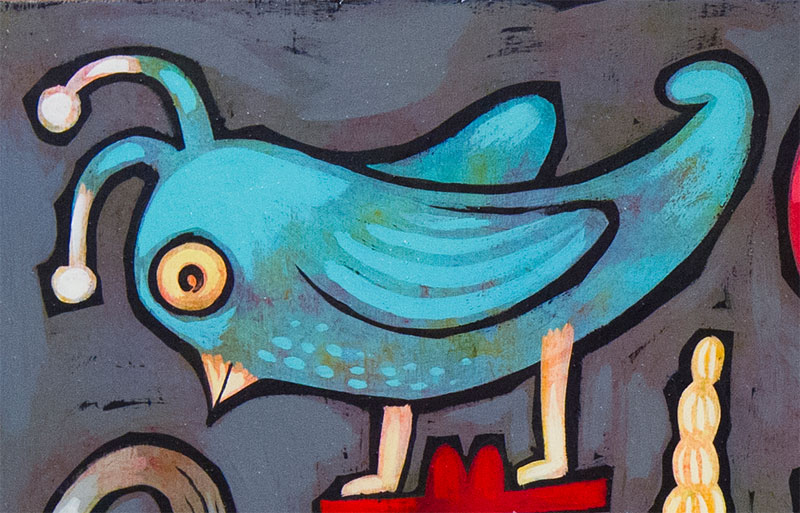
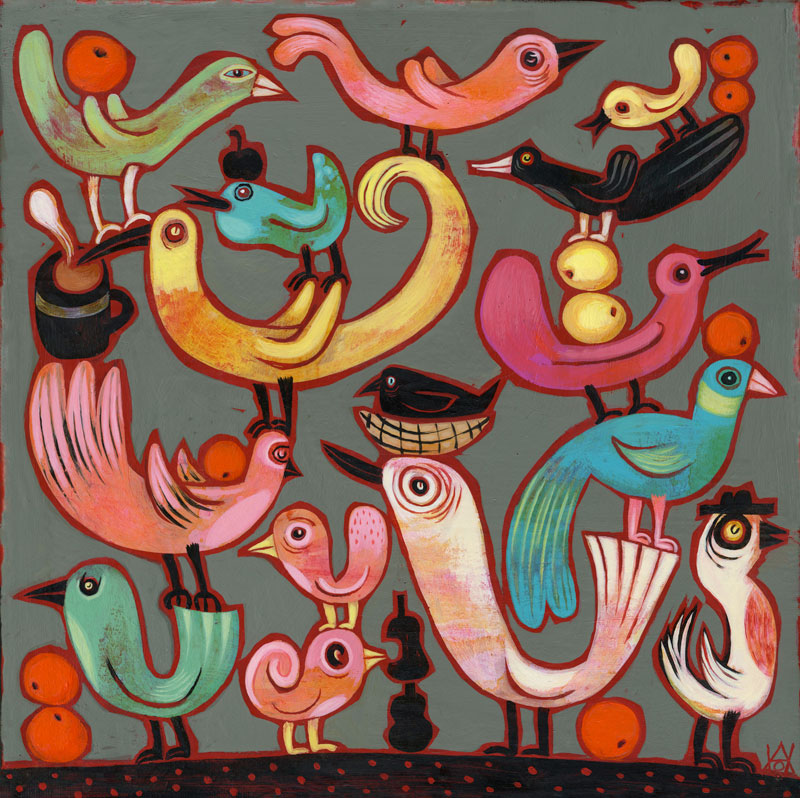
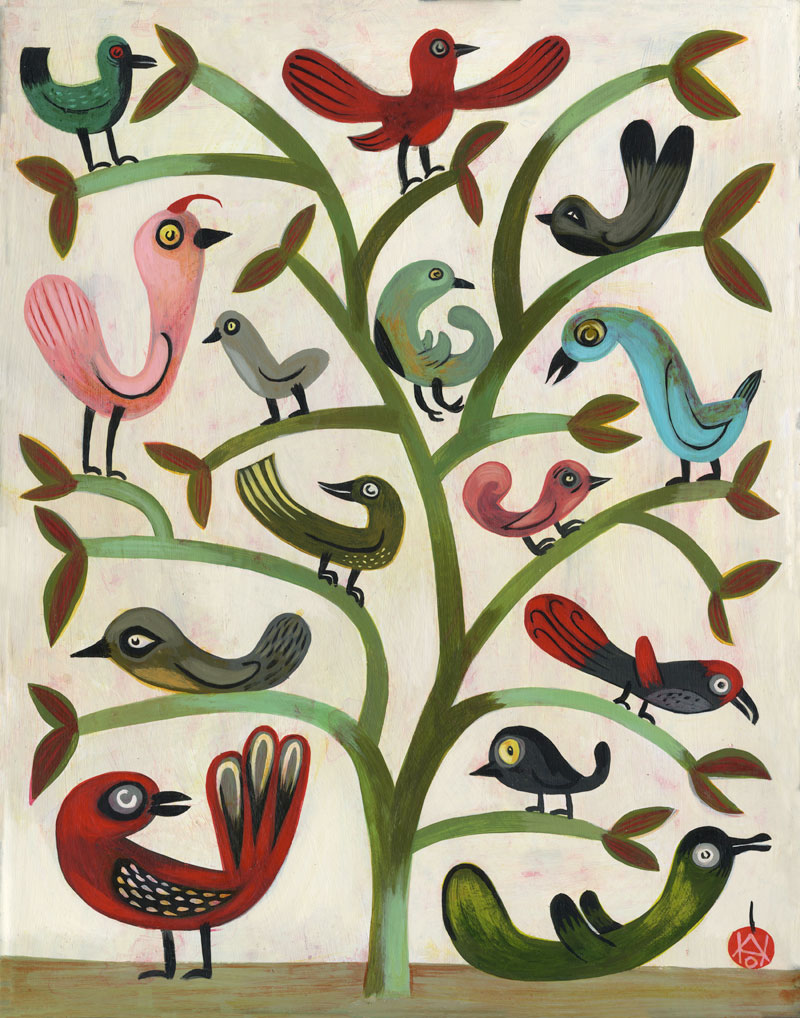
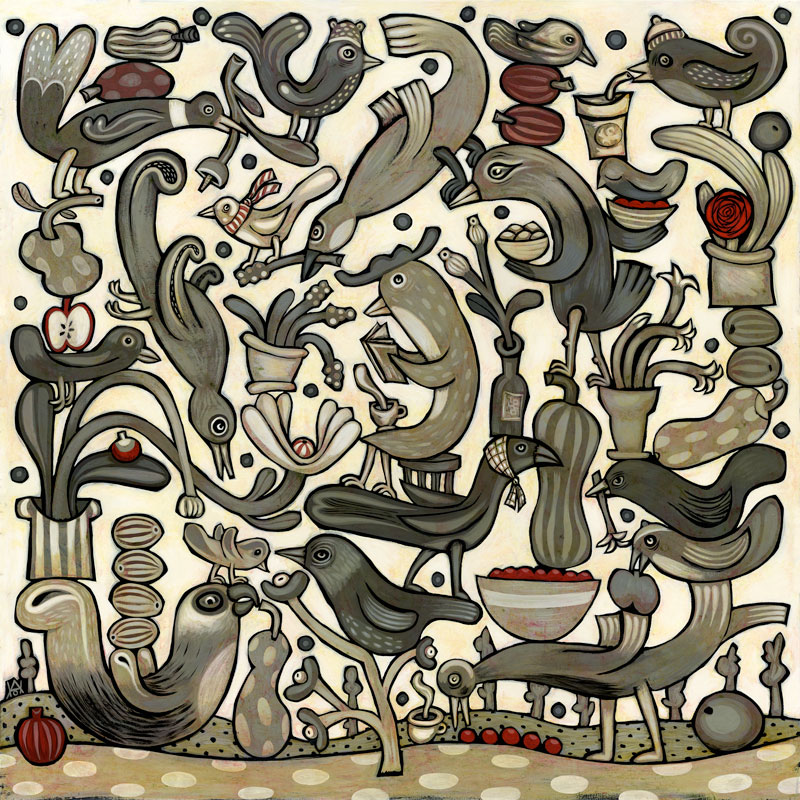
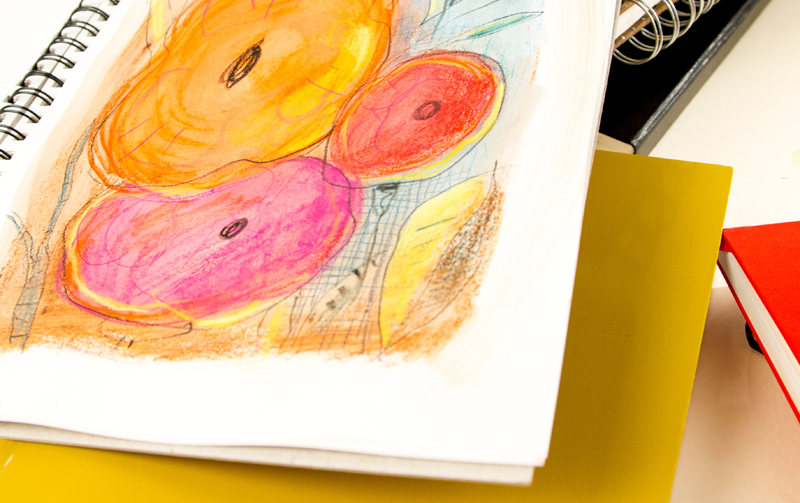
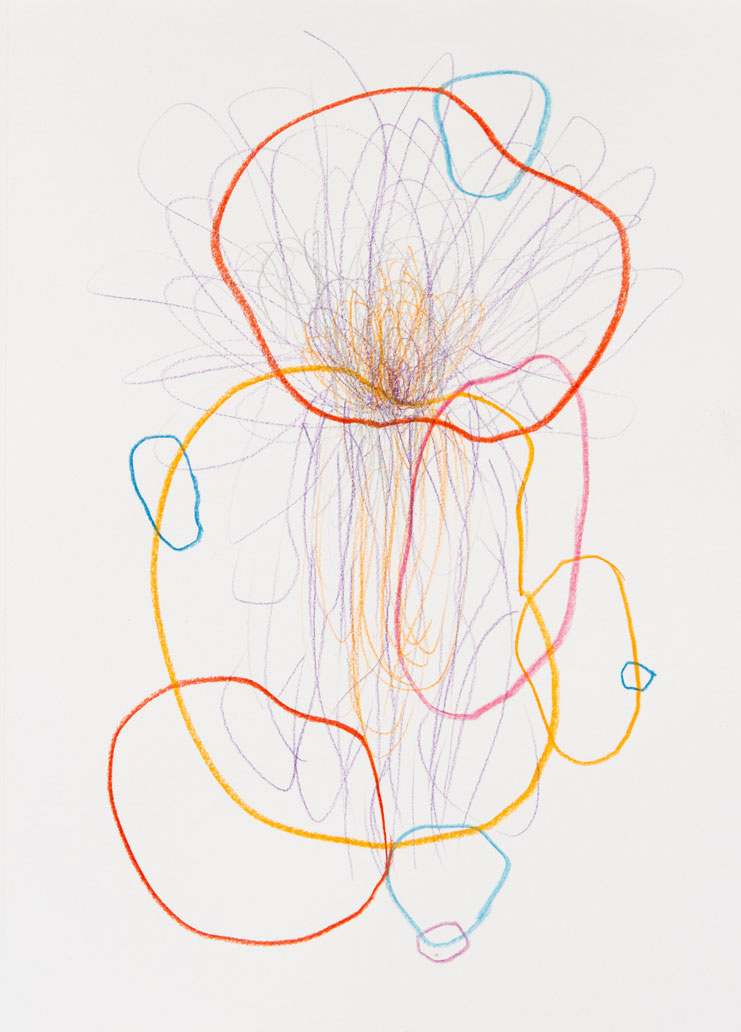
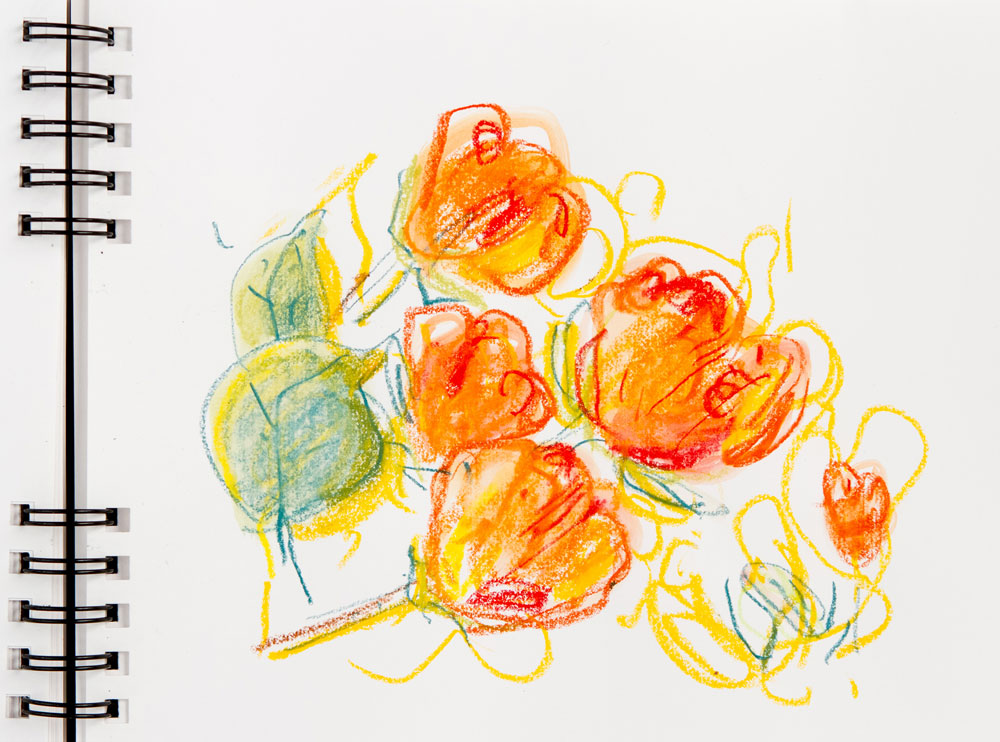


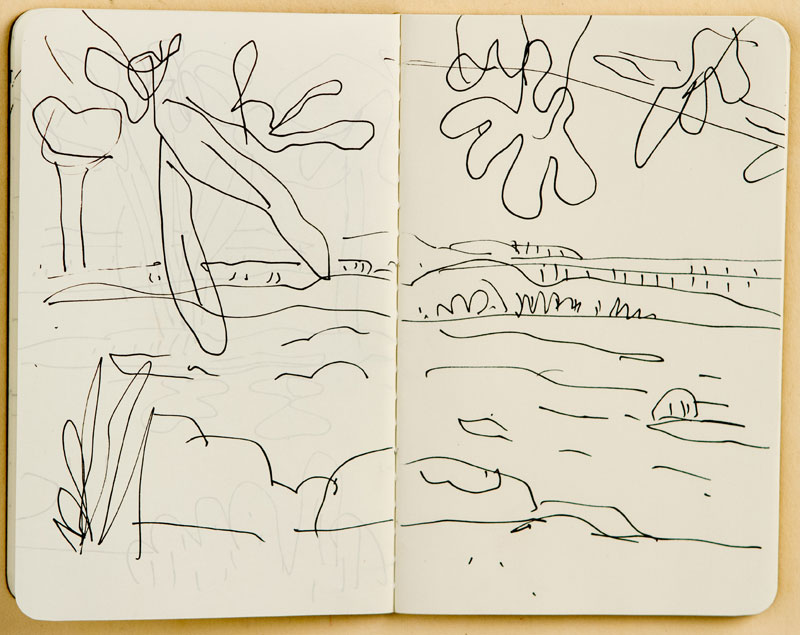
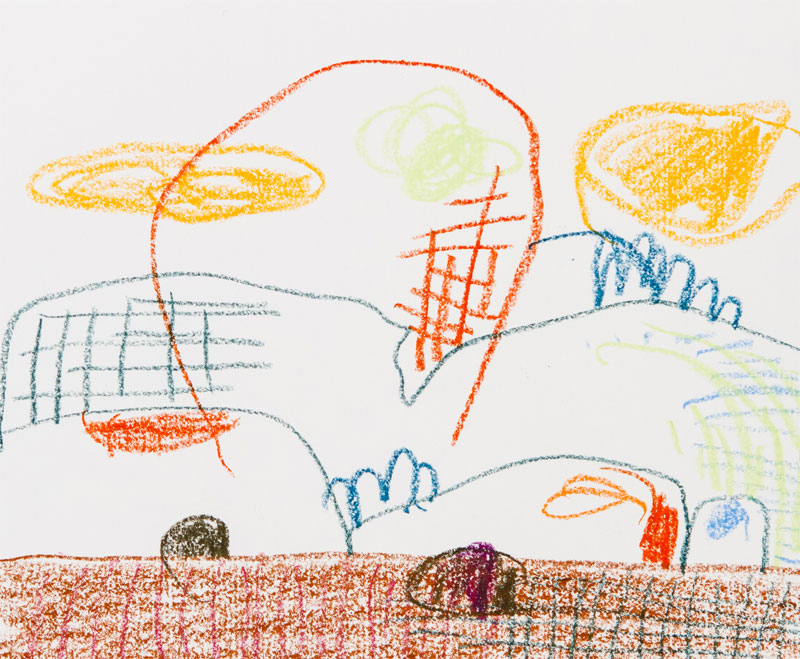

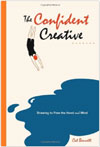

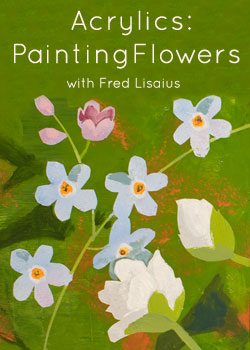
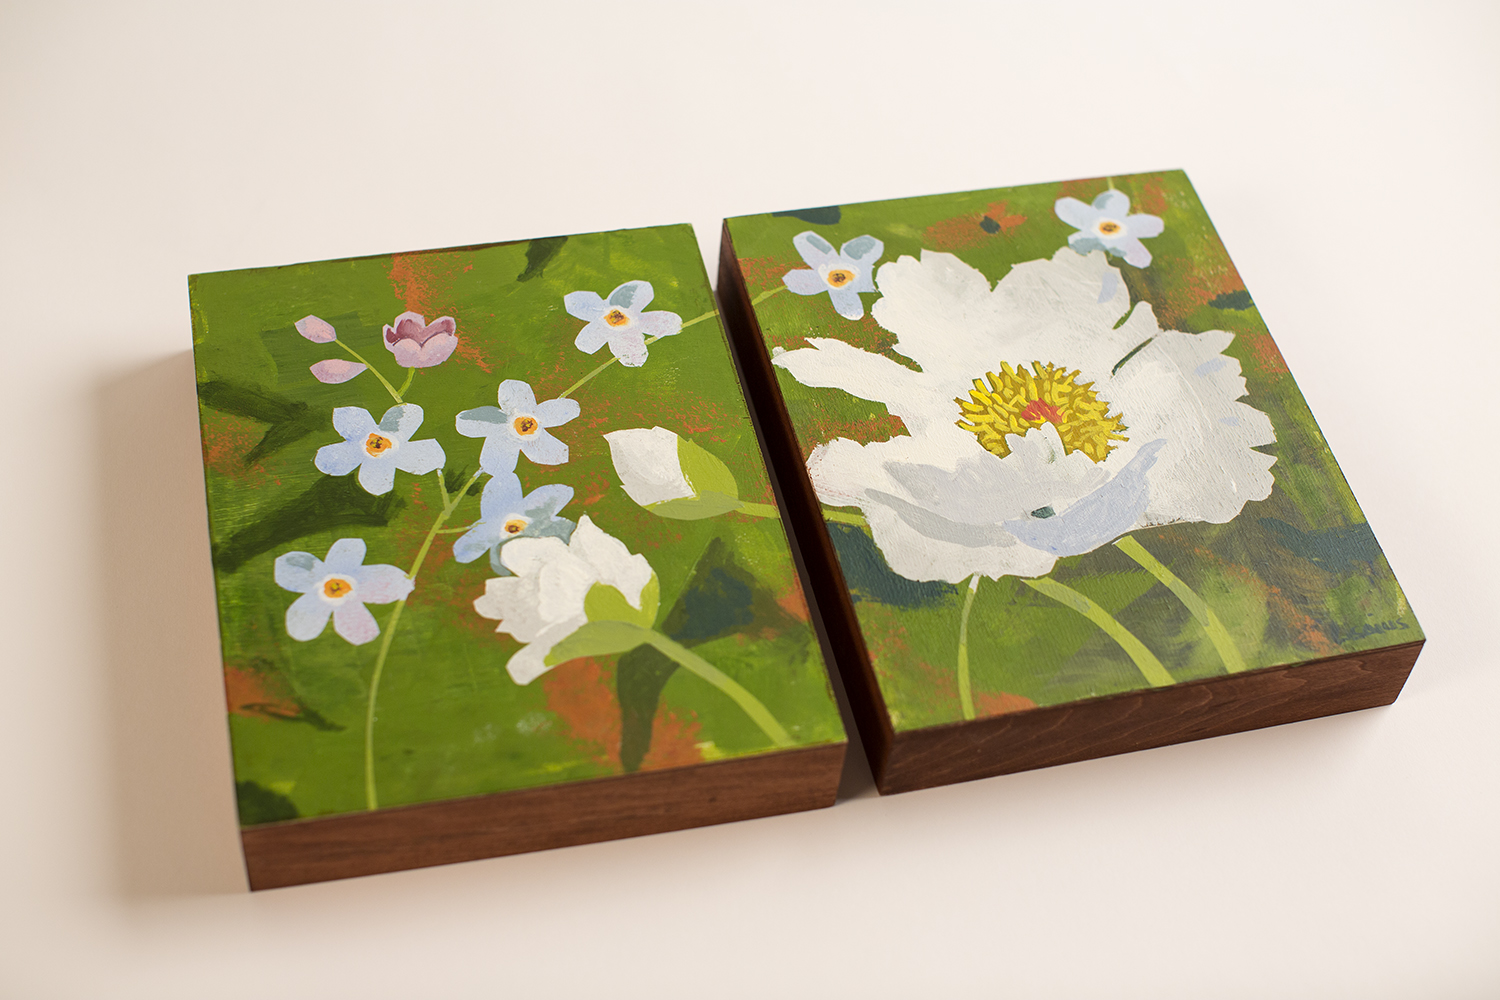
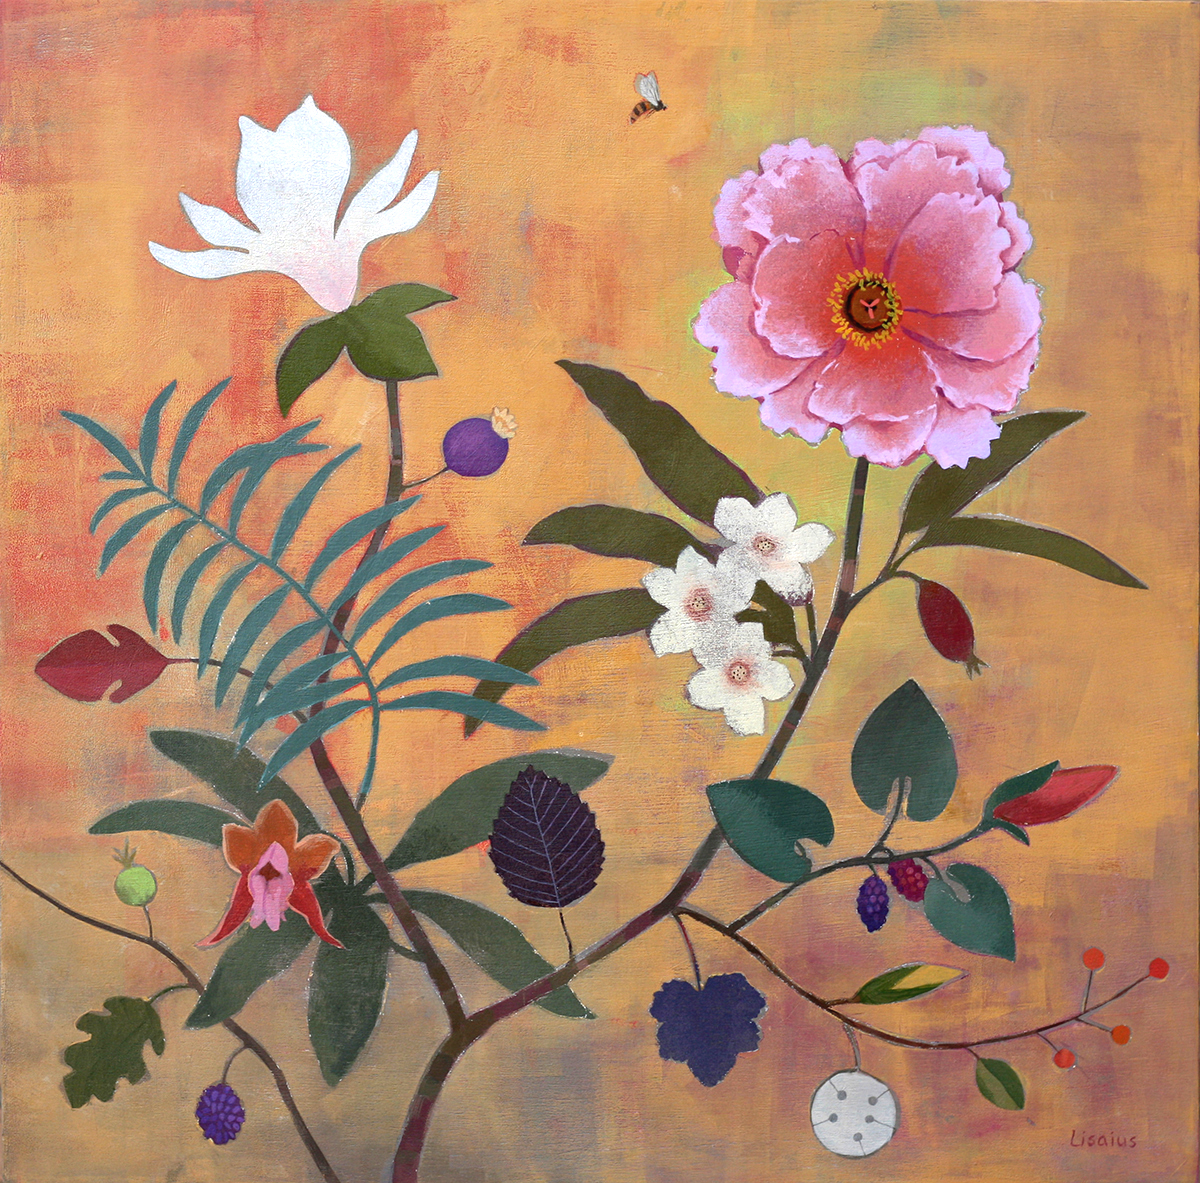
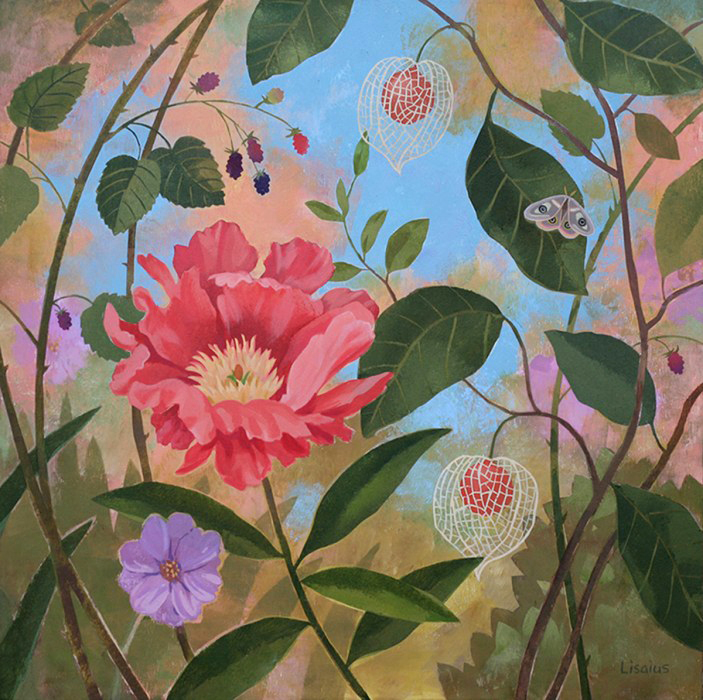
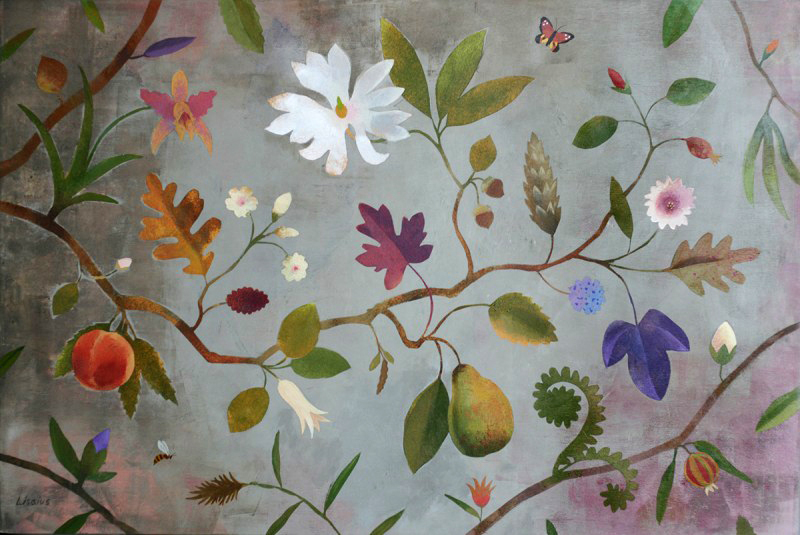
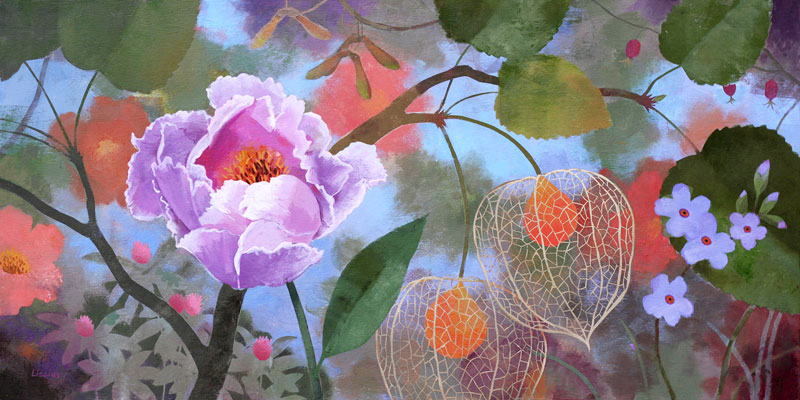
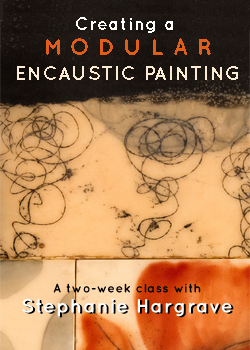
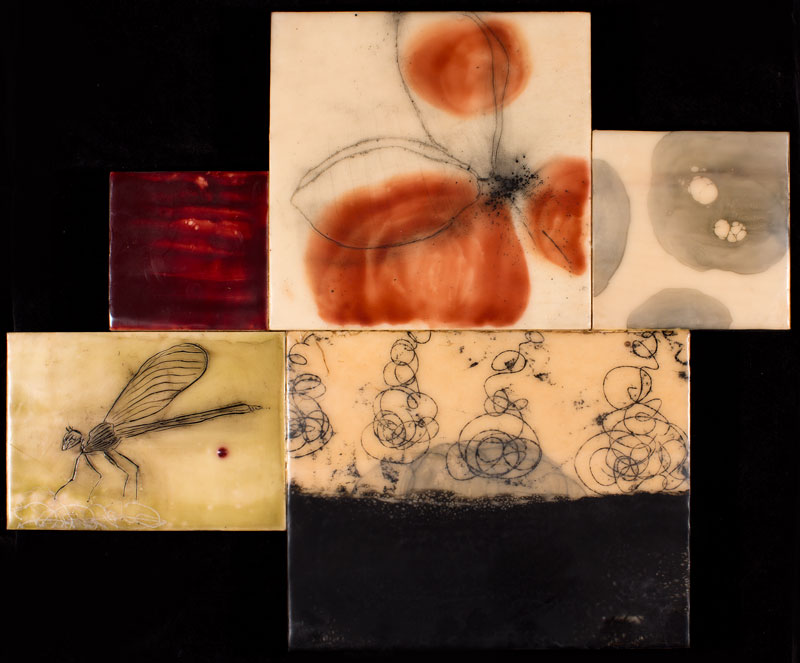
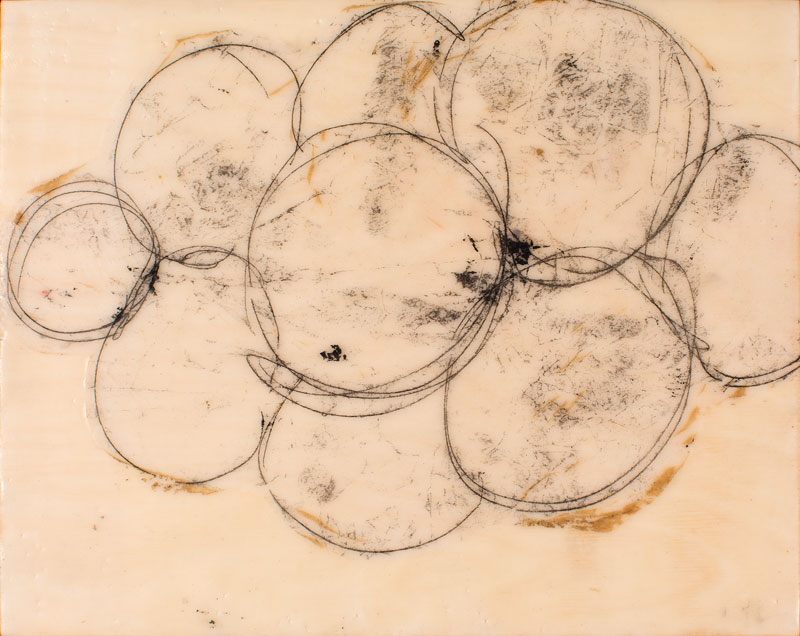
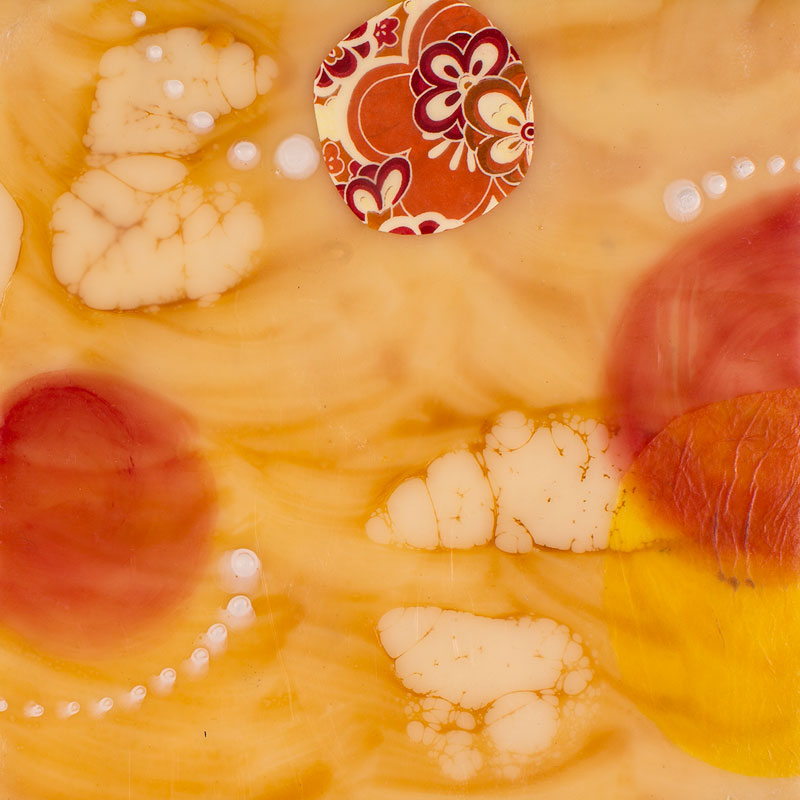
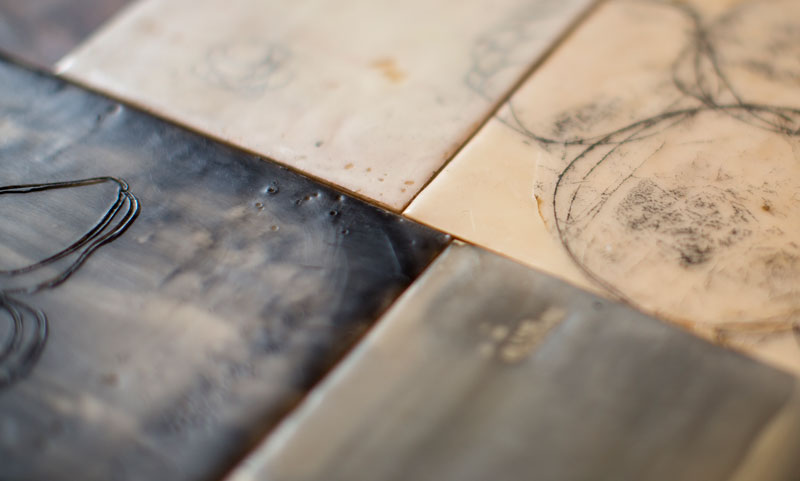

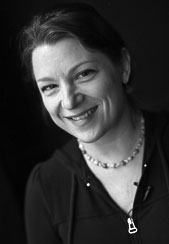
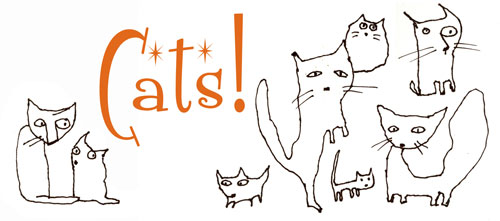

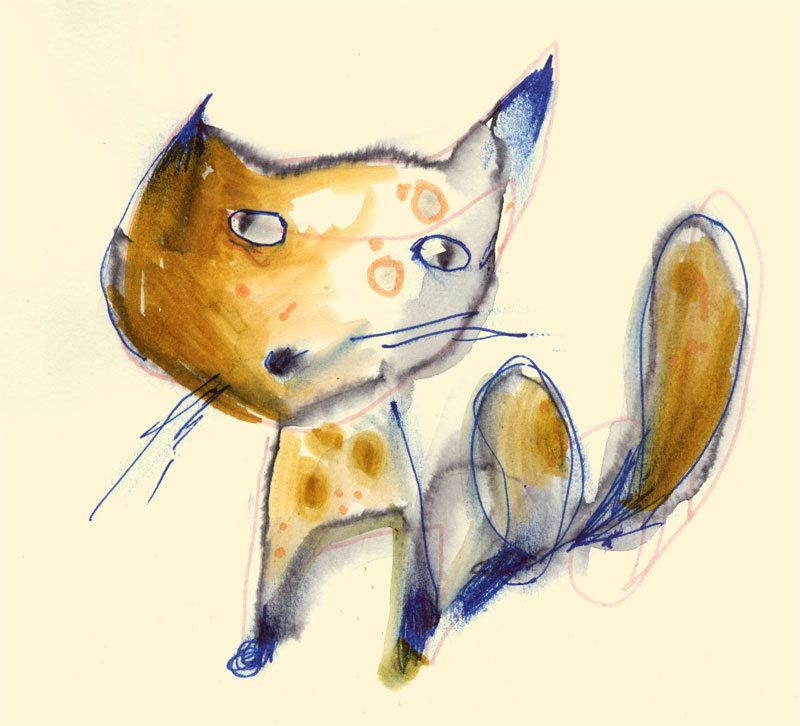

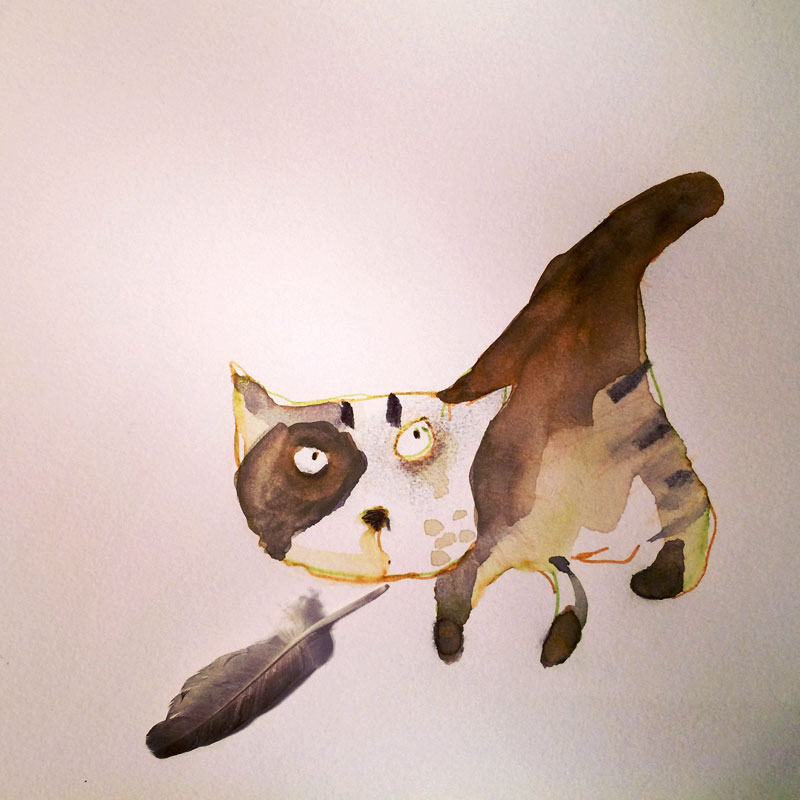
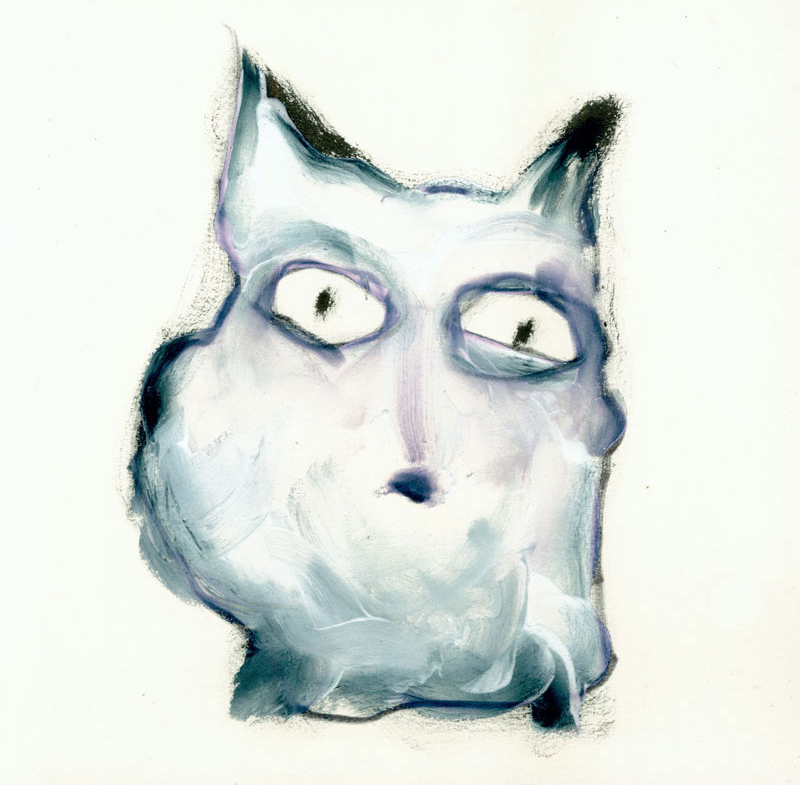
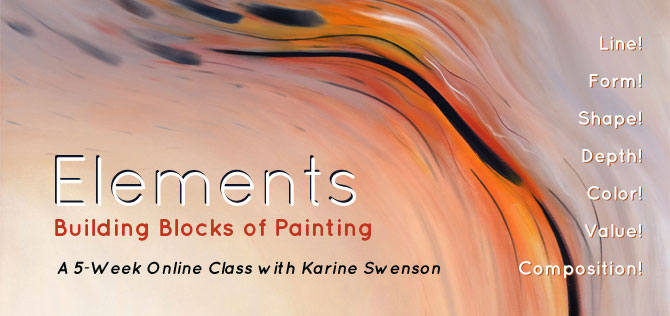
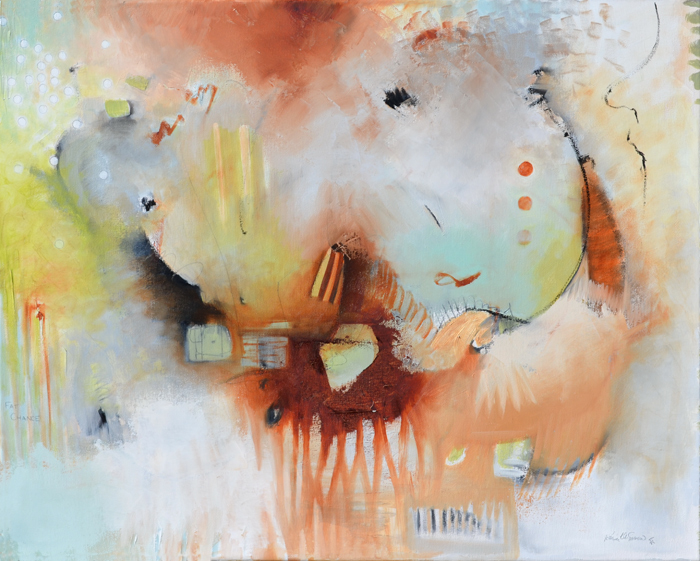
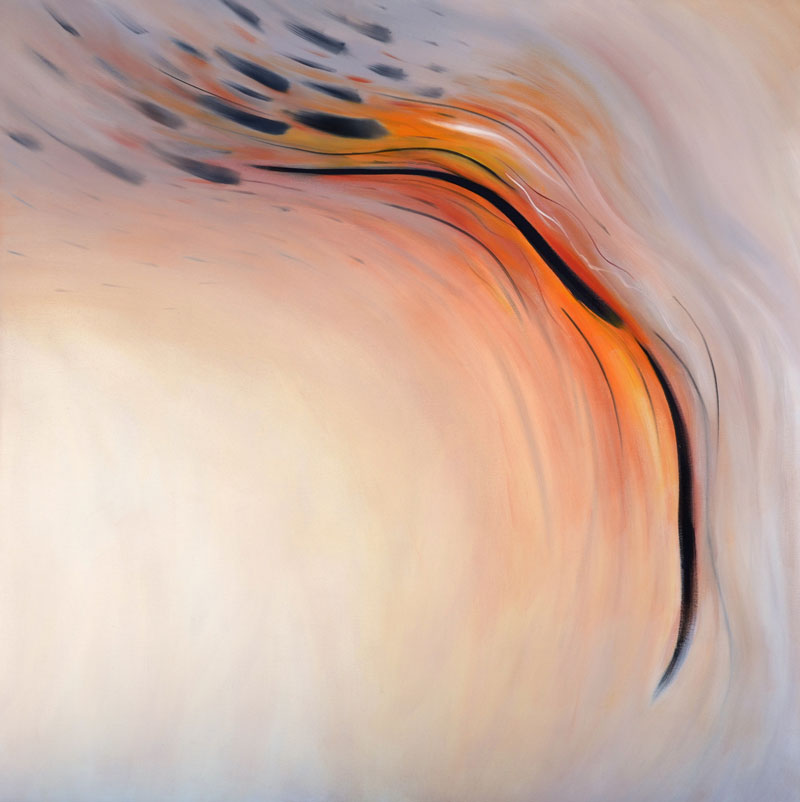

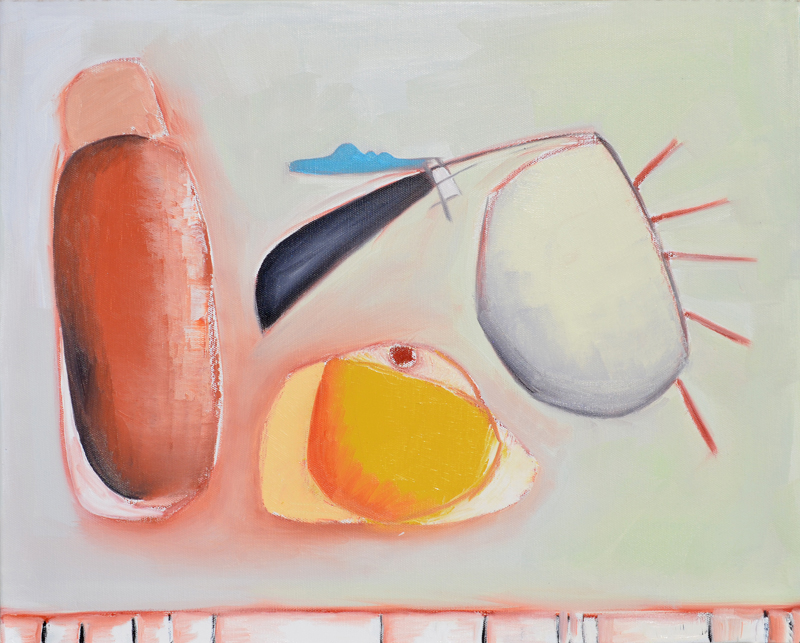
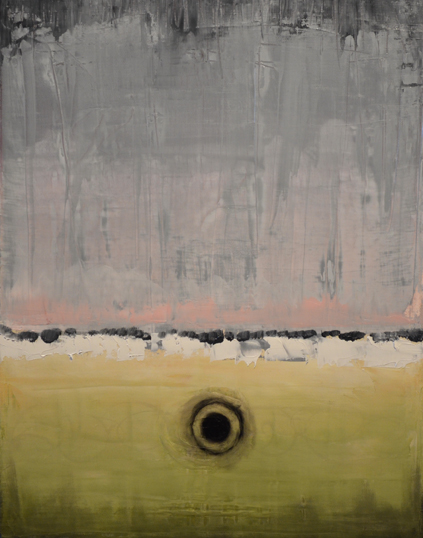
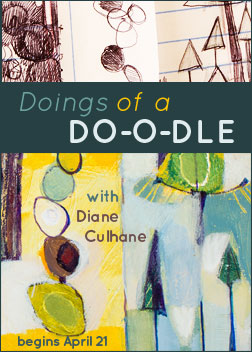
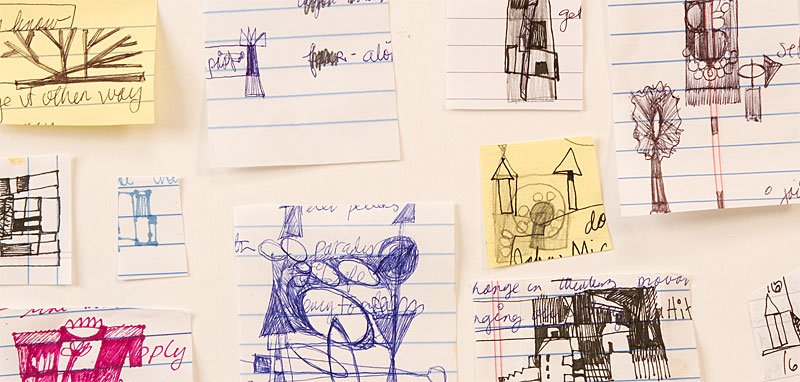
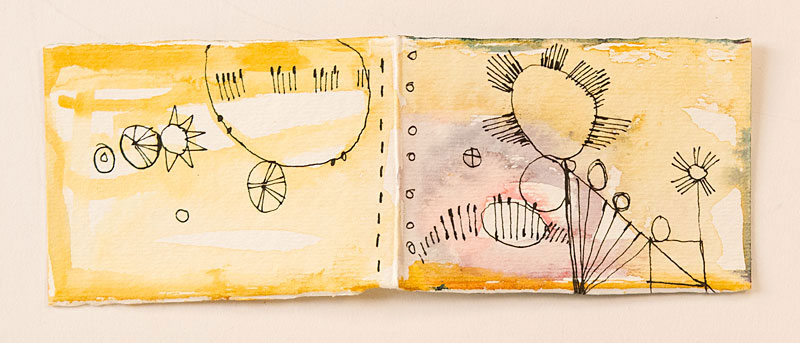
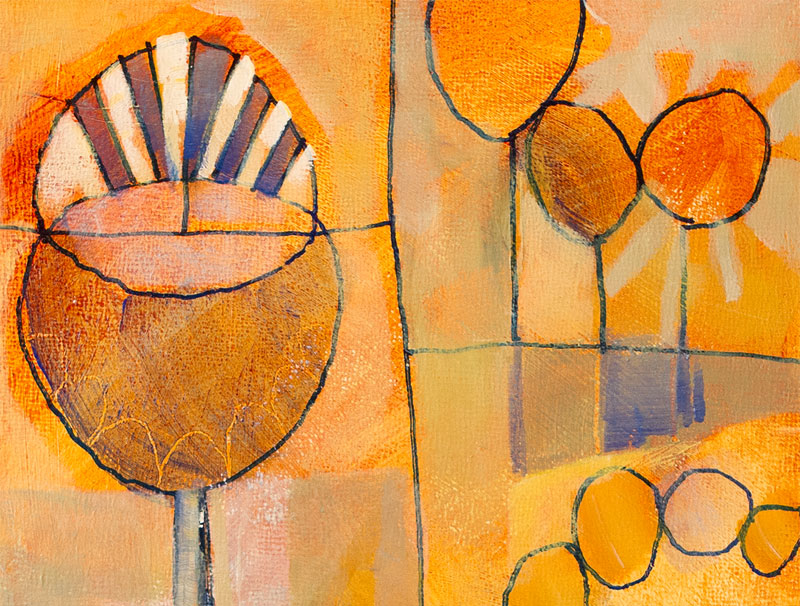
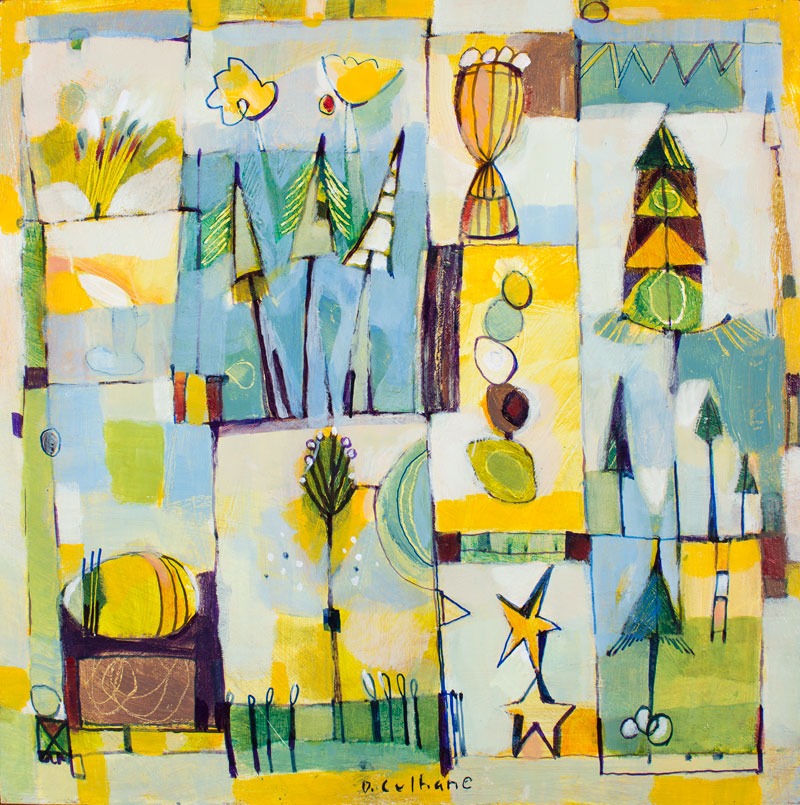
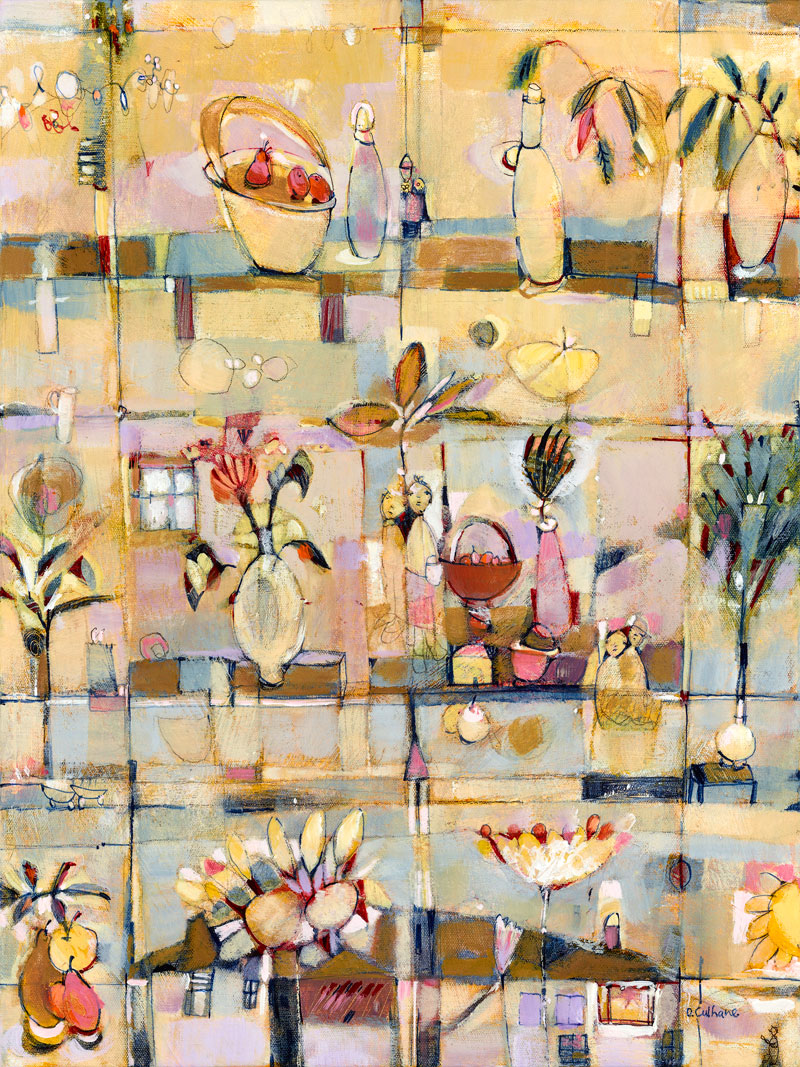
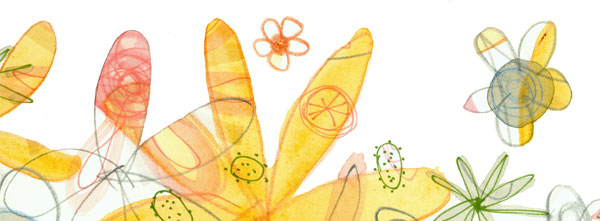

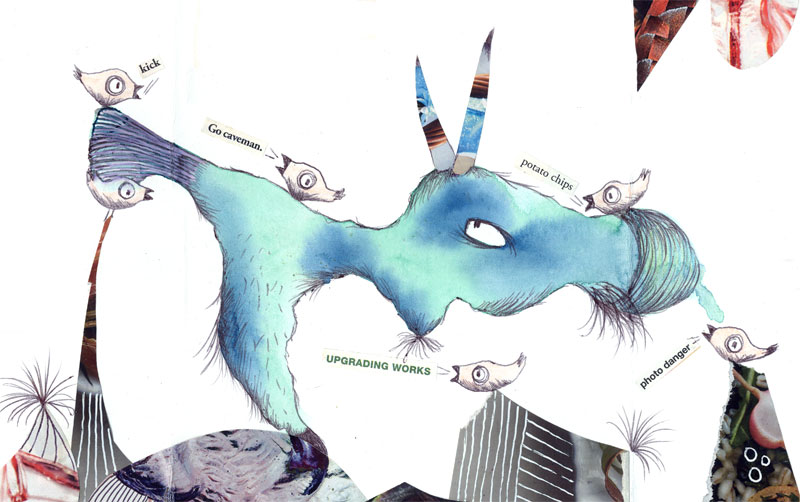
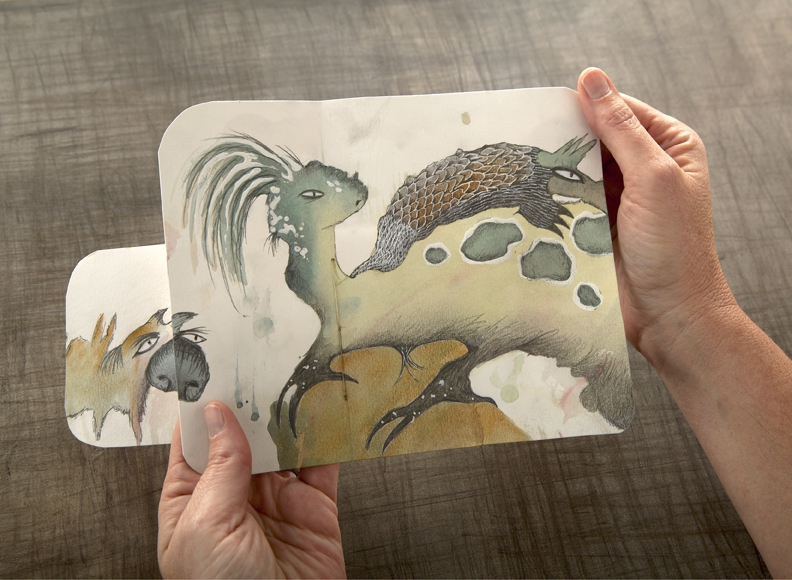
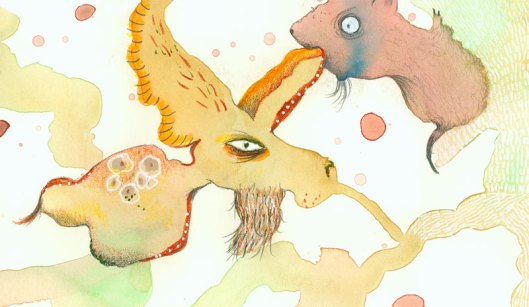
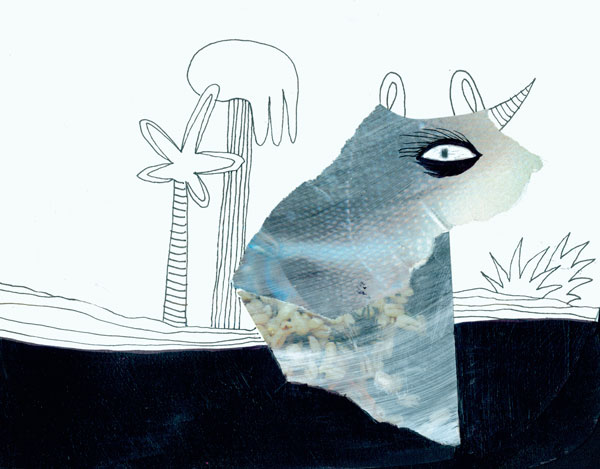
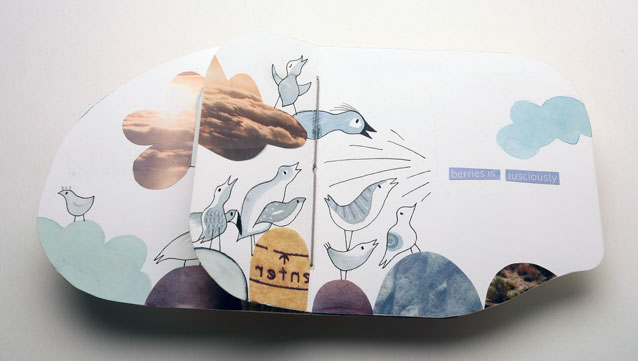
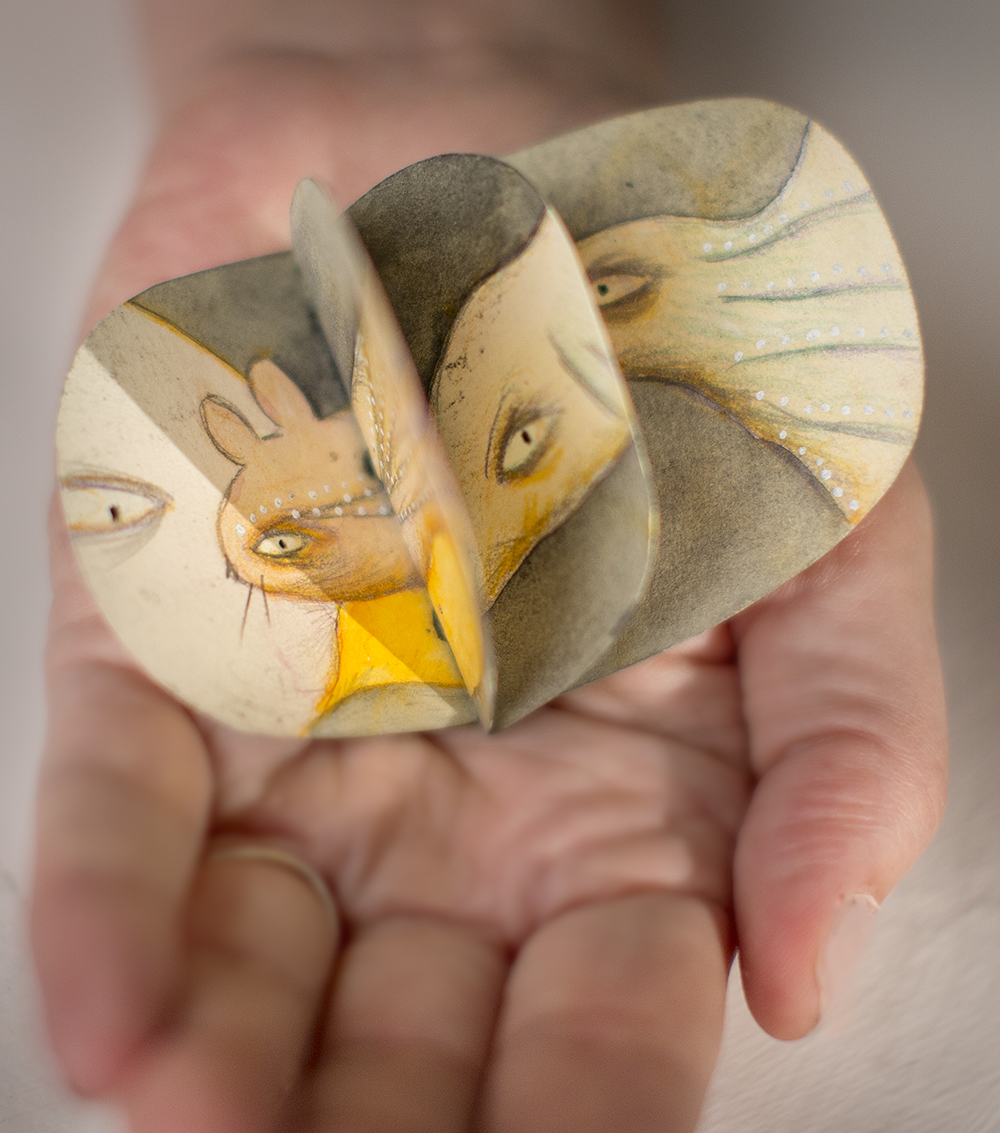

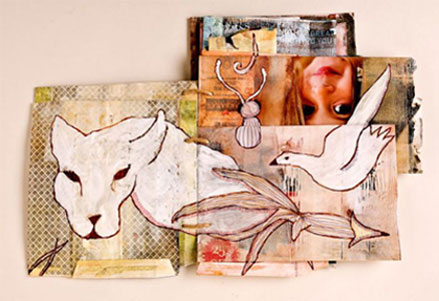
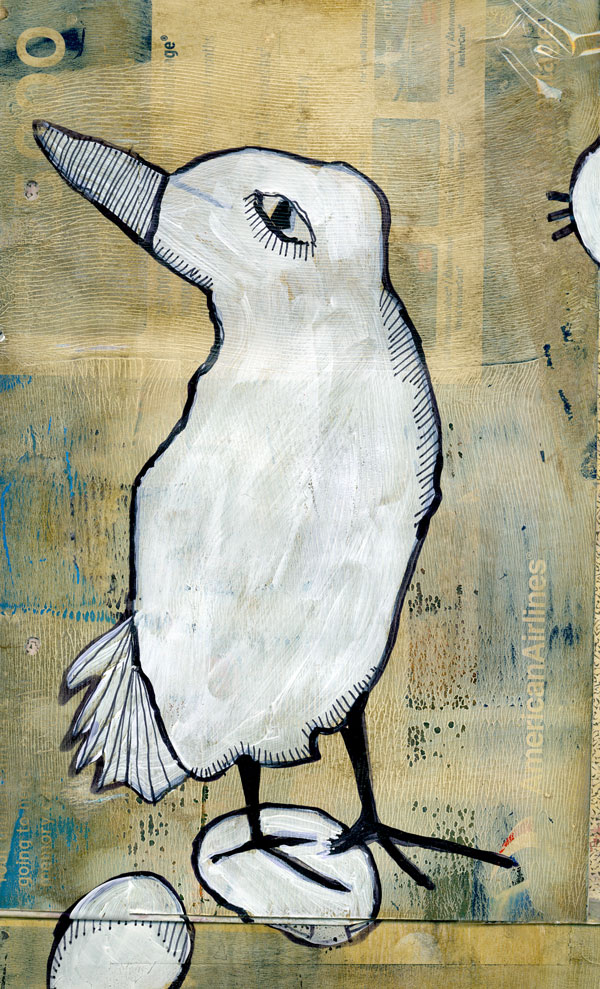
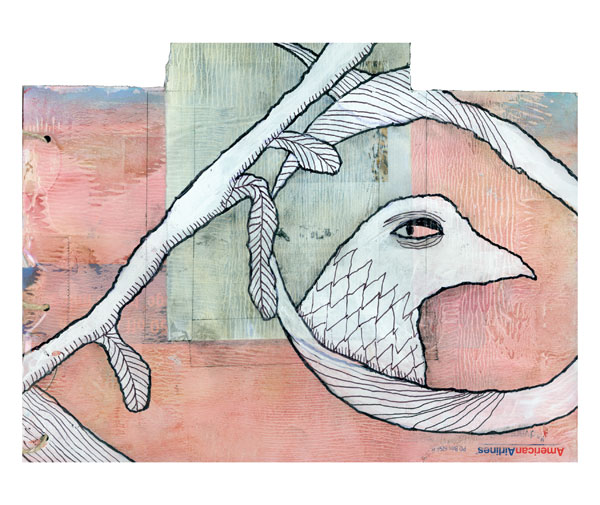

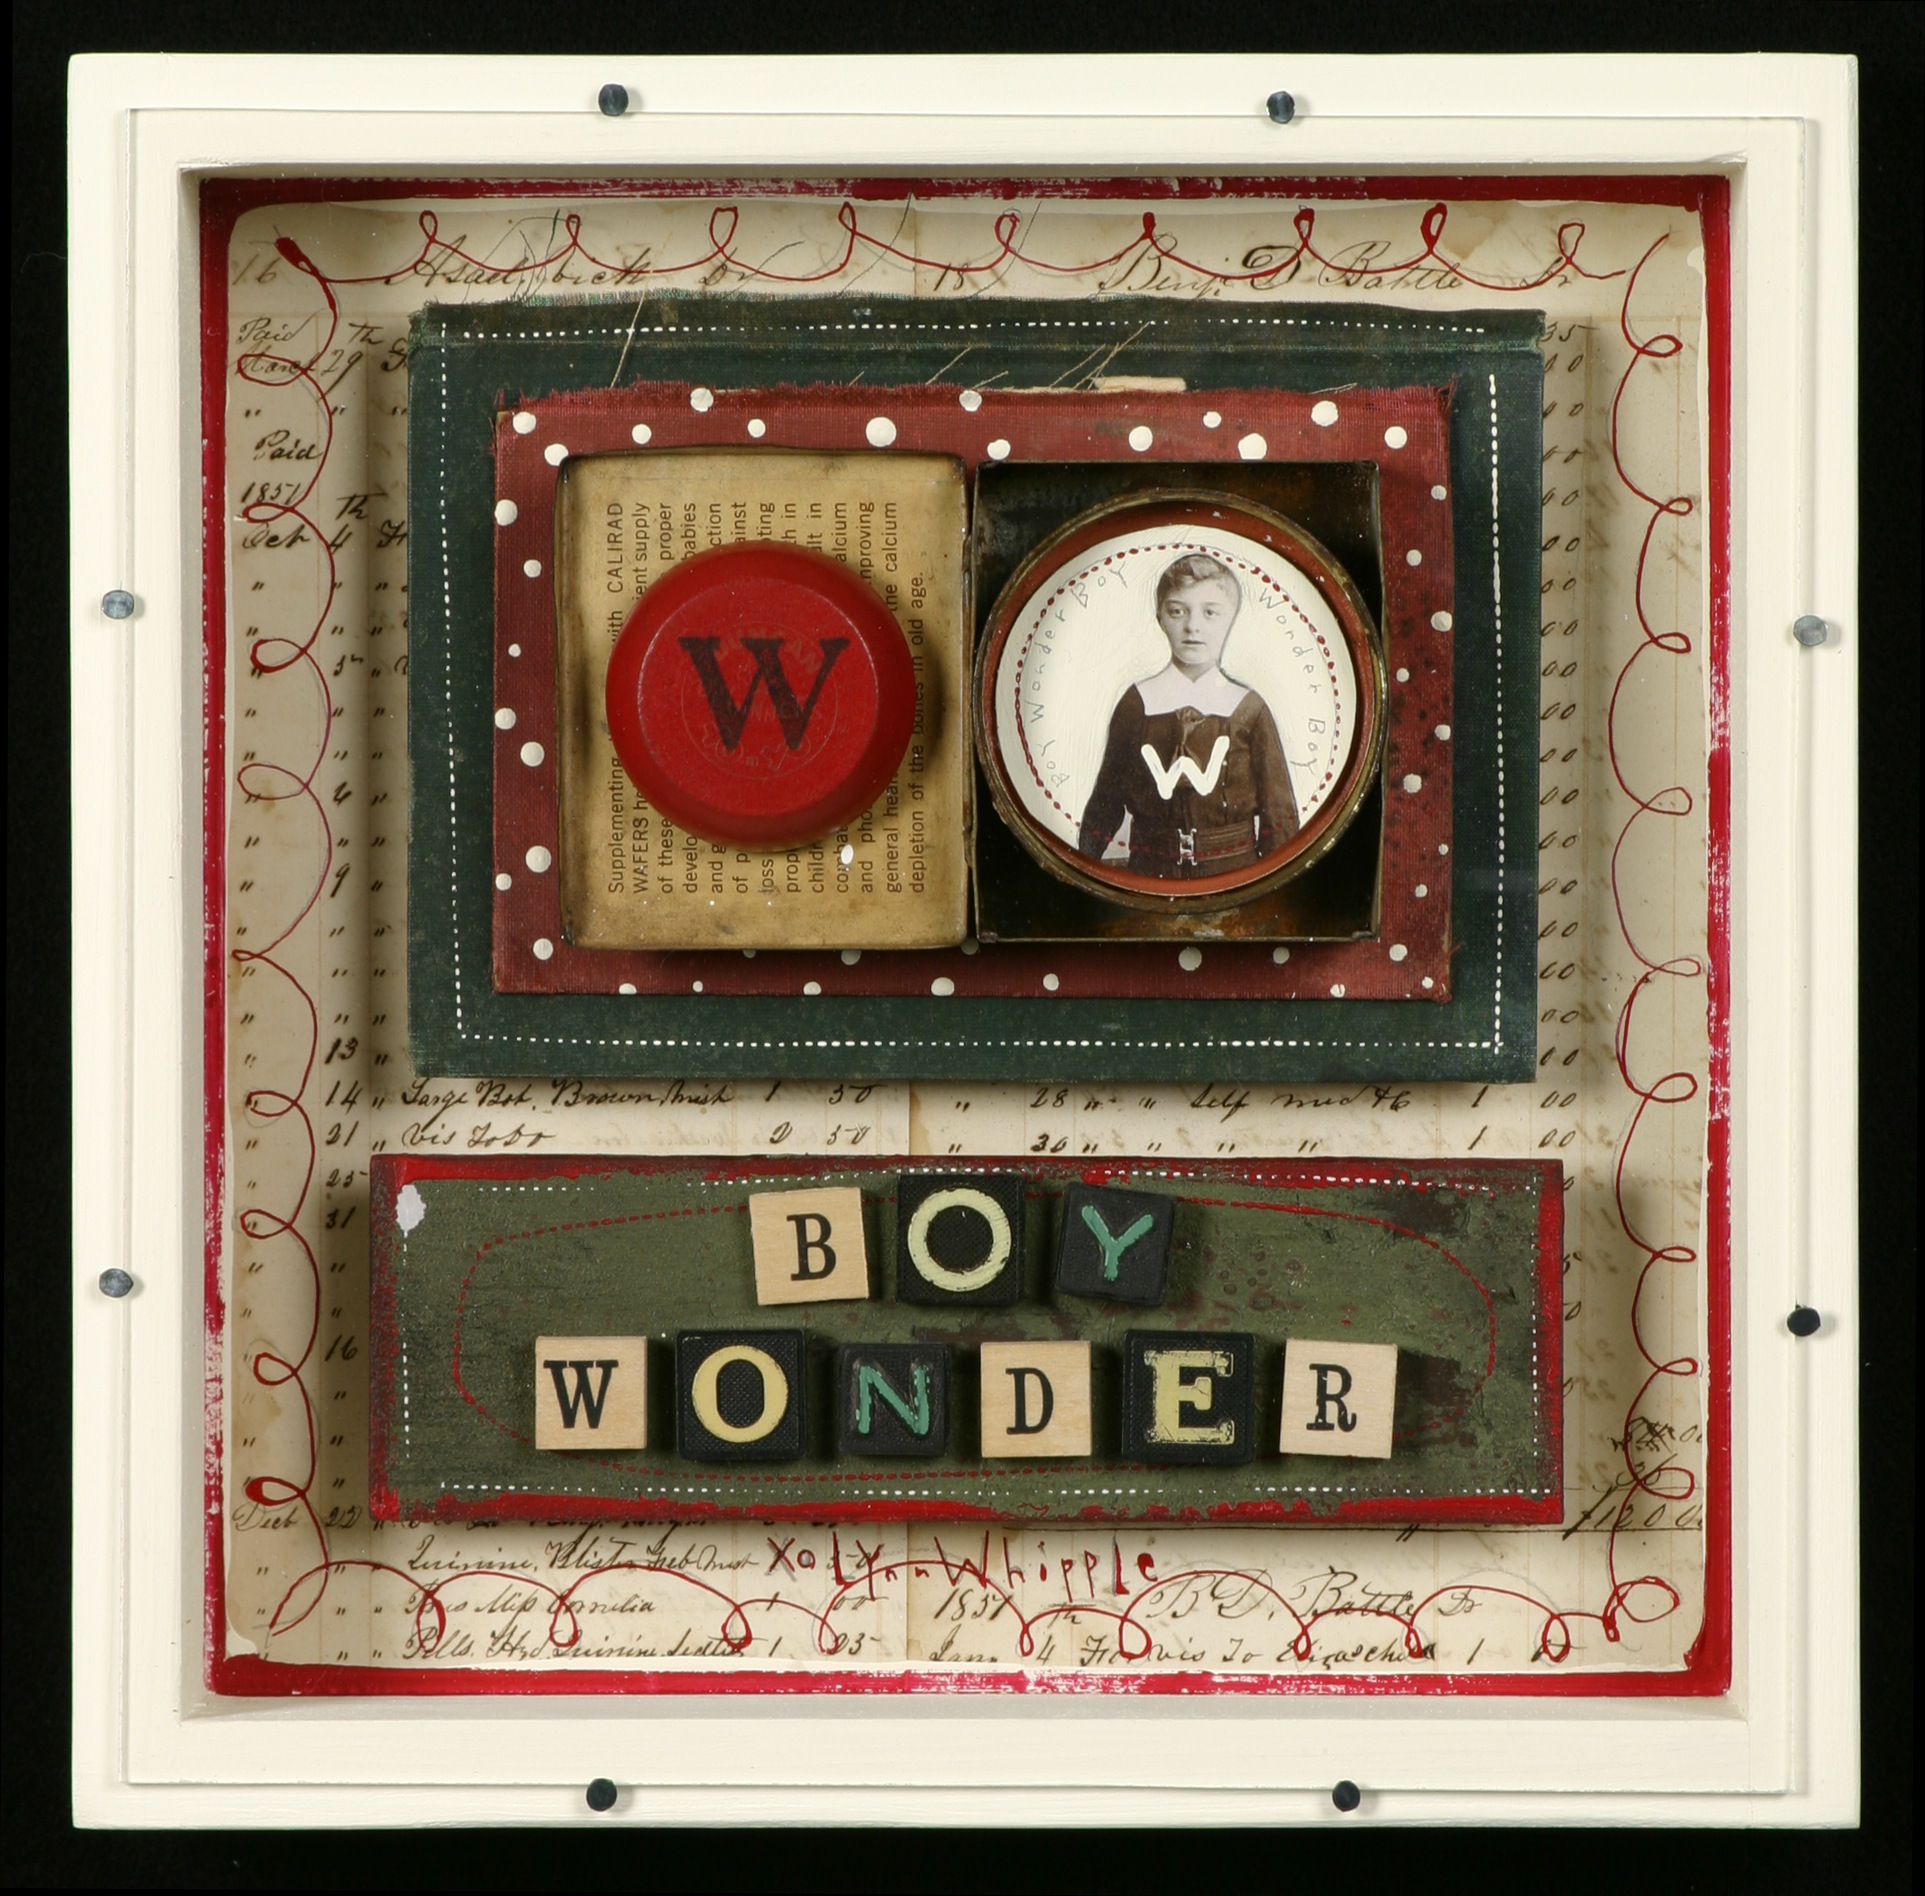
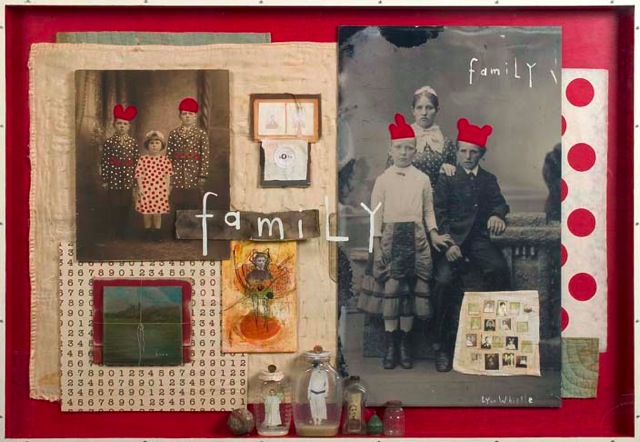
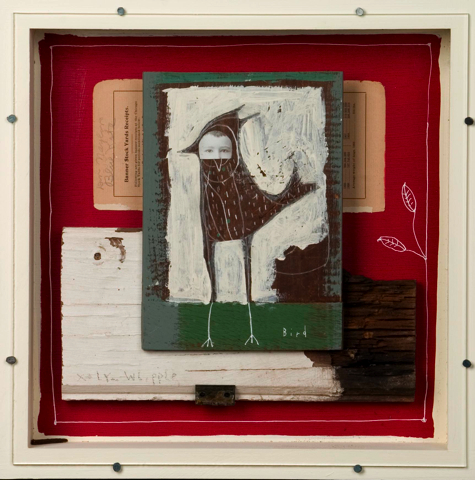
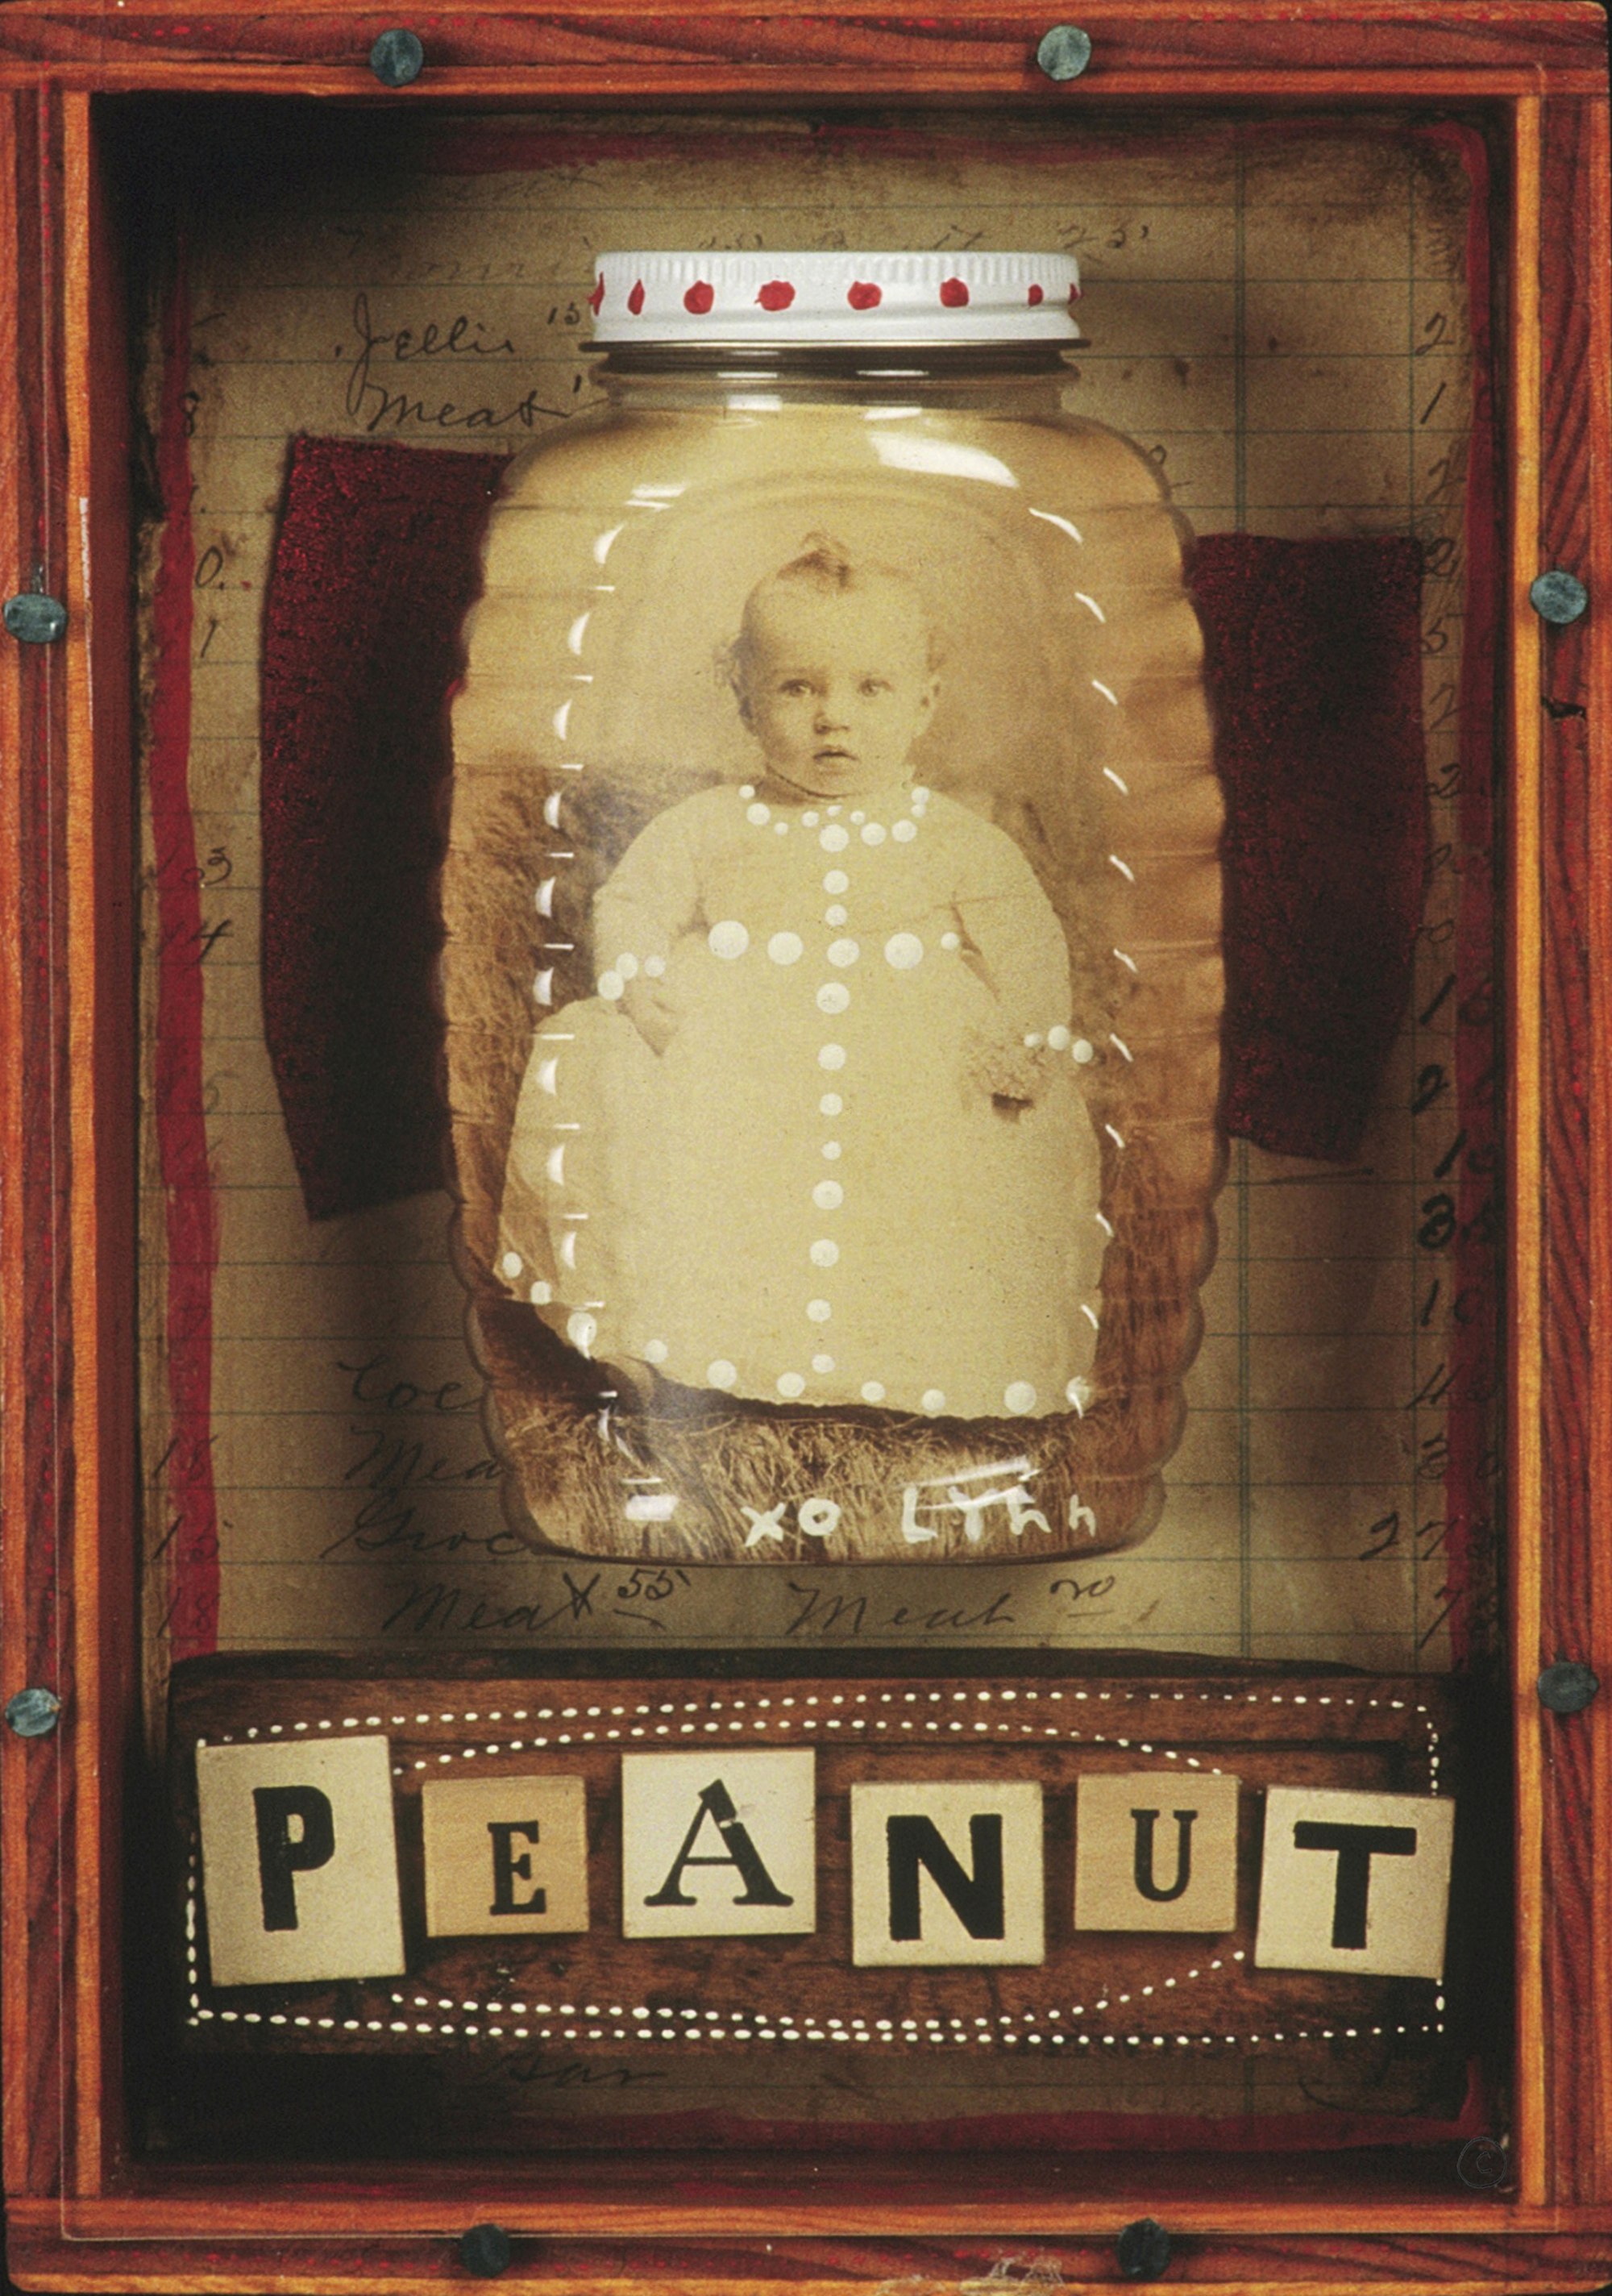
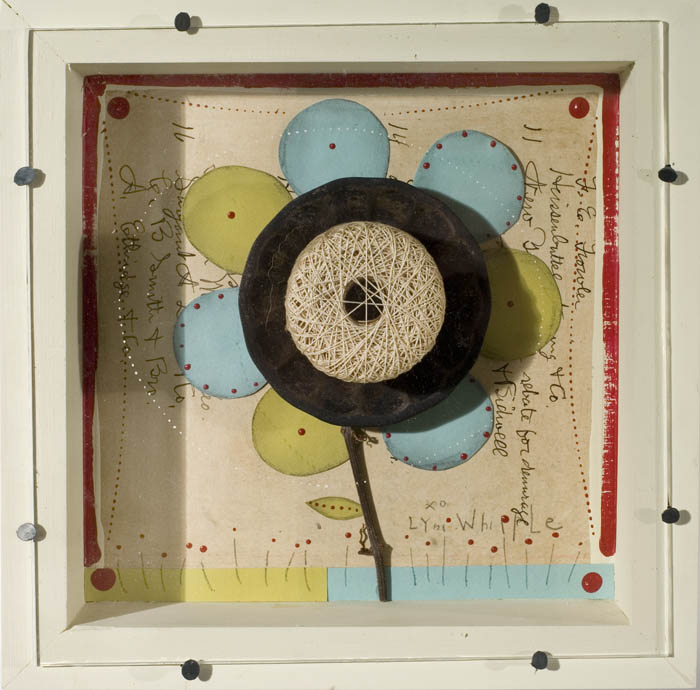
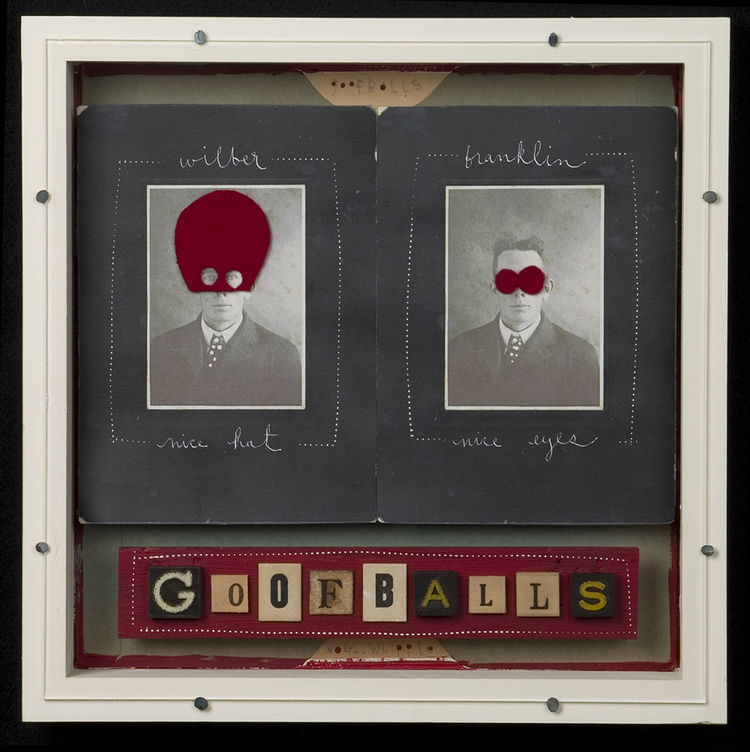
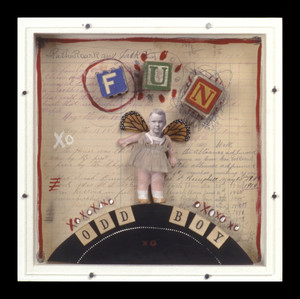
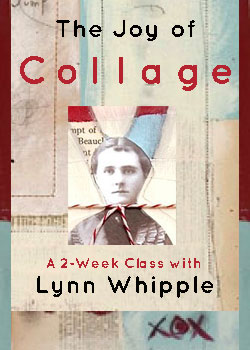
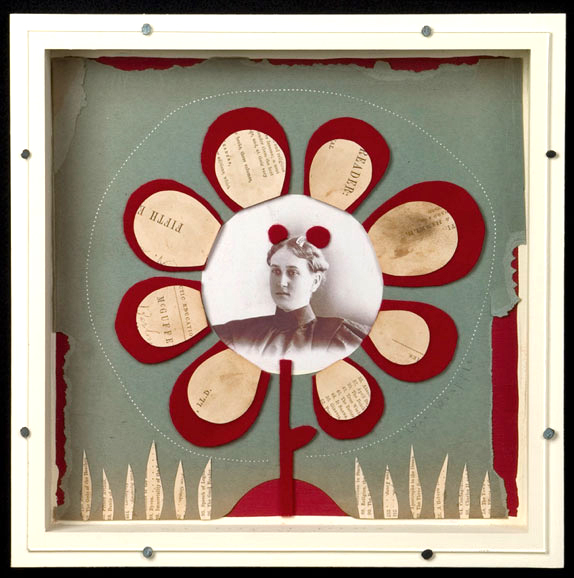
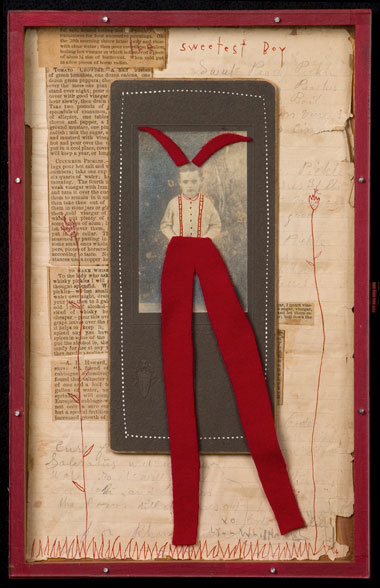
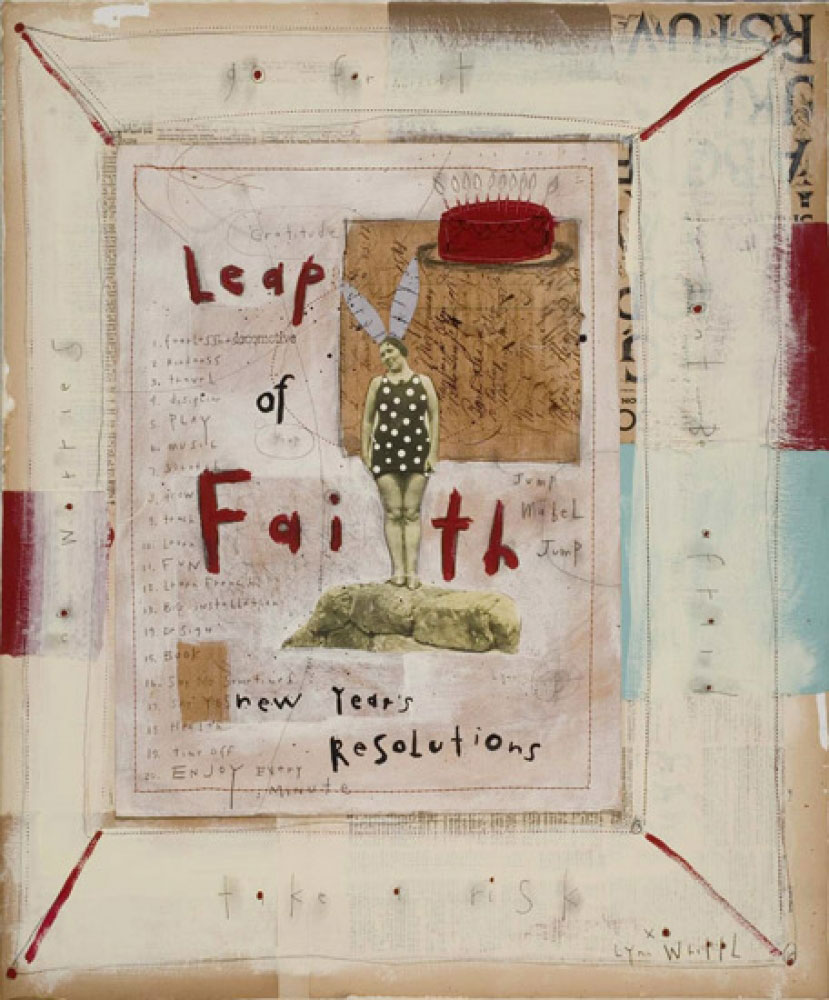
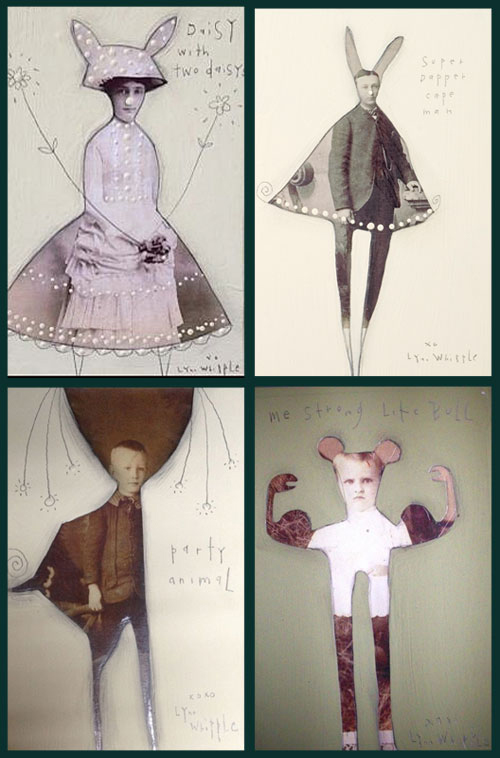
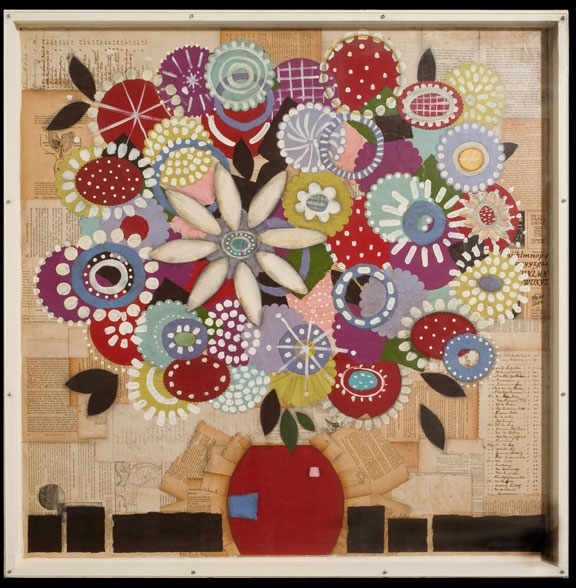
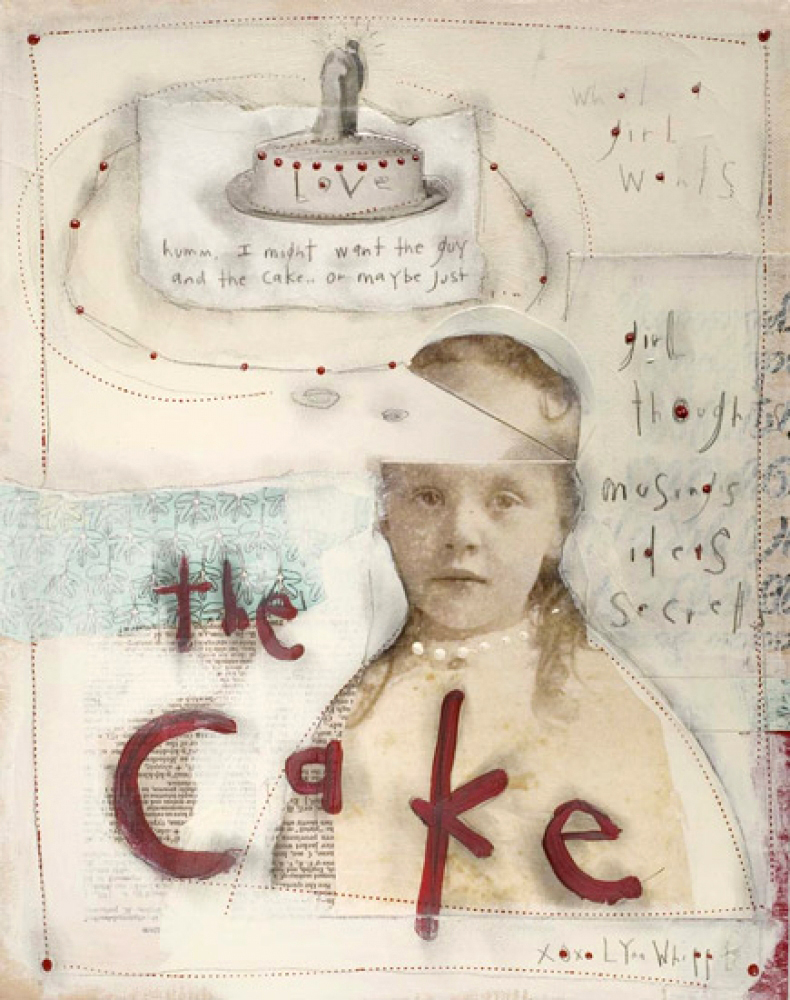
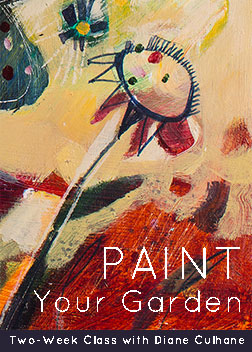
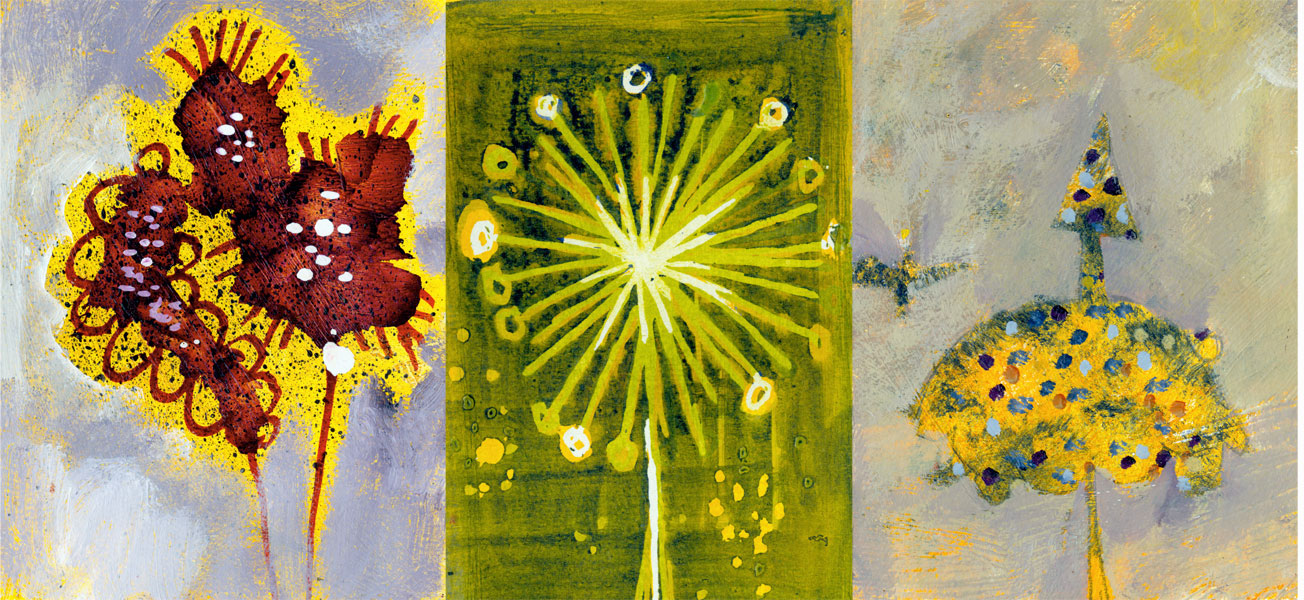
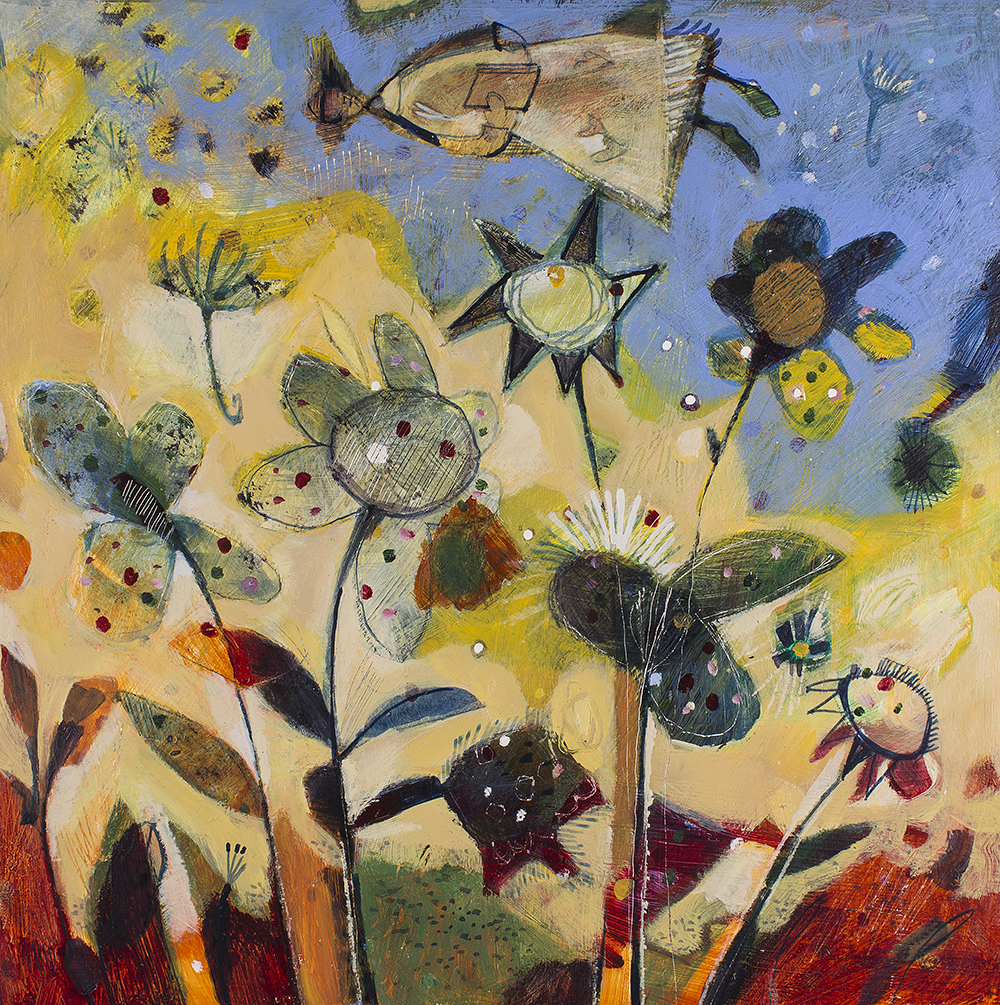
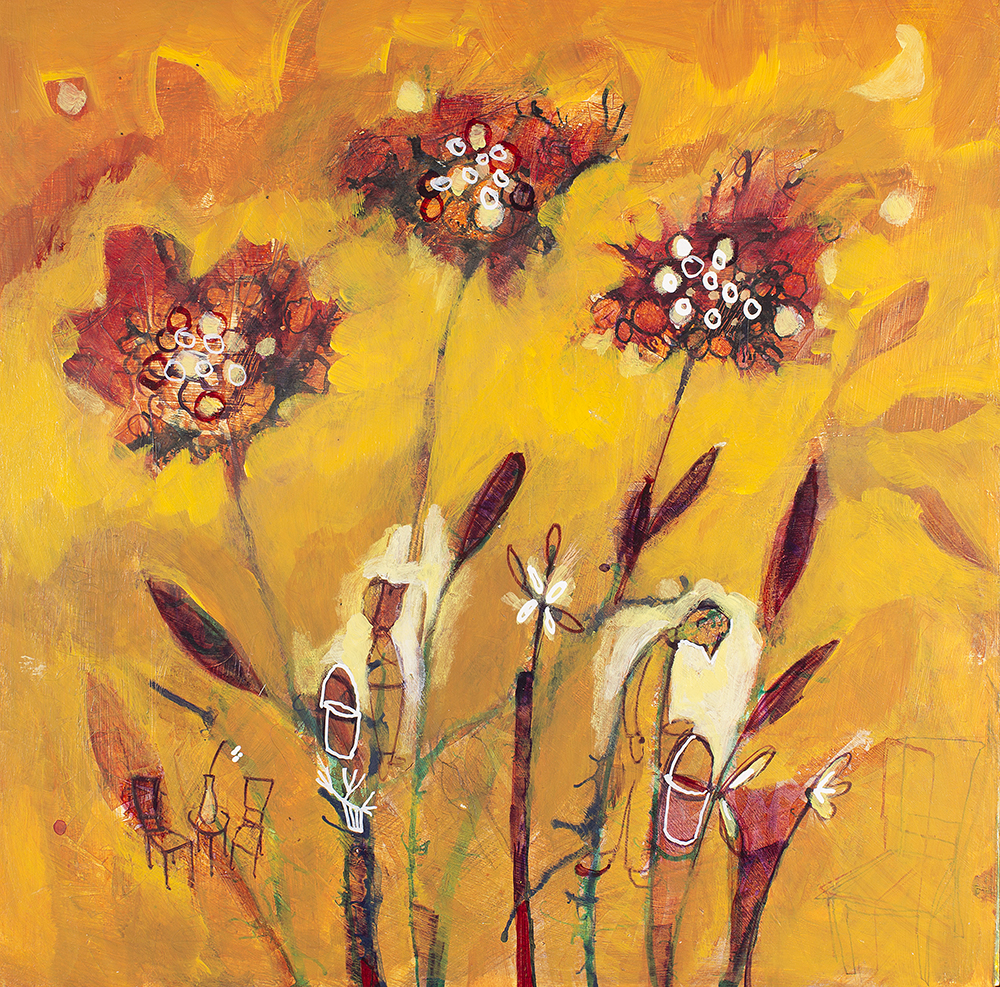
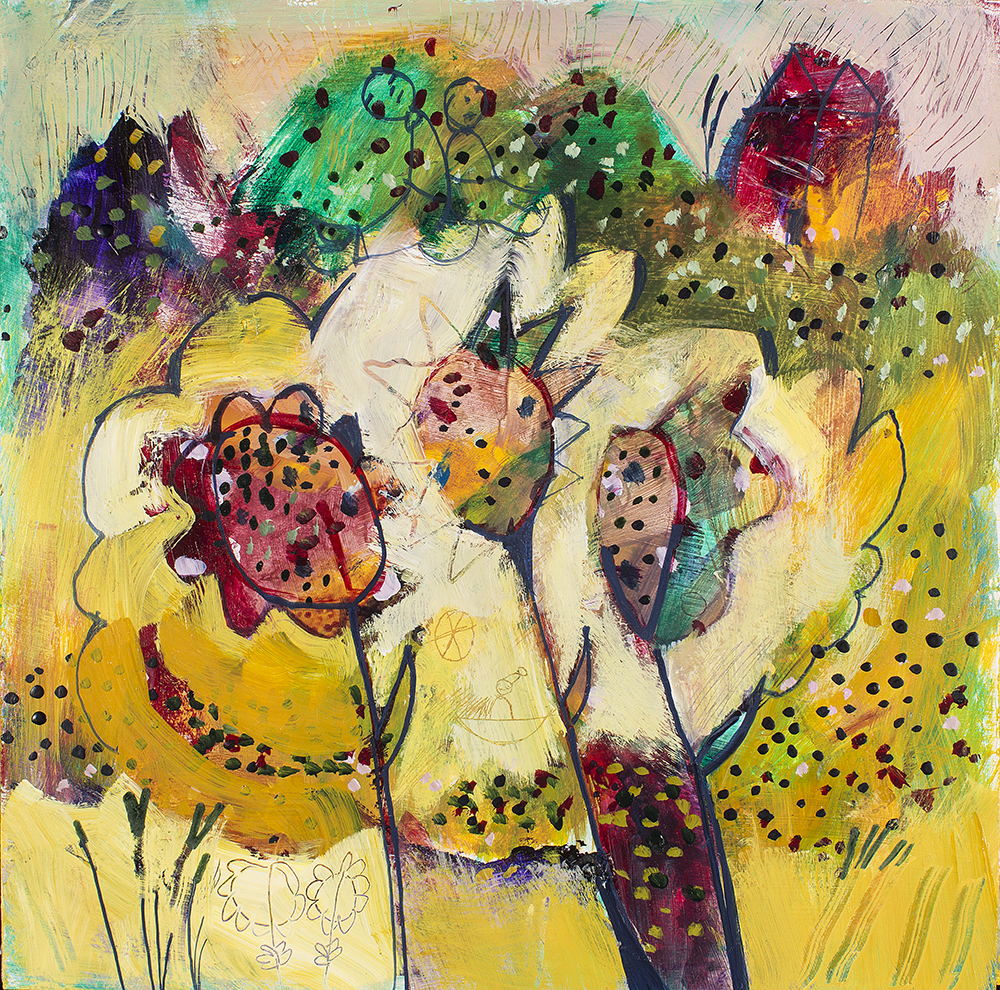
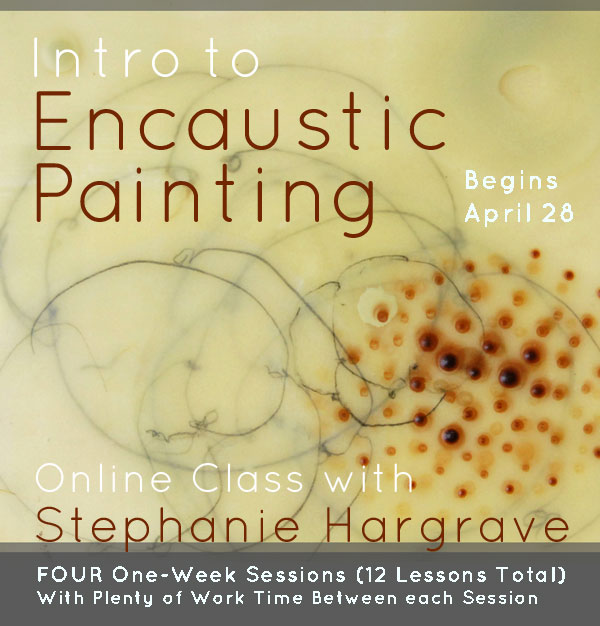
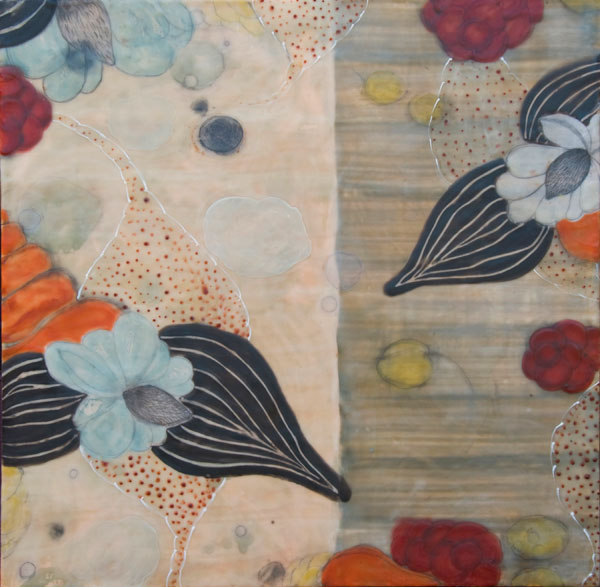
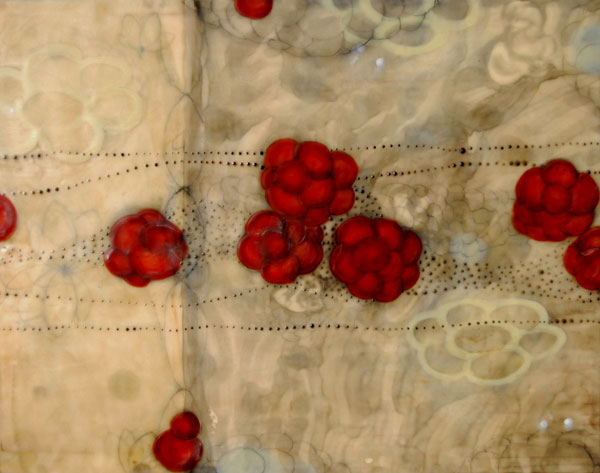
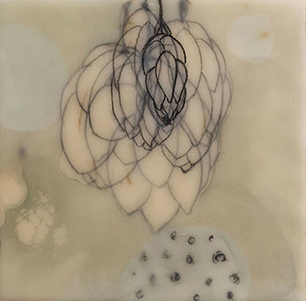
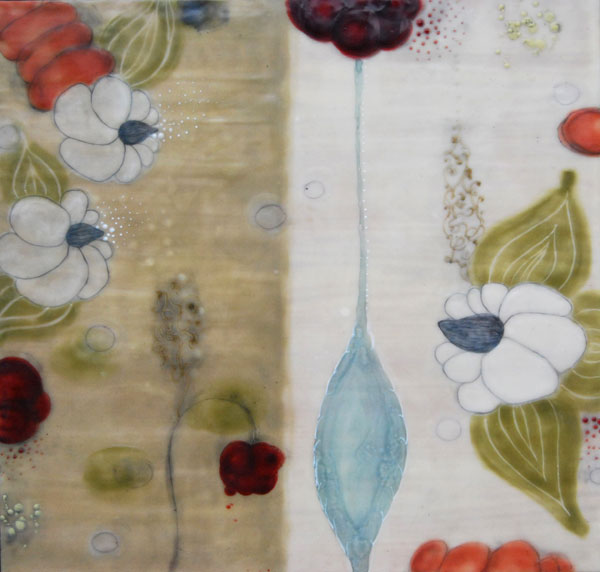

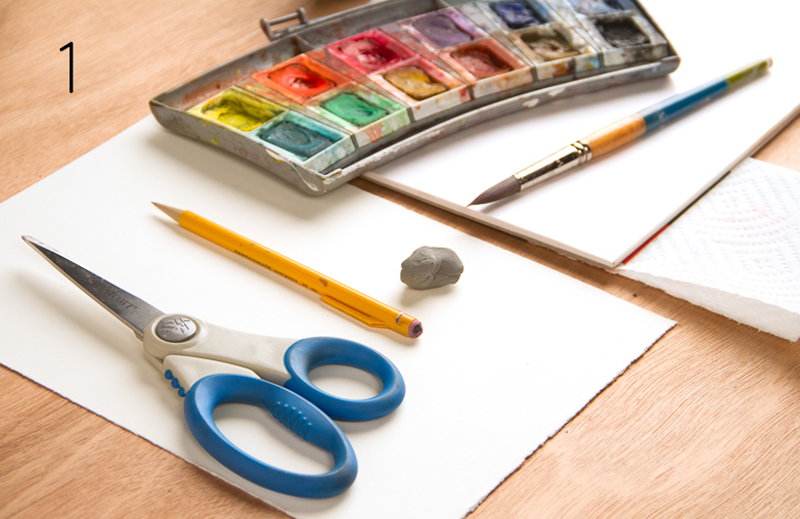
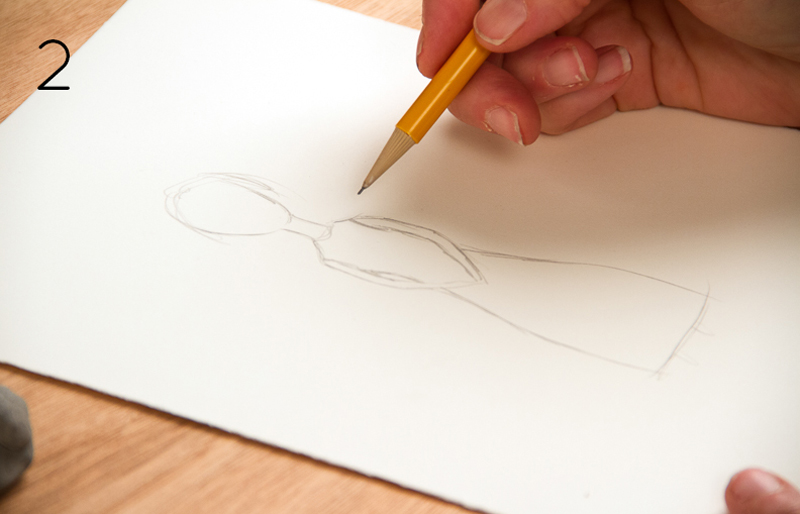


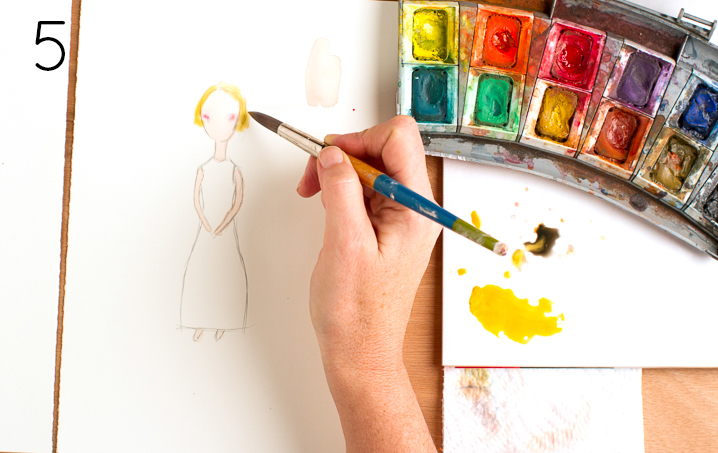
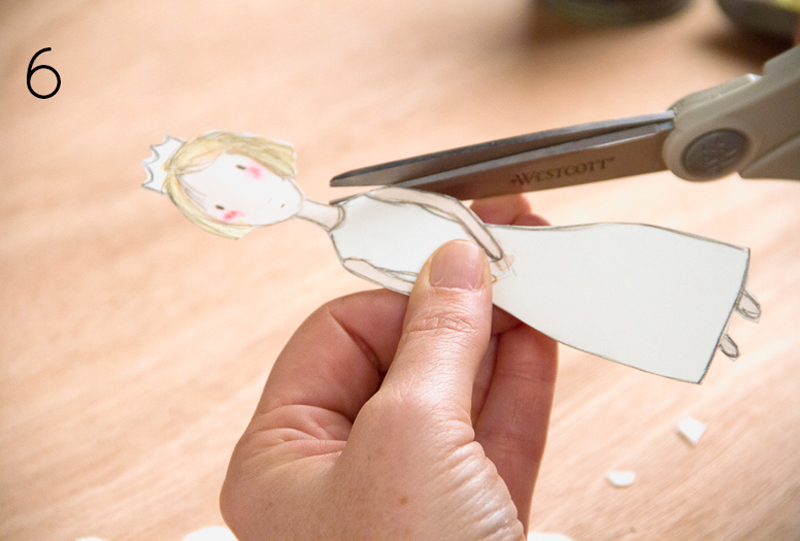
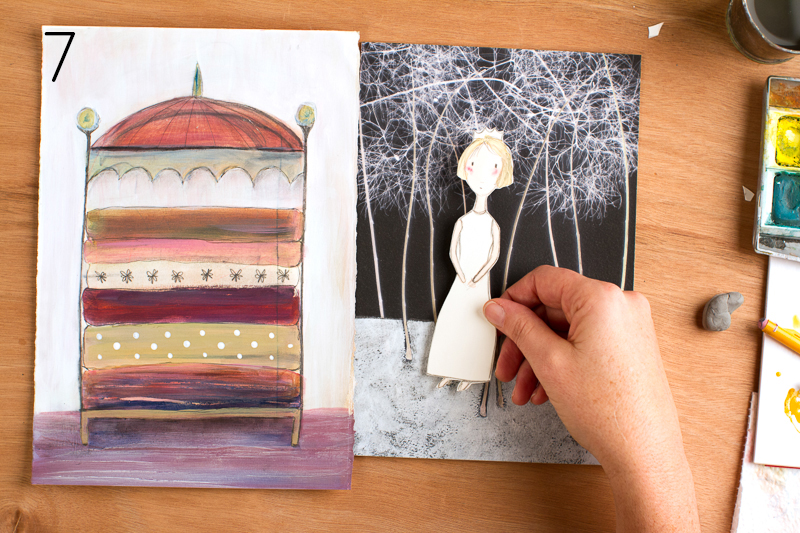
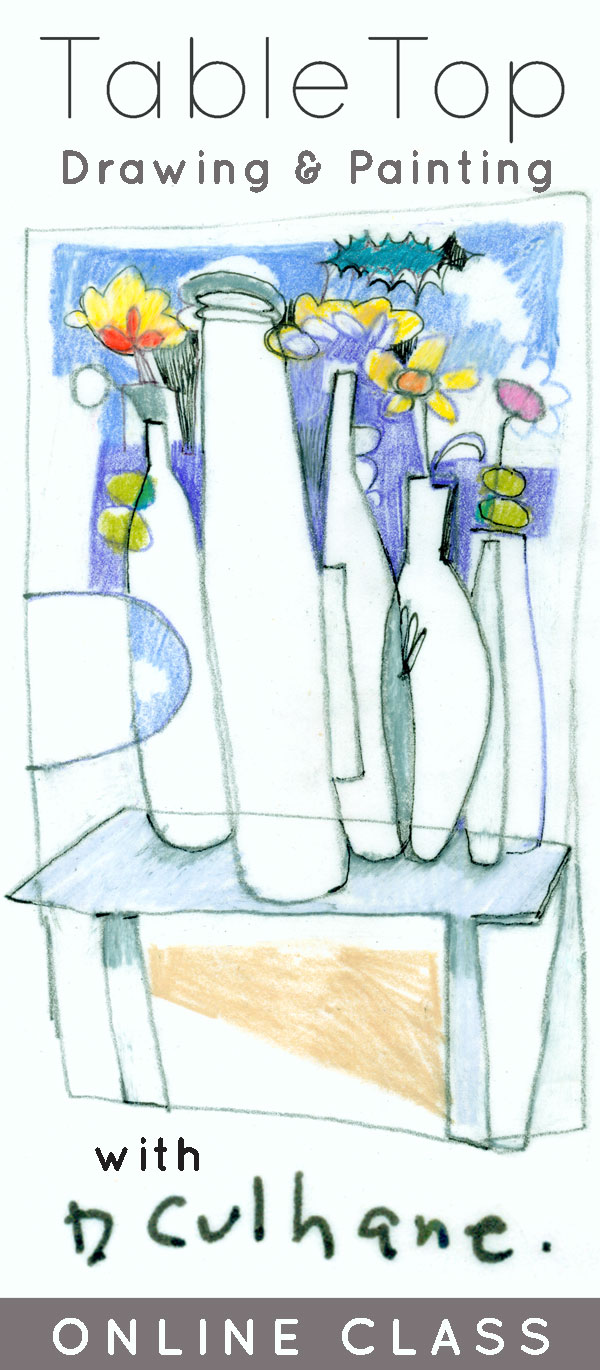
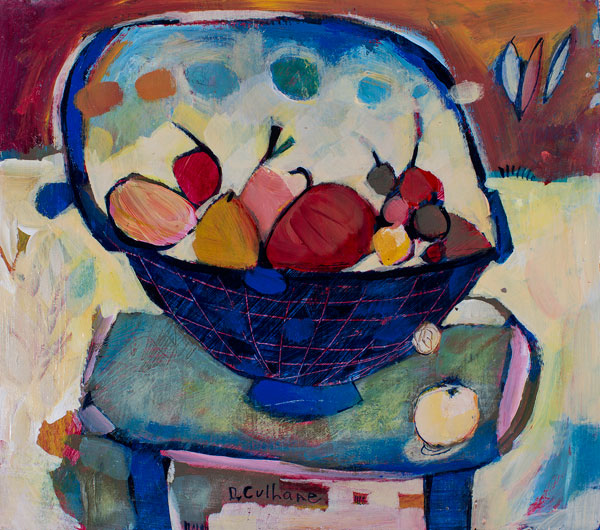
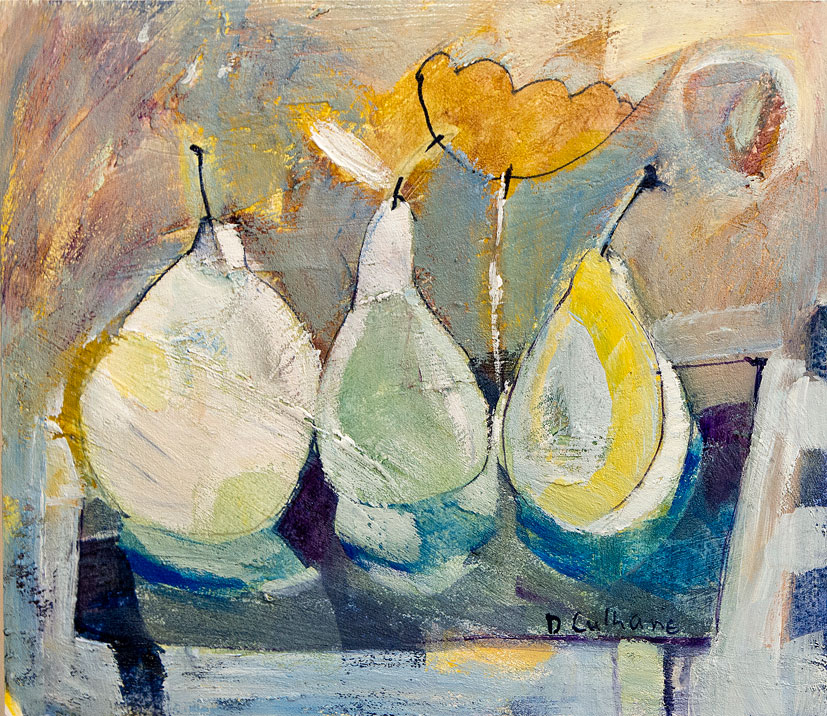

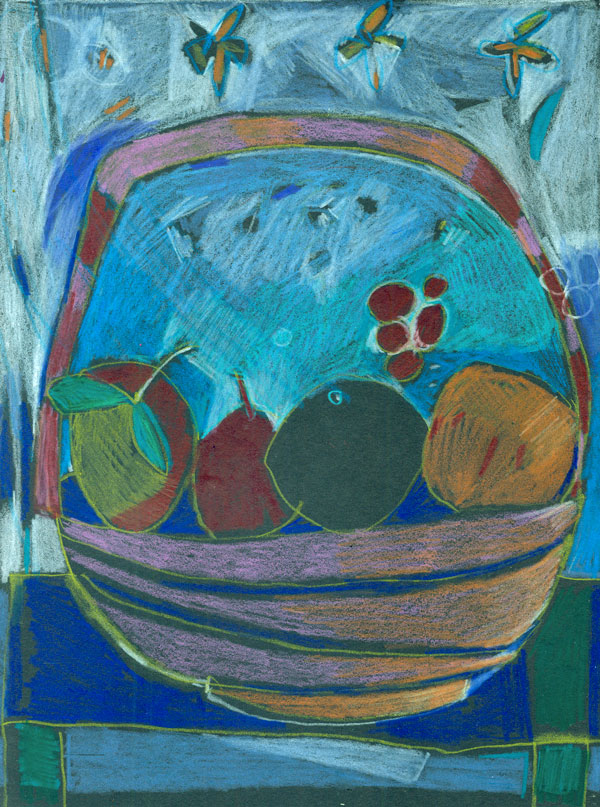


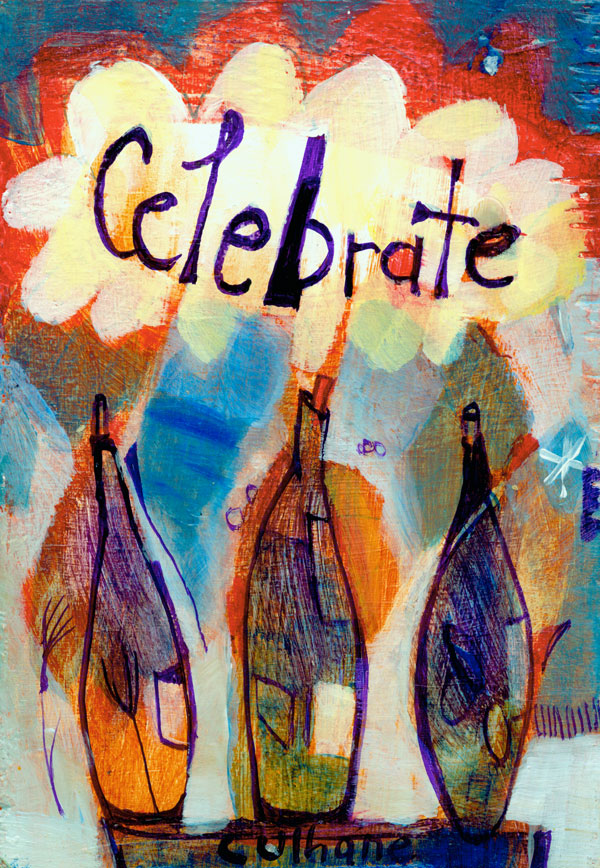


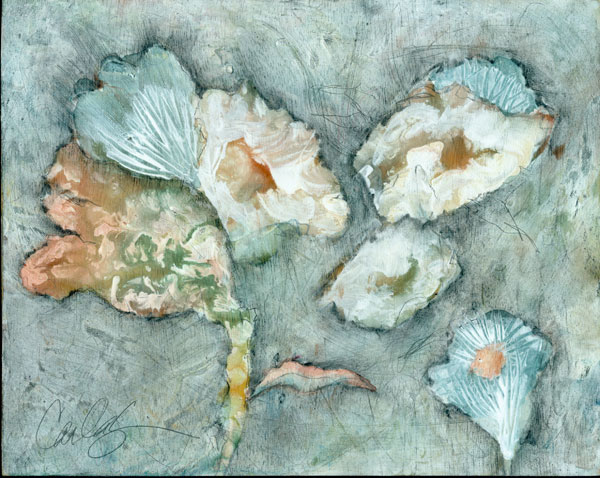


